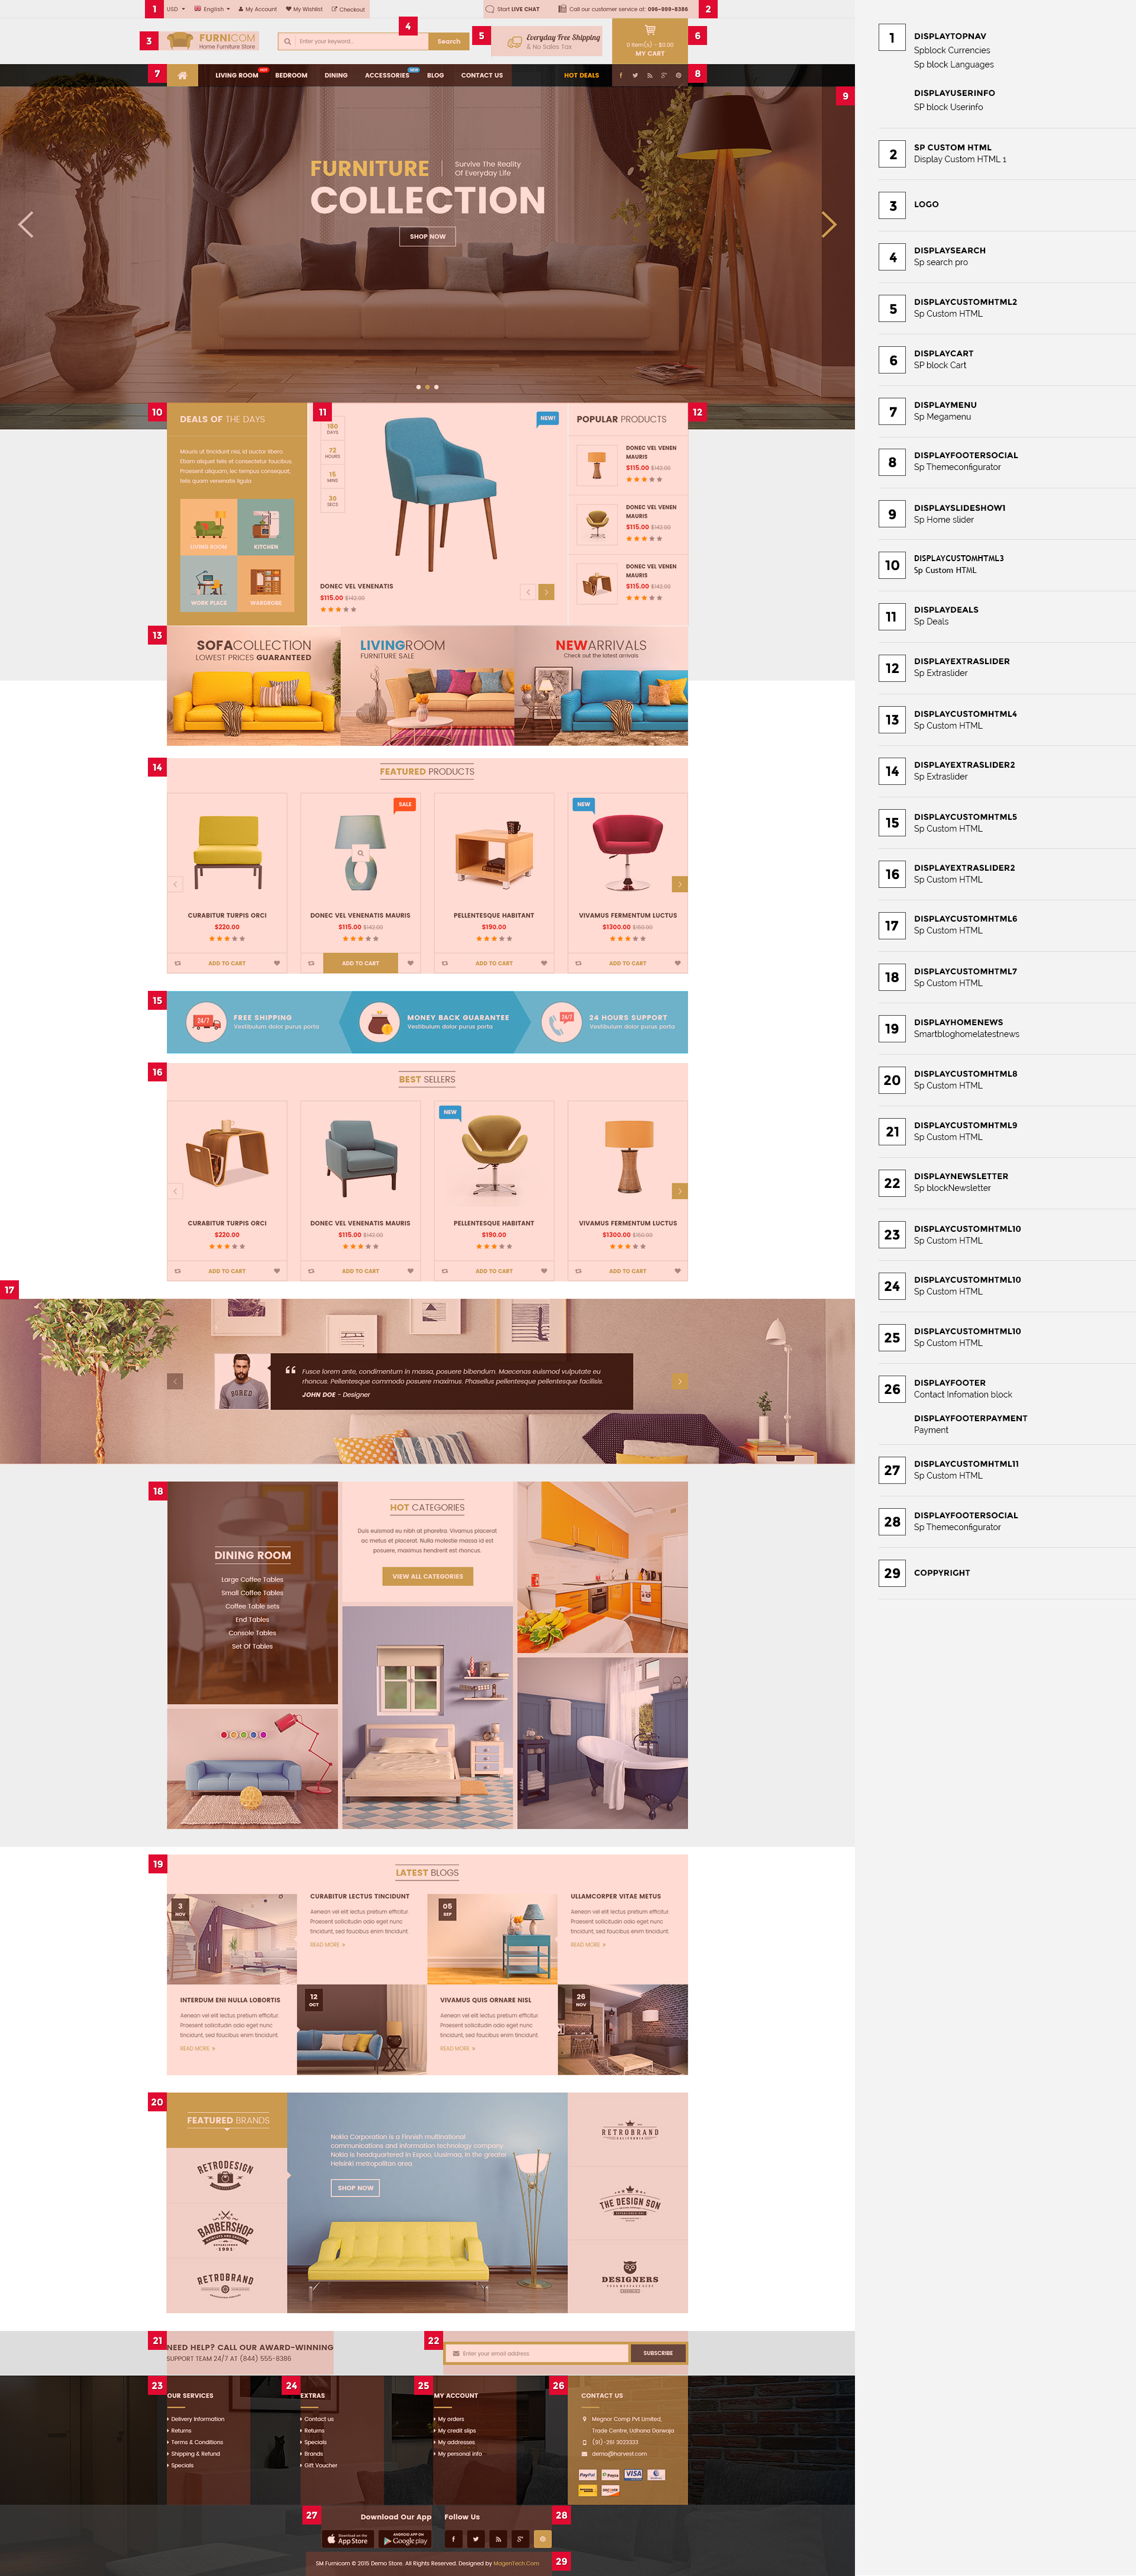
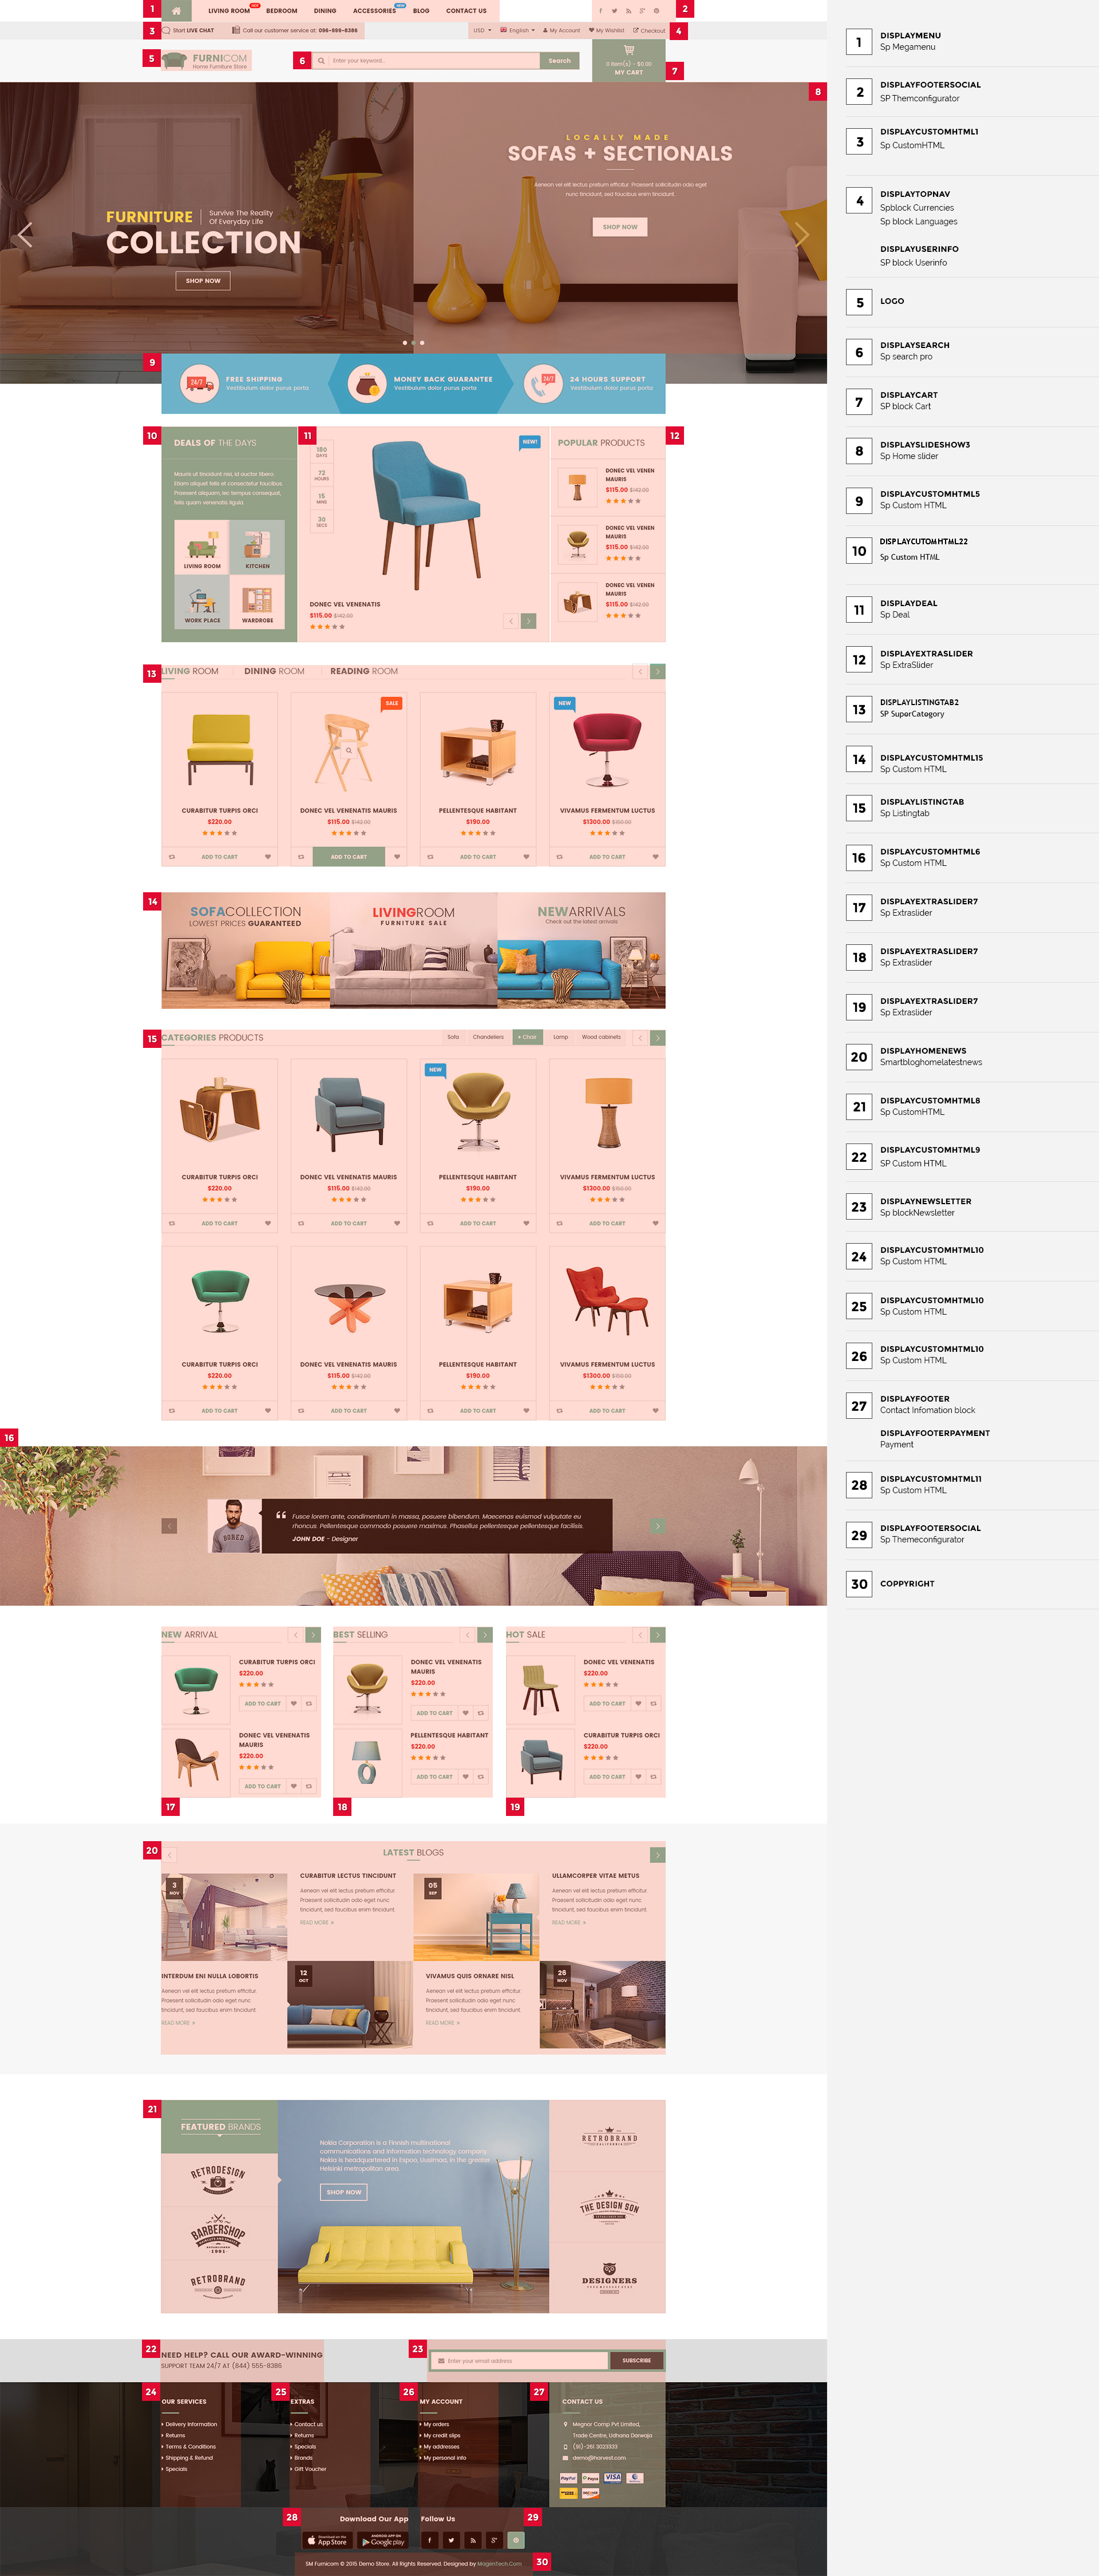
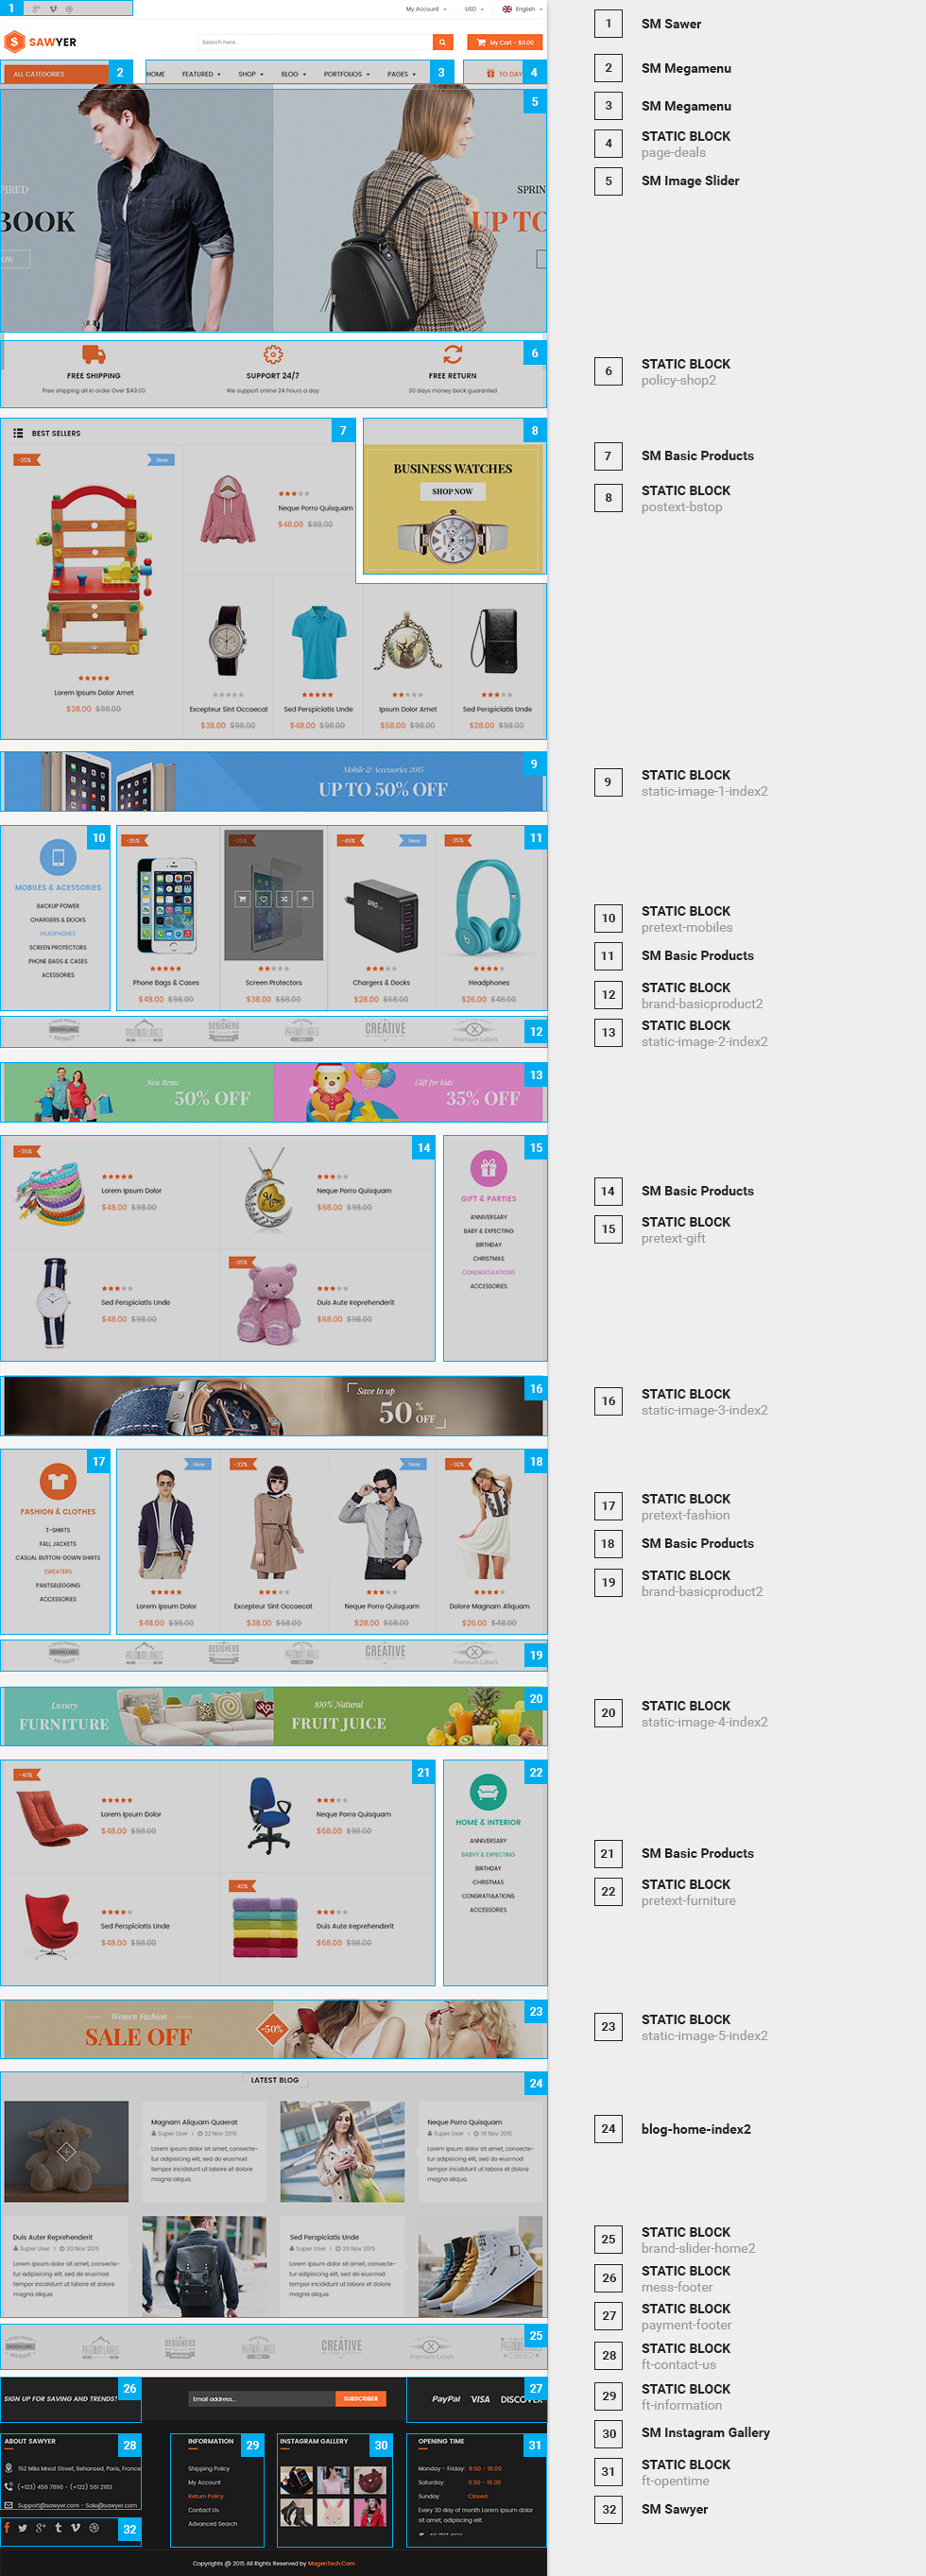
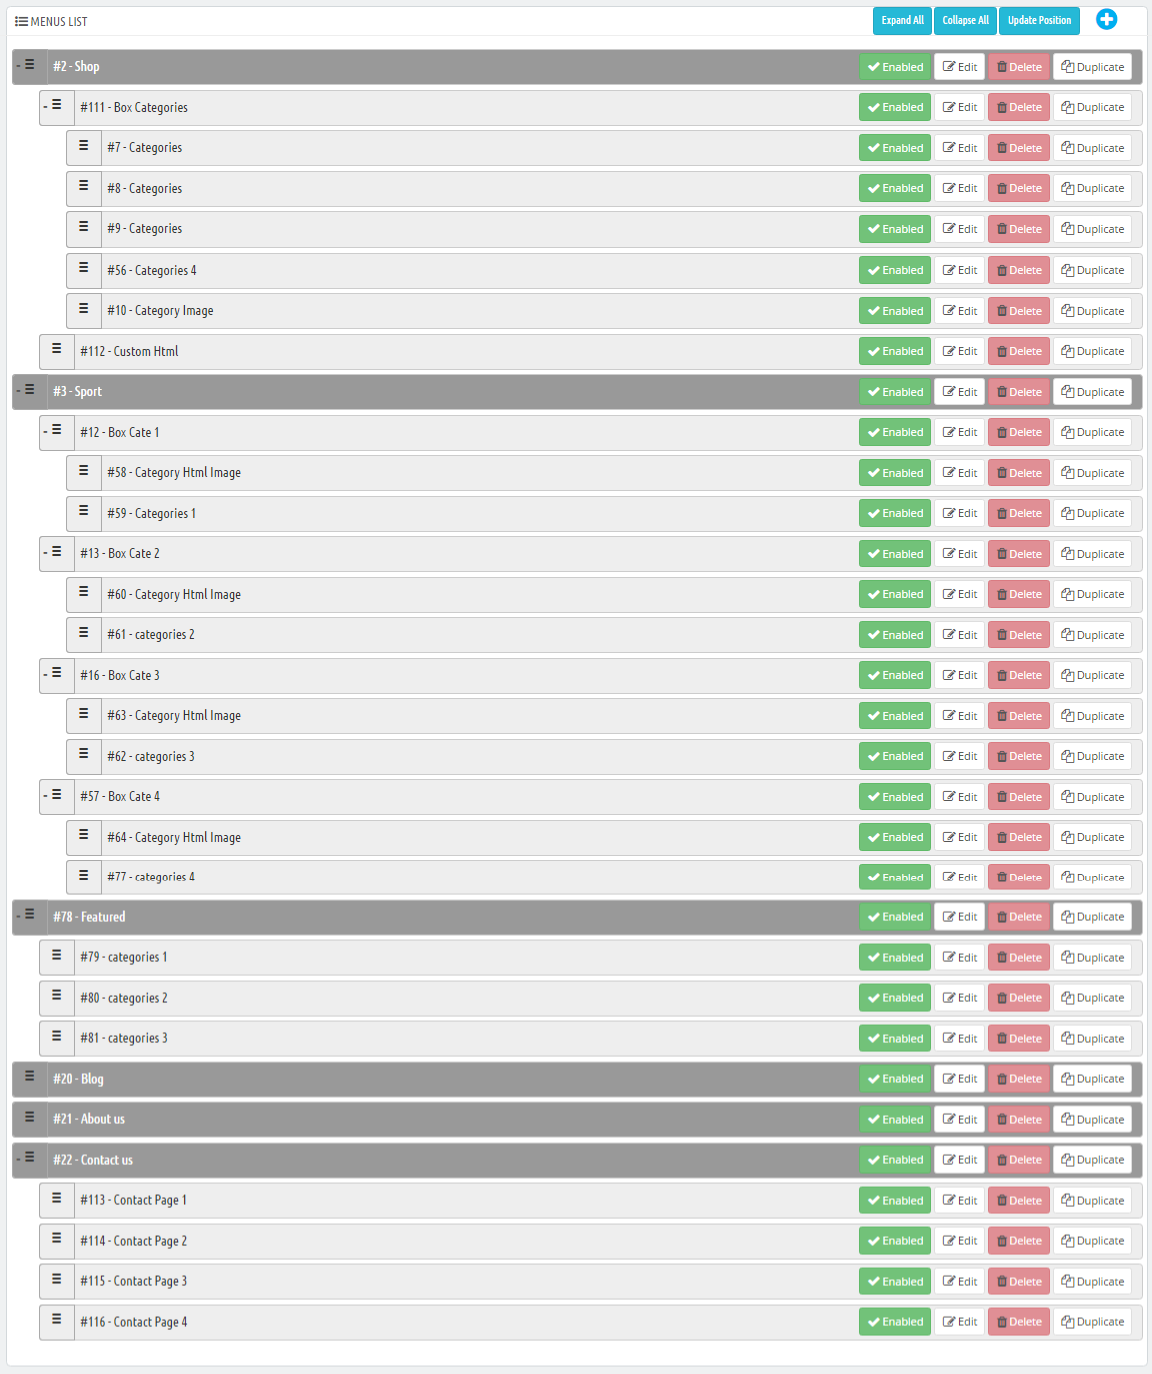
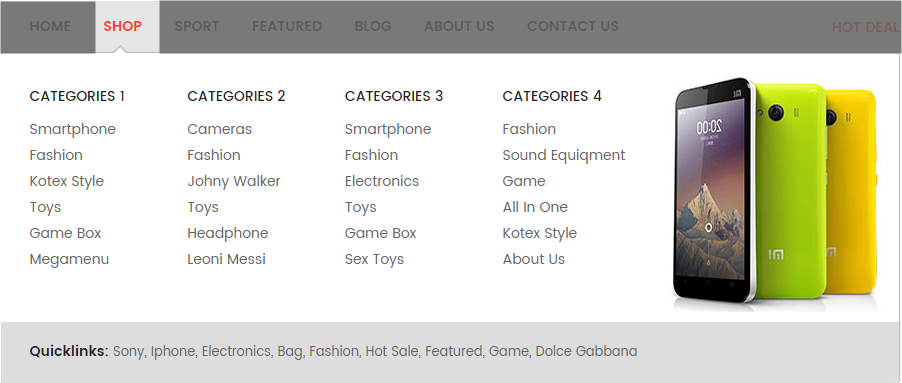
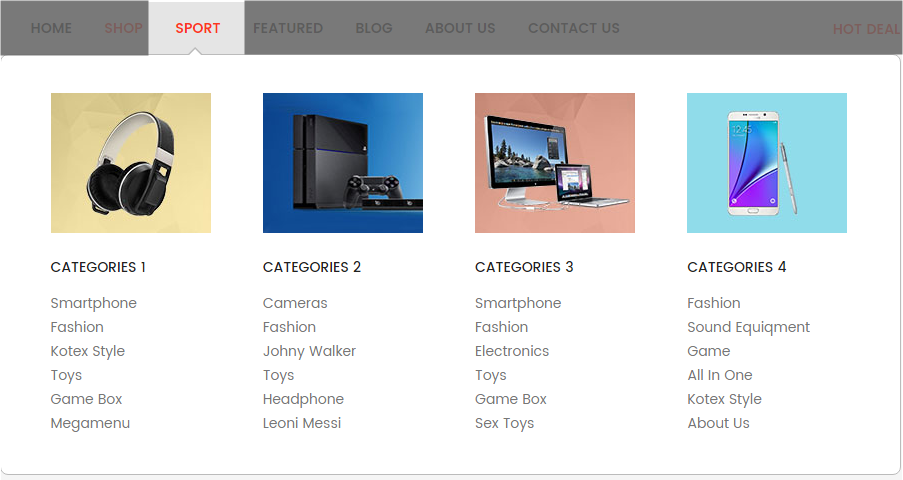
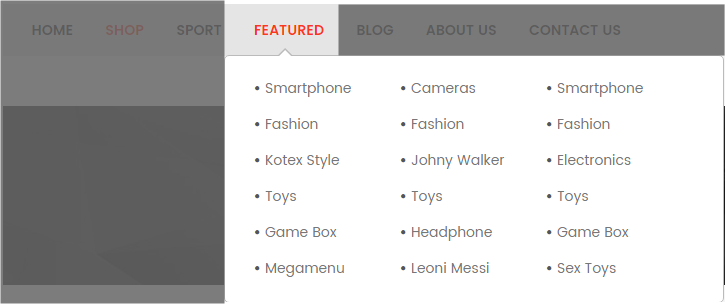
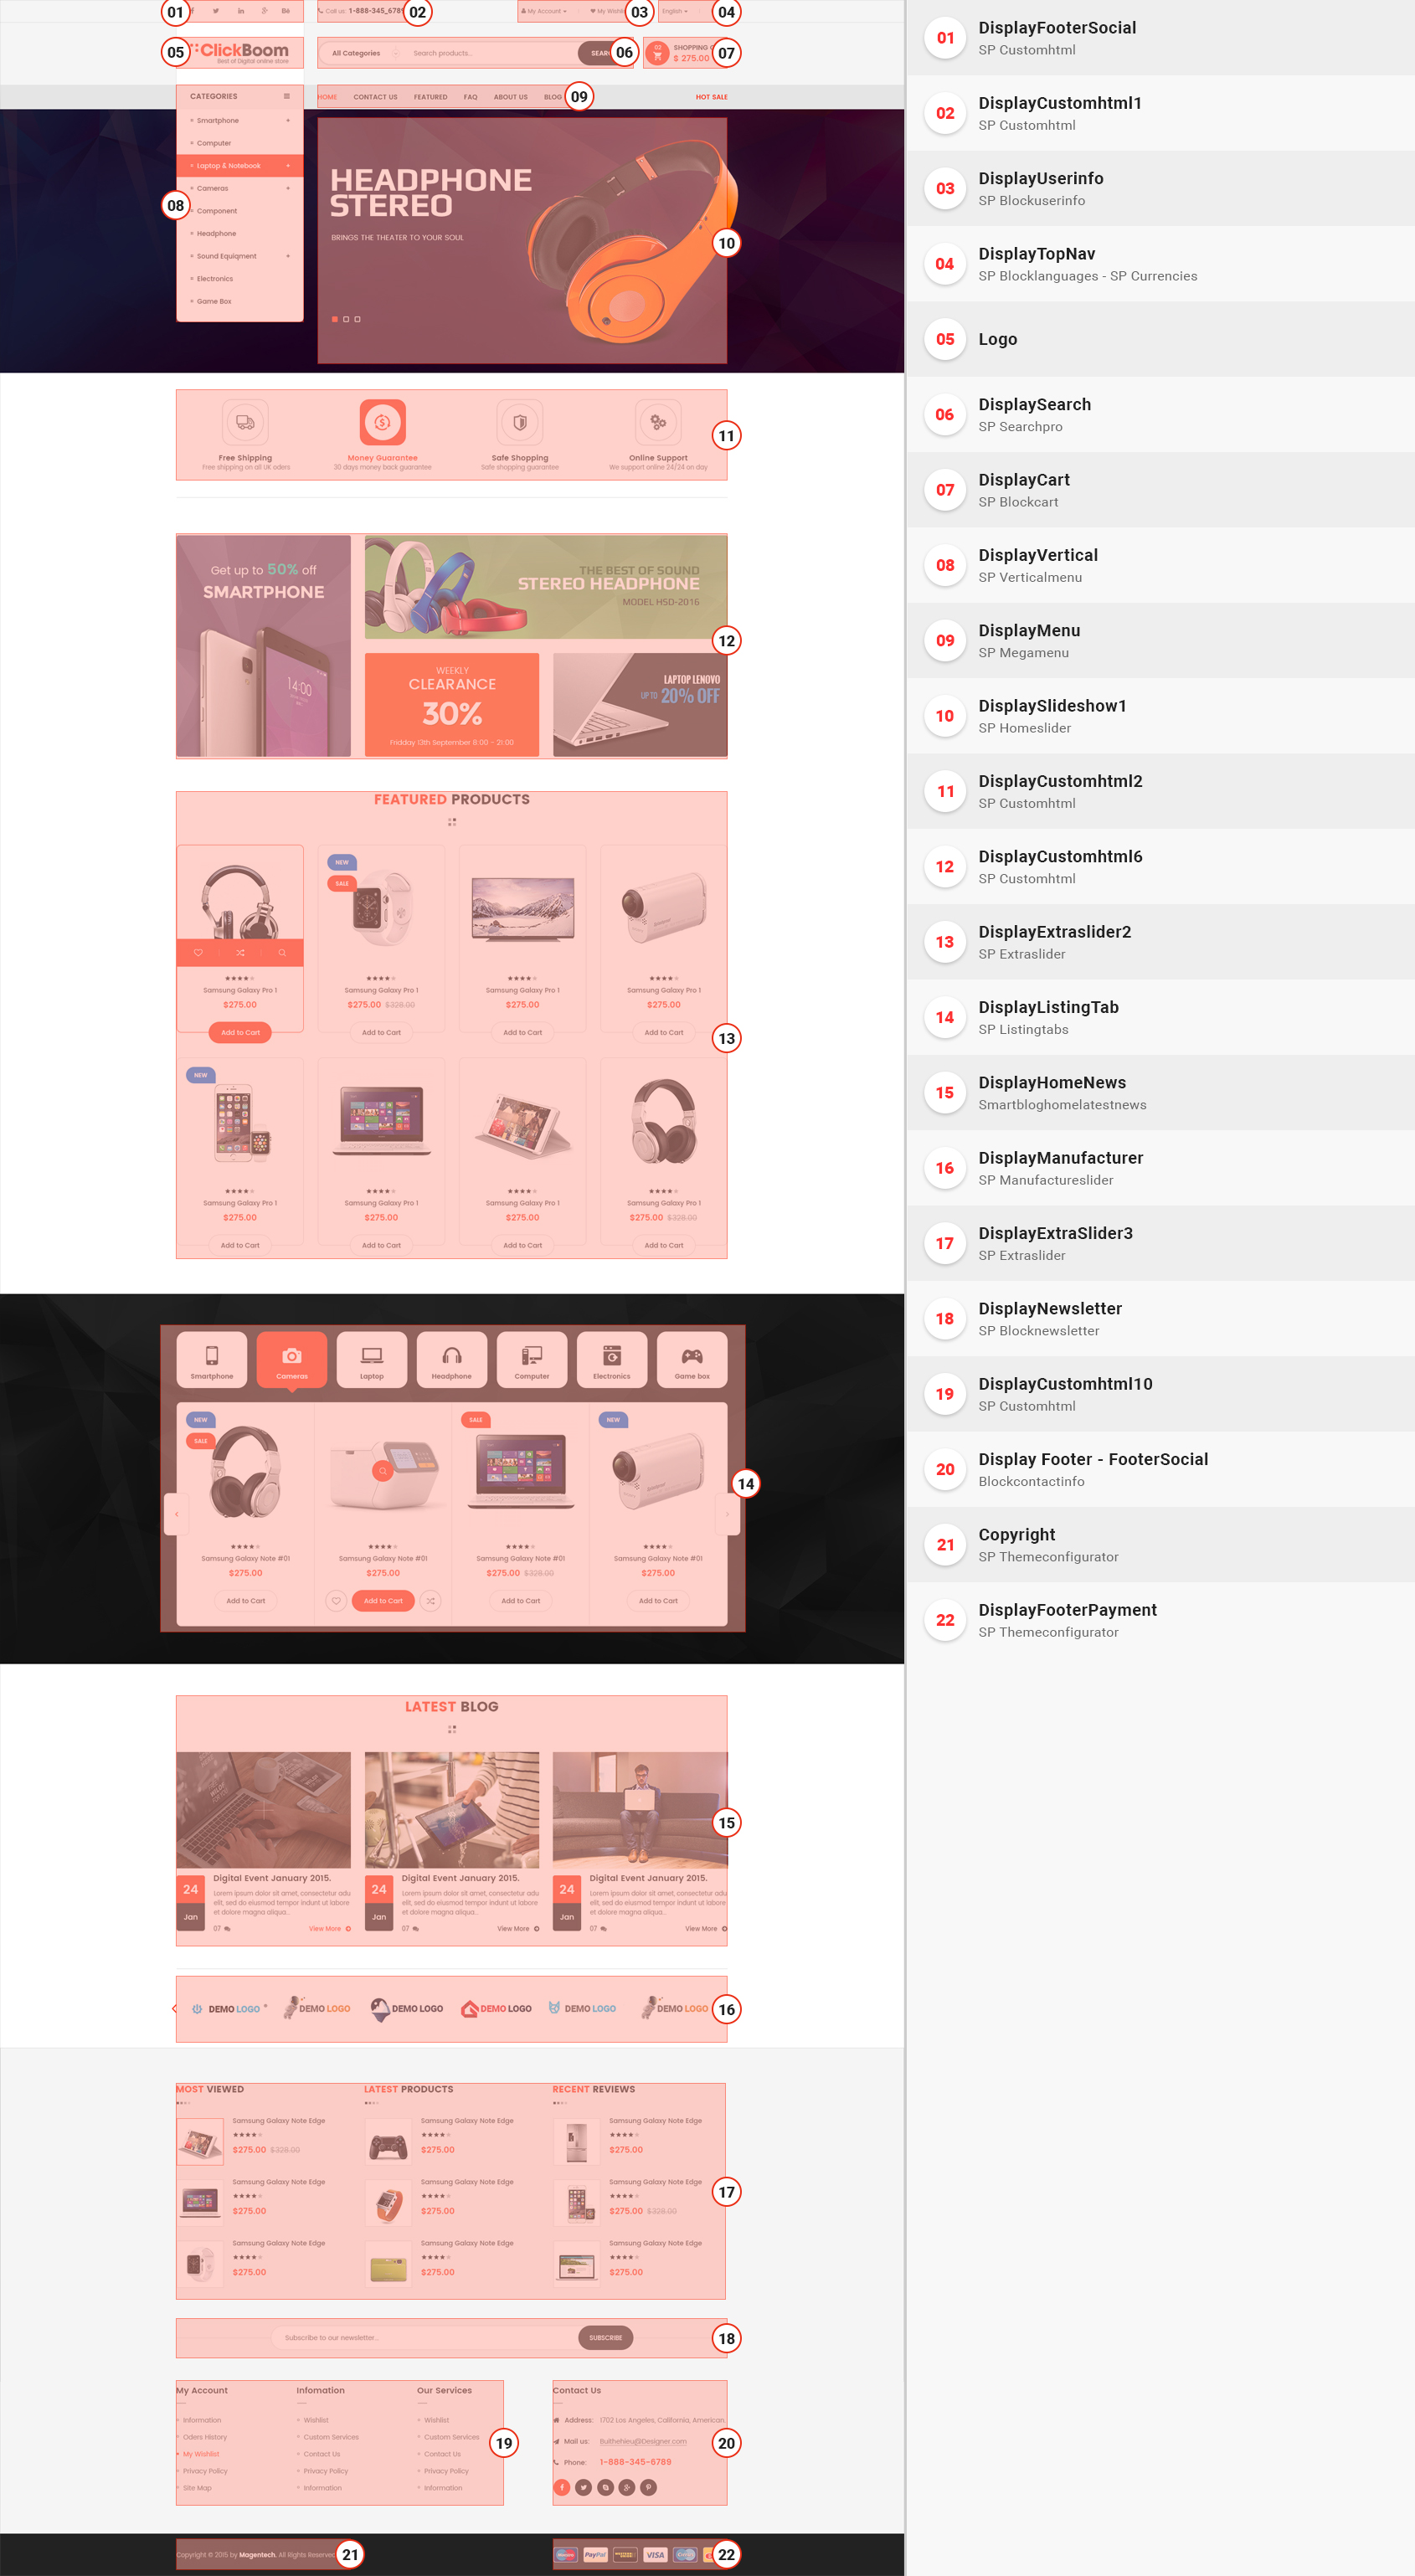
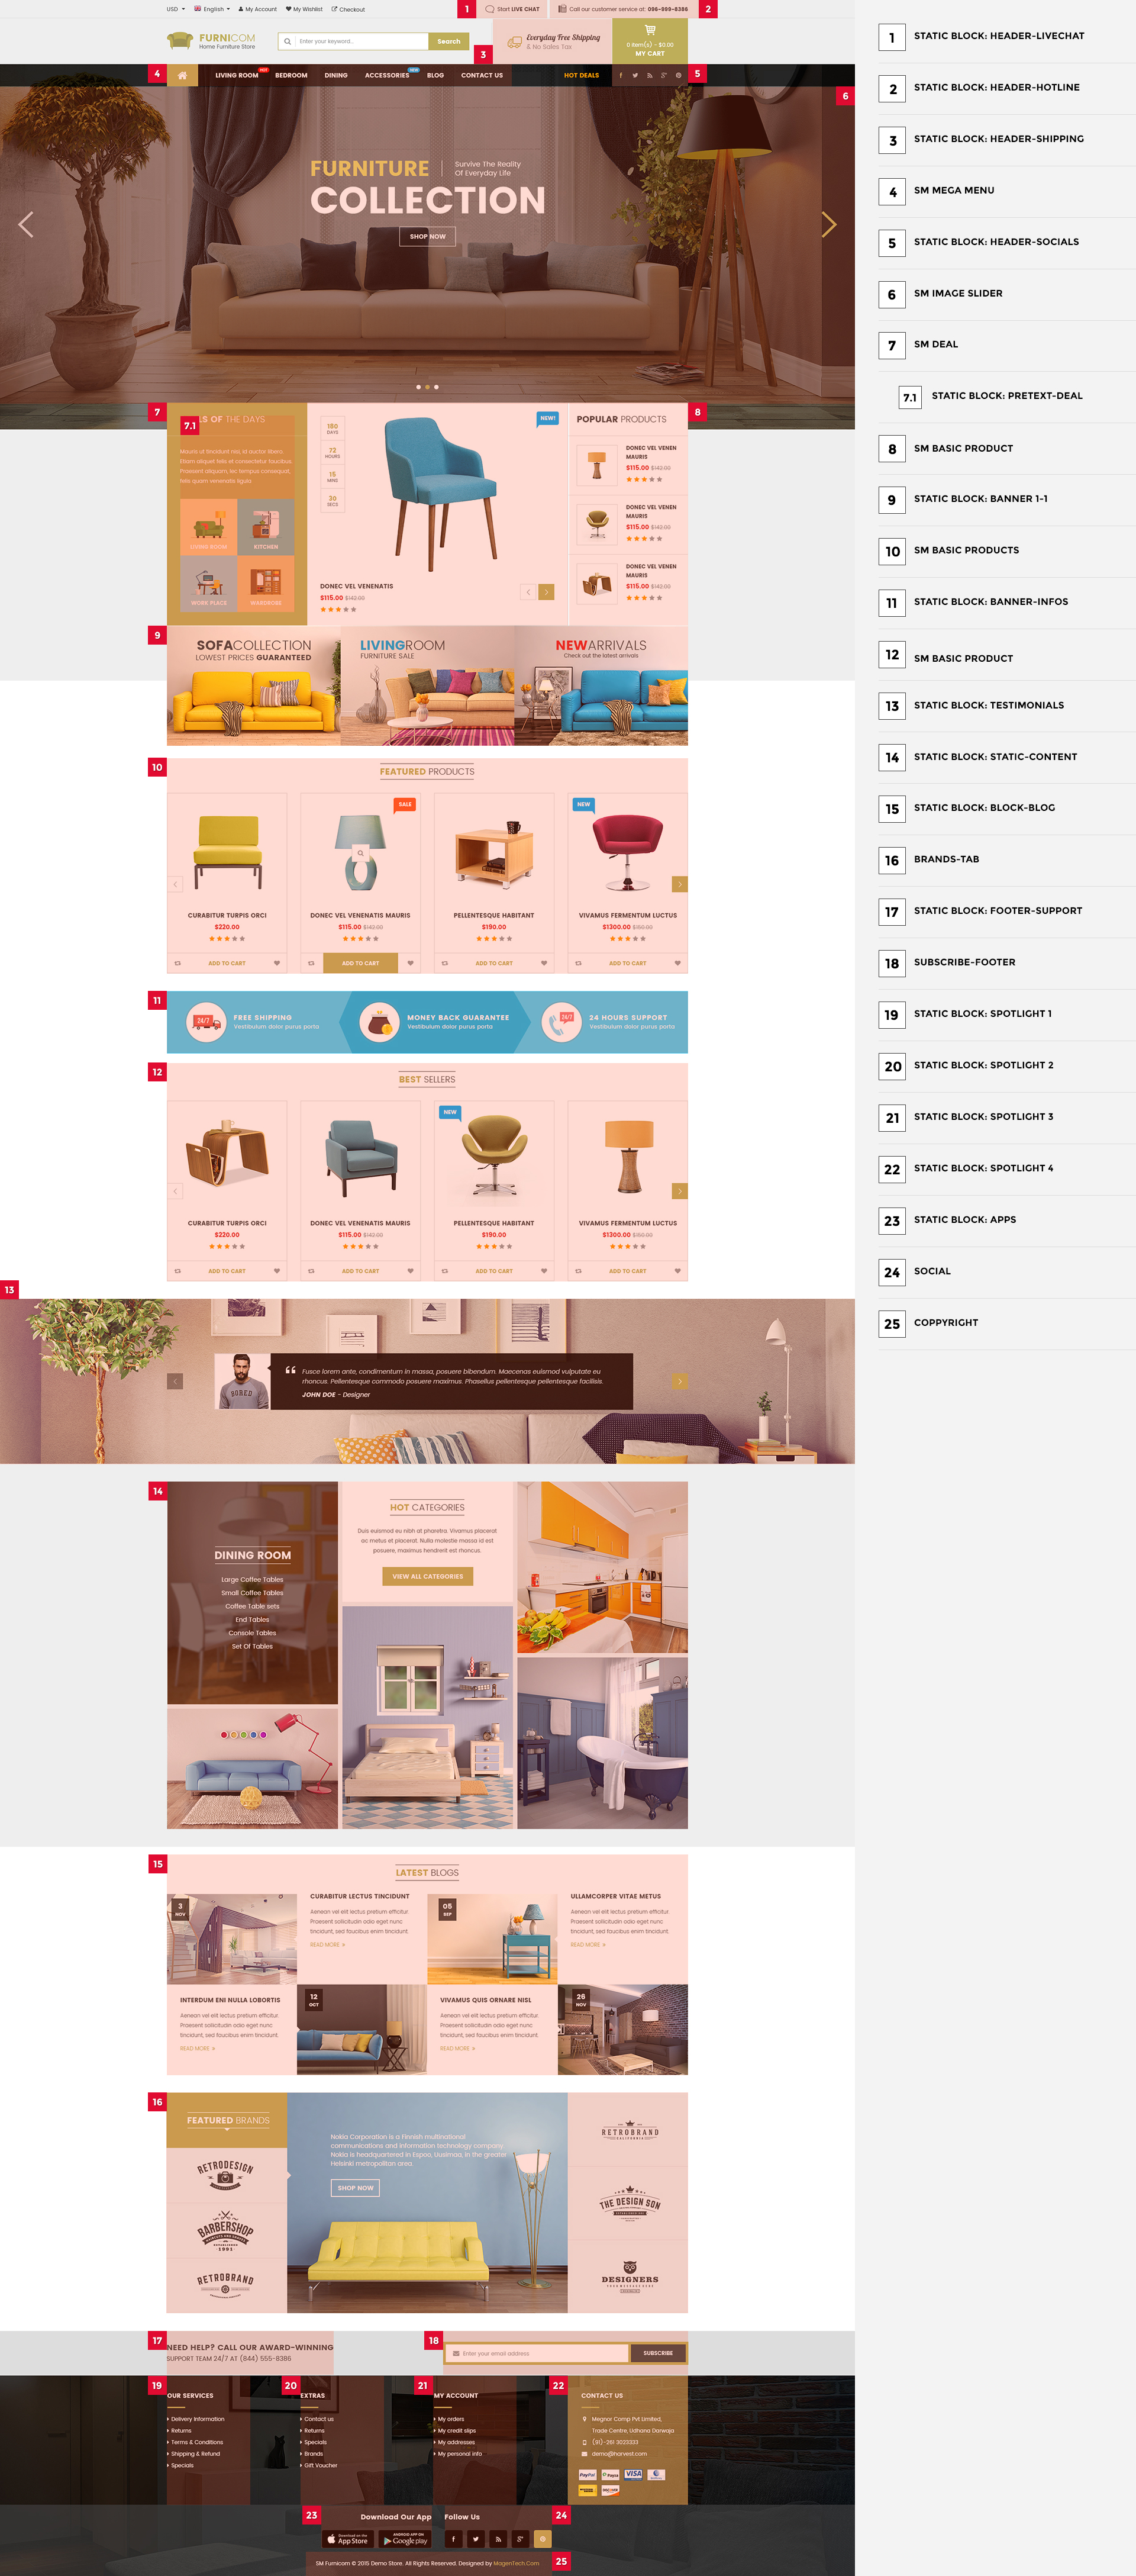
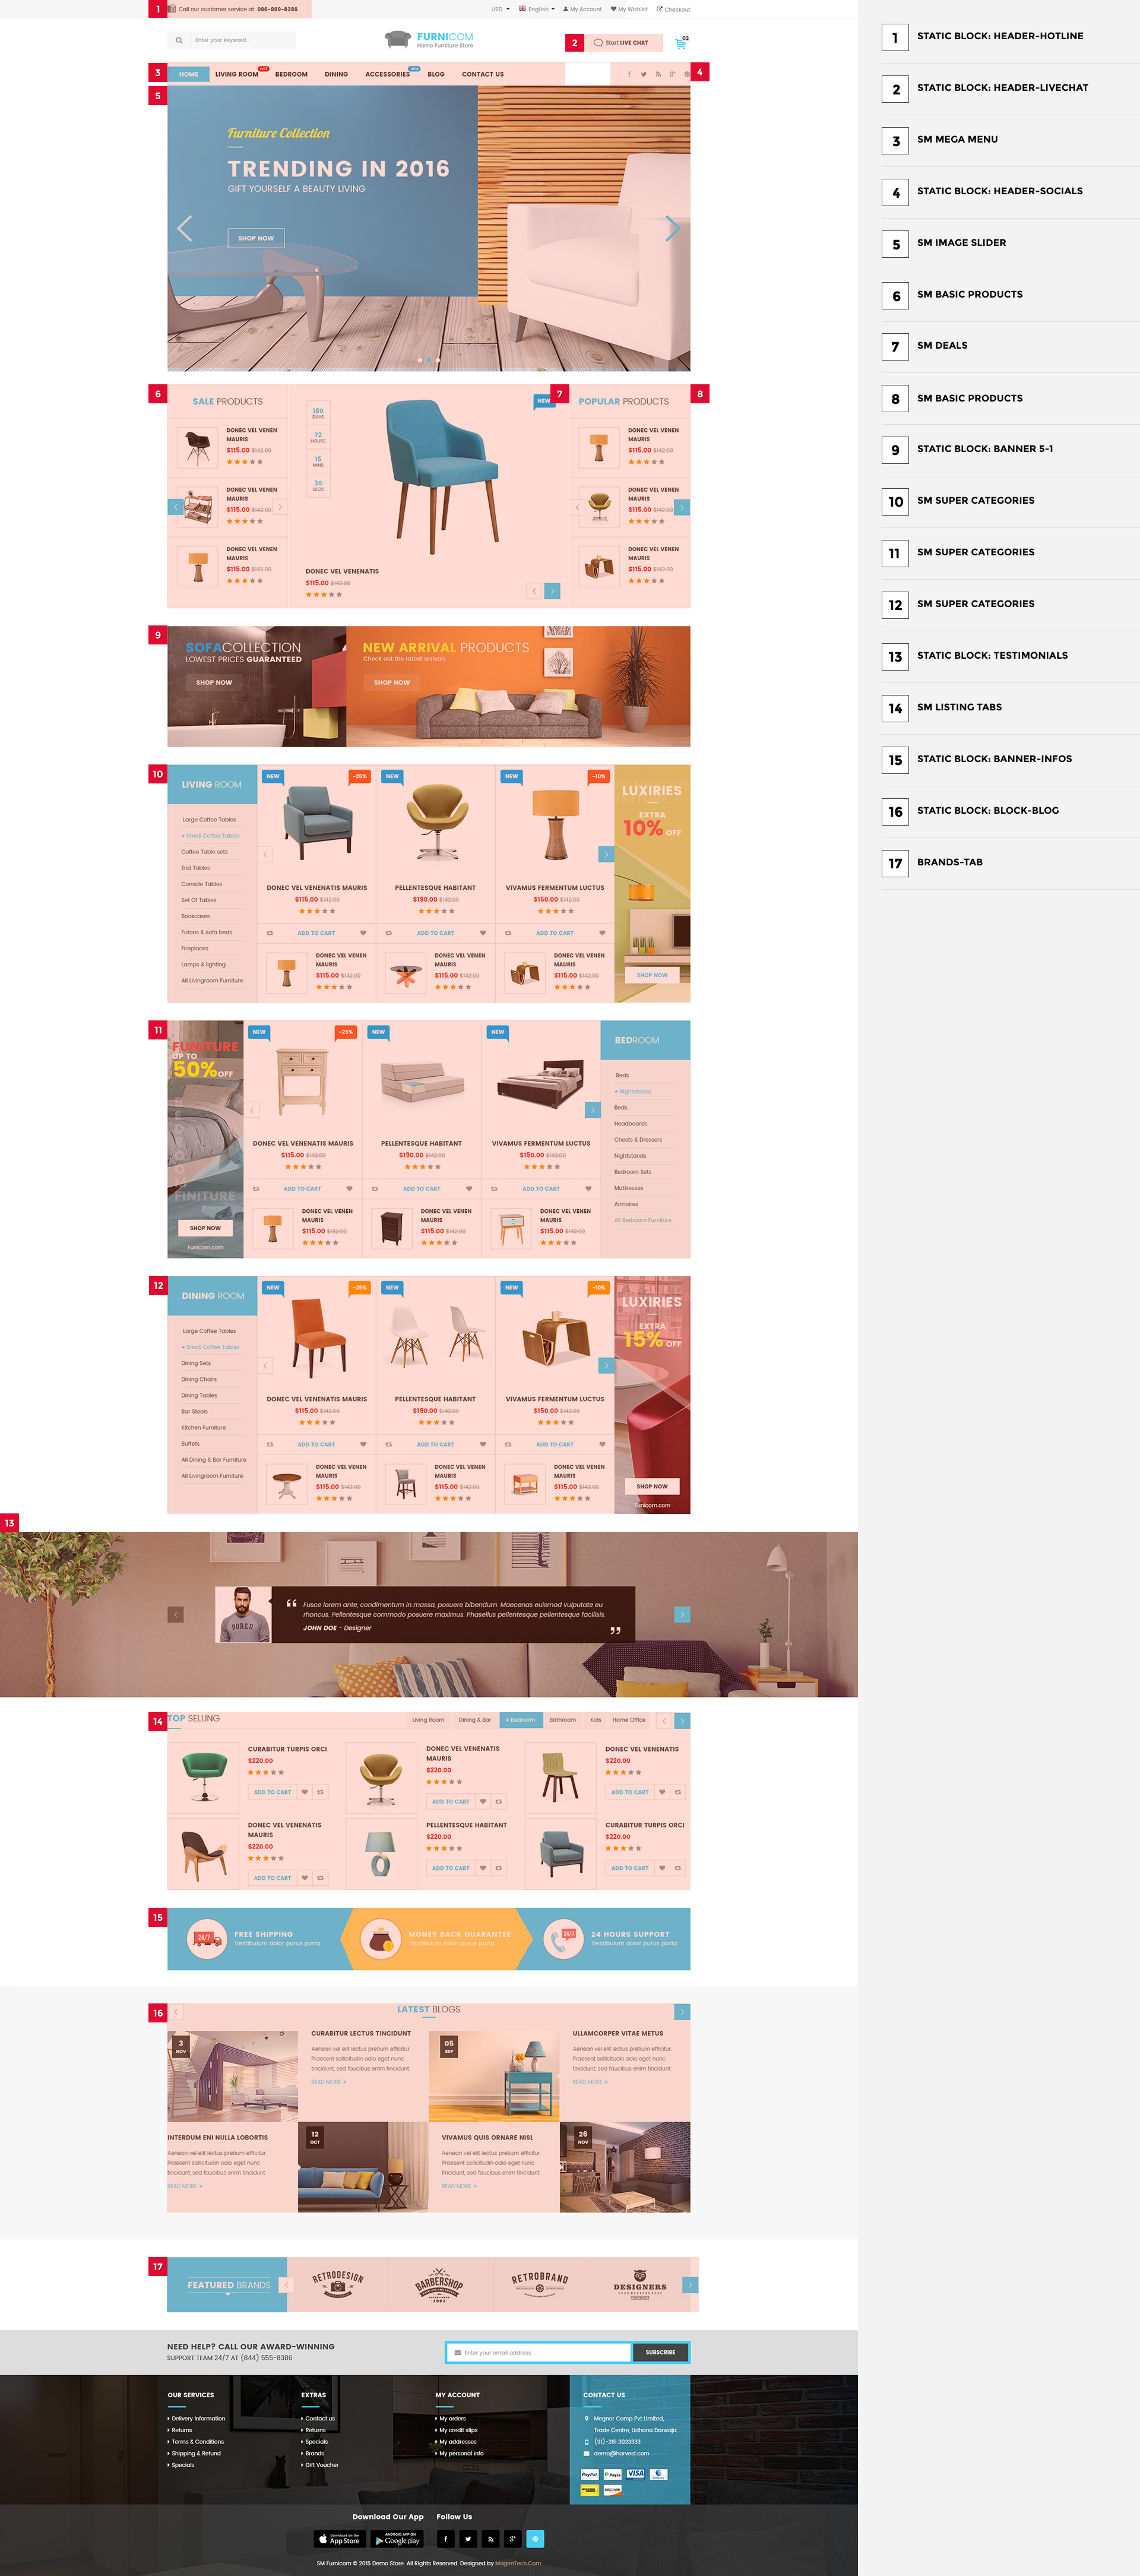
6.1 SP Topshop Layout 1
![home-default]()
display CustomHTML1
SP Custom HTML – Call Support
Frontend Appearance:
![]()
Backend Settings:
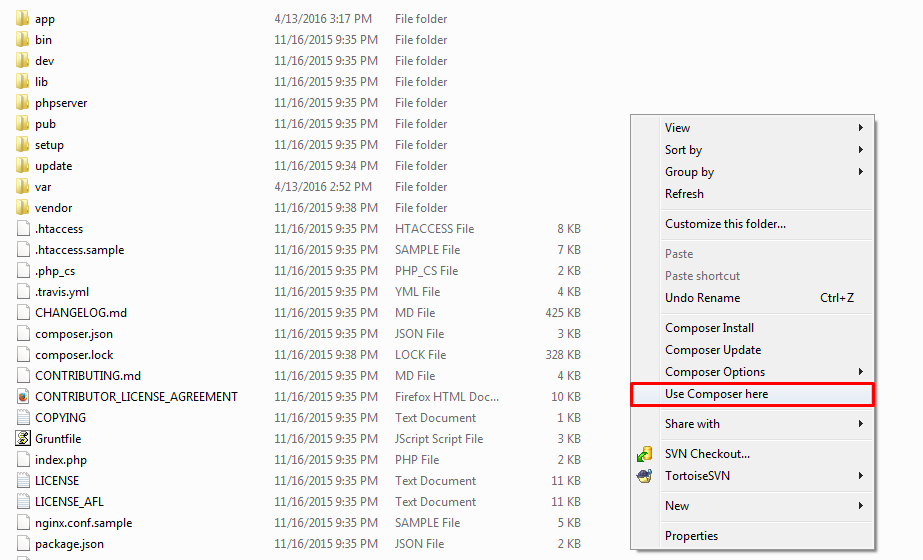
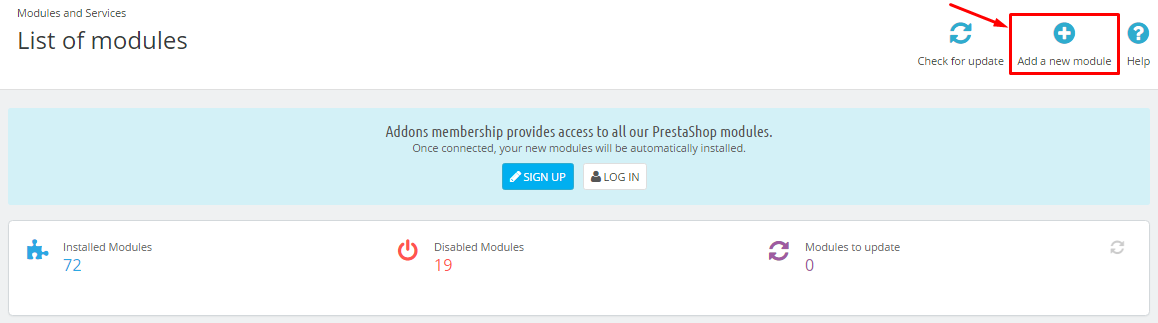
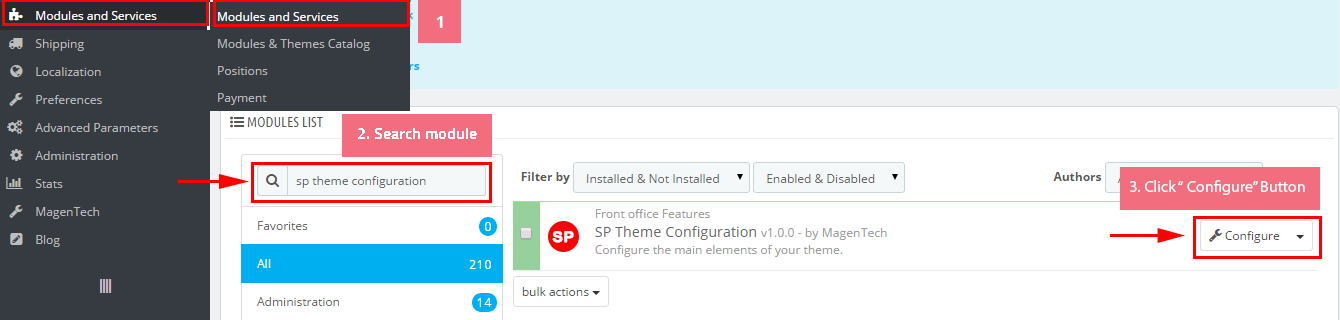
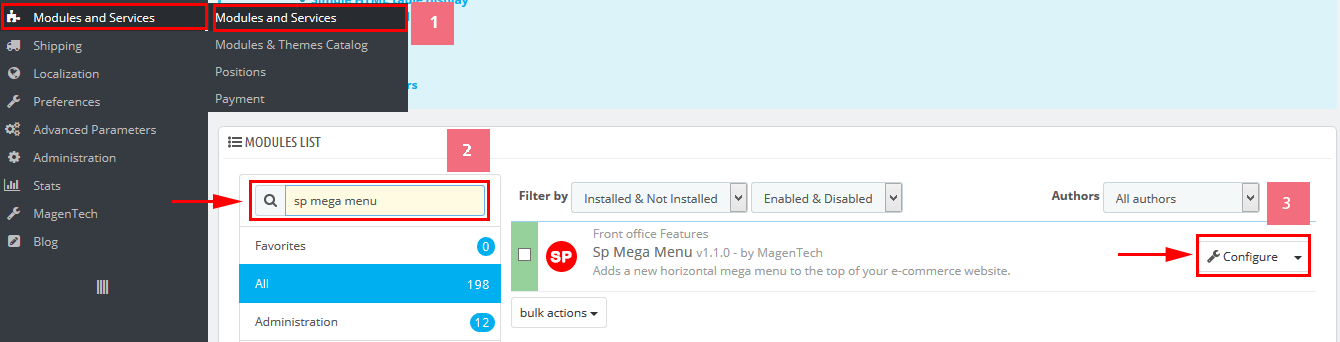
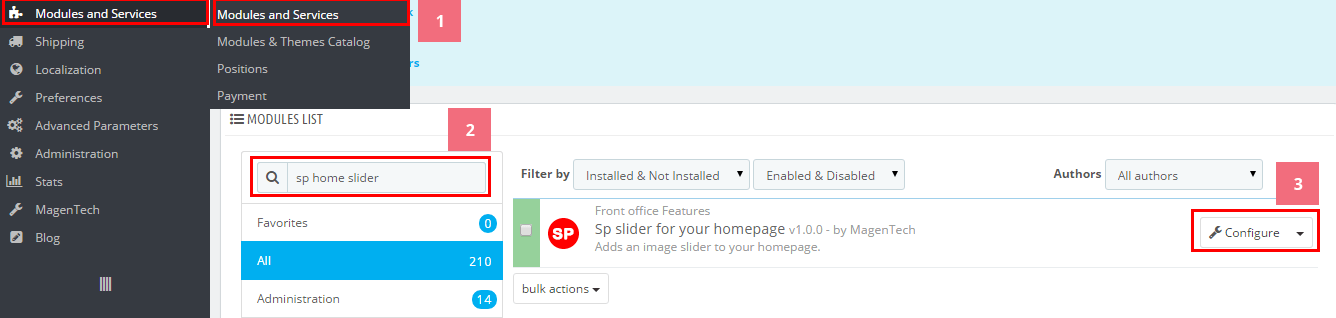
Step 1: In the Pretashop Admin Panel, navigate to Modules and Services >> Modules and Services >> look for “SP Custom HTML” module >> click “Configure” button to configure.
![]()
Step 2: In the “SP Custom HTML” configuration page, click ![]() button in the right corner to “ADD NEW MODULE”.
button in the right corner to “ADD NEW MODULE”.
Step 3: You could configure this module like the following image.
![]()
Copy and paste the following code into the content:
<div class="call_sp">
<p>Call Support for Free : (044) 6789 839</p>
</div>
displayUserinfo
SP User Info Block
Frontend Appearance:
![]()
Backend Settings:
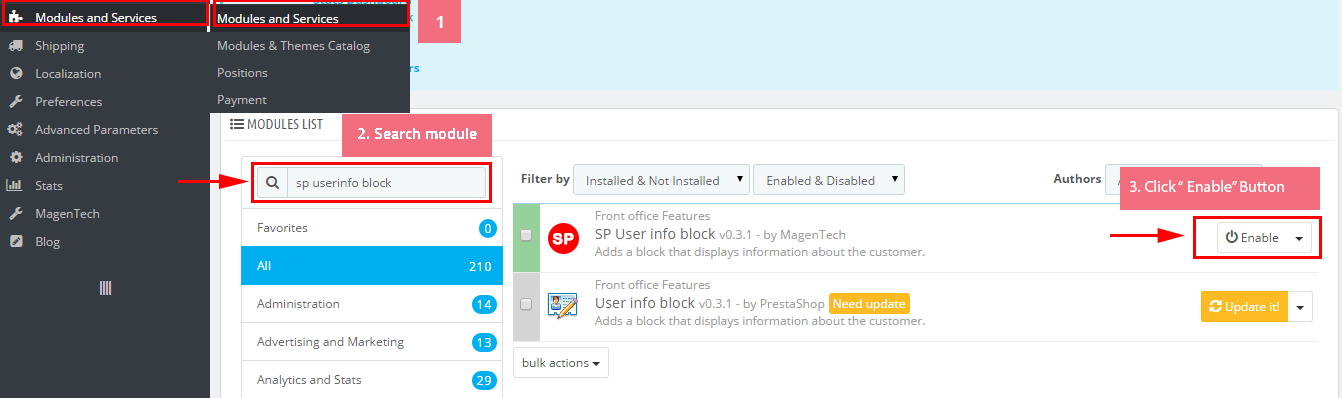
In the Pretashop Admin Panel, navigate to Modules and Services >> Modules and Services >> look for “SP User Info Block” module >> click “Enable” button to enable this module.
![]()
displayTopNav
1. SP Block Currencies
Frontend Appearance:
![]()
Backend Settings:
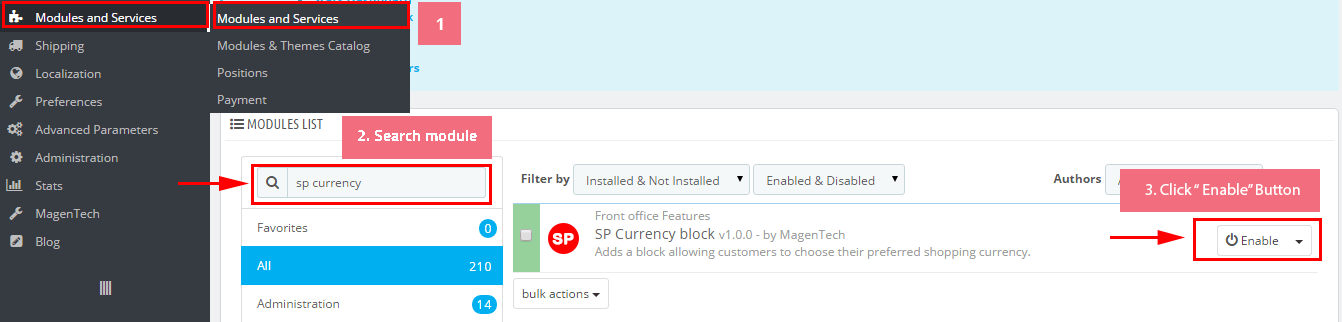
In the Pretashop Admin Panel, navigate to Modules and Services >> Modules and Services >> look for “SP Currency Block” >> click “Enable” button to enable this module.
![]()
2. SP Block Languages
Frontend Appearance:
![]()
Backend Settings:
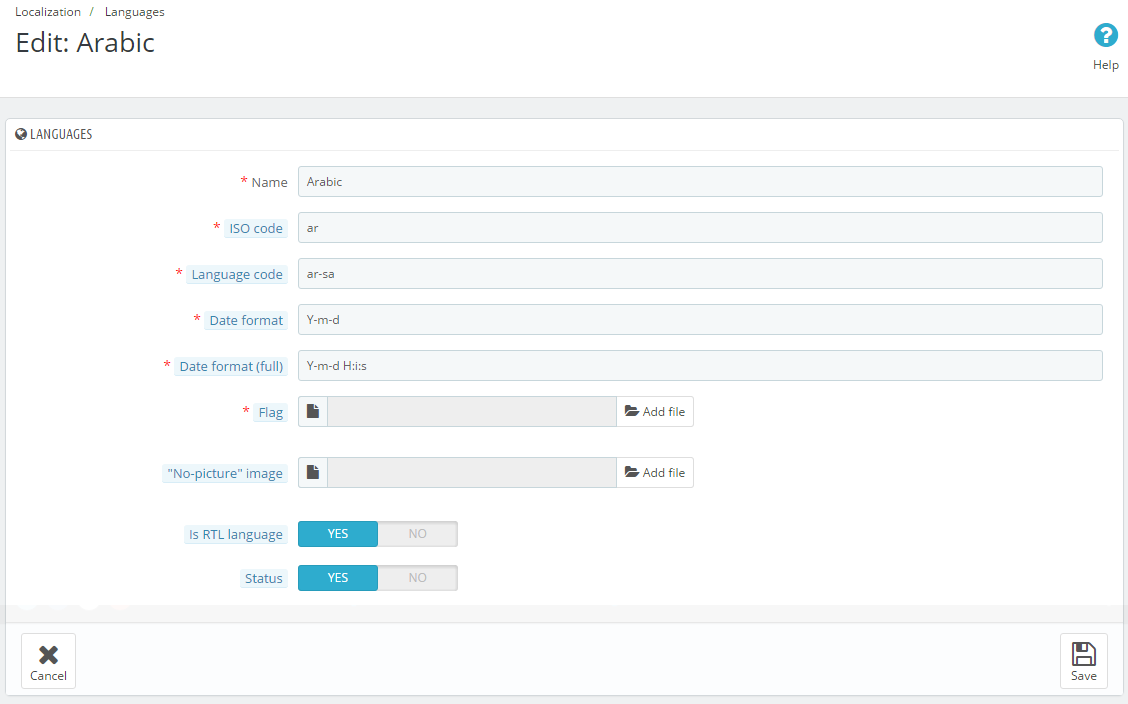
Step 1: To add language as you want. For example: To add “Arabic” language, in your Admin Panel >> navigate to LOCALIZATION >> Languages >> click ![]() button in the right corner to “ADD NEW”.
button in the right corner to “ADD NEW”.
![]()
Step 2: Fill information into the required field (*) as below:
![]()
Step 3: Click “Save” button and view shop to see the changes.
Note: When you add any language as you want, for example: Arabic language as above. At the frontend , some images will display “?” image as following:
![]() .
.
To resolve this error, please make the steps following:
1. In your administator, please find to position of this module, for example: Position – displayHtml4: Fashion; Module: SP Custom HTML.
![]() .
.
2. And click source code to add “../” at before the image url >> Click “OK”.
![]() .
.
3. Click “Save” button and go to the frontend to view the changes.
![]()
display Customhtml2
SP Custom HTML – Banner Top
Frontend Appearance:
![]()
Backend Settings:
Step 1: In the Pretashop Admin Panel, navigate to Modules and Services >> Modules and Services >> look for “SP Custom HTML” module >> click “Configure” button to configure.
![]()
Step 2: In the “SP Custom HTML” configuration page, click ![]() button in the right corner to “ADD NEW MODULE”.
button in the right corner to “ADD NEW MODULE”.
Step 3: You could configure this module like the following image.
![]()
Copy and paste the following code into the content:
<div class="banner_adv"><a href="#"><img class="mfvwivdixpanpwoszxls" src="http://your-website.yourdomain/themes/sp_topshop/img/cms/adv1.jpg" alt="" /></a></div>
displaySearch
SP Search Block
Frontend Appearance:
![]()
Backend Settings:
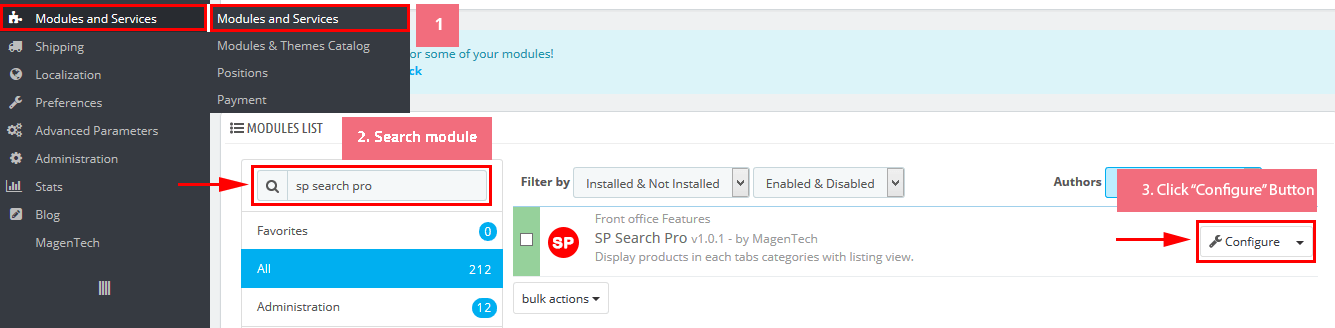
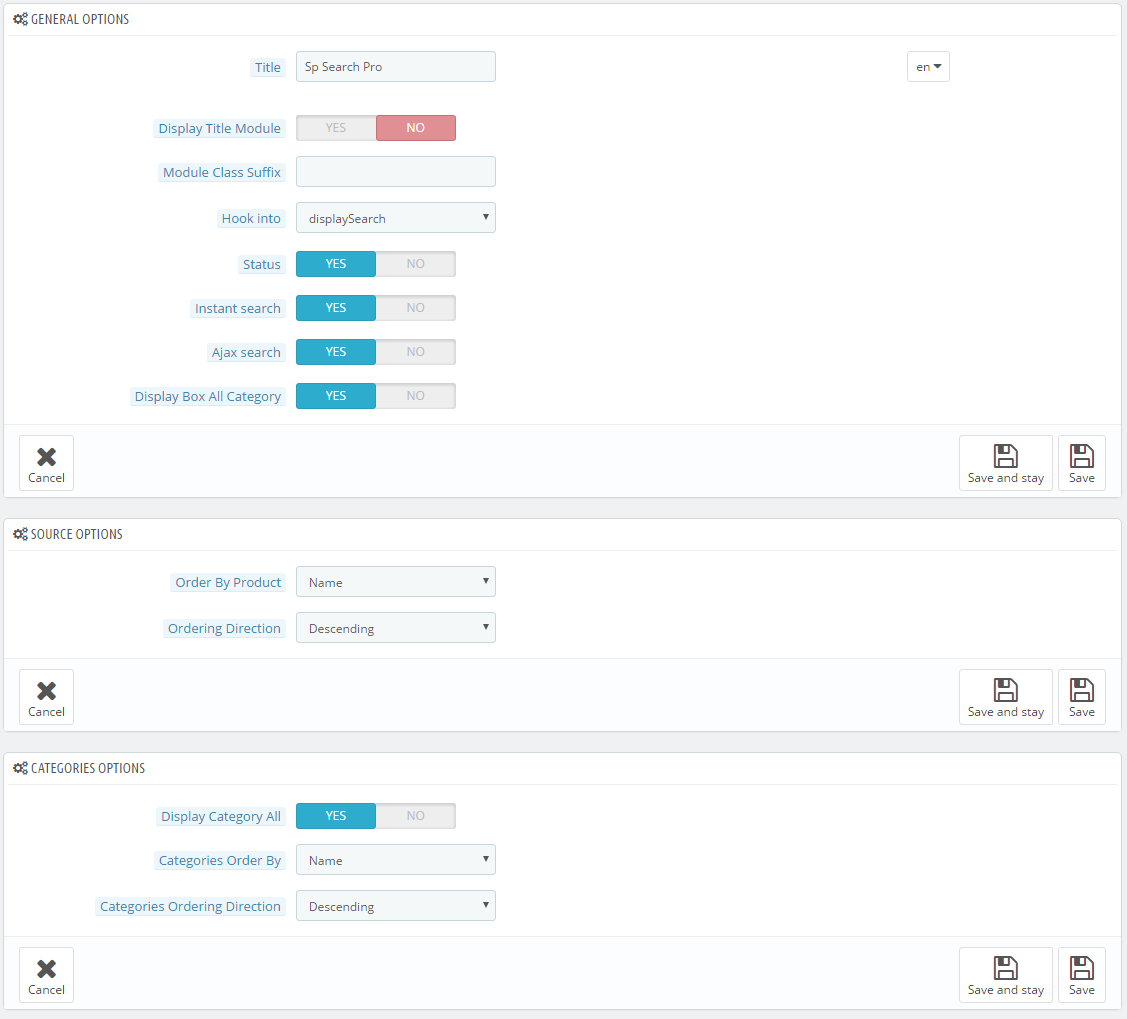
Step 1: In the Pretashop Admin Panel, navigate to Modules and Services >> Modules and Services >> look for “SP Search Pro” module >> click “Configure” button to configure.
![]()
Step 2: In the “SP Search Pro” configuration page, click ![]() button in the right corner to “ADD NEW MODULE”.
button in the right corner to “ADD NEW MODULE”.
Step 3: You could configure this module like the following image.
![]()
displayCart
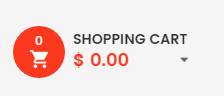
SP Cart Block
Frontend Appearance:
![]()
Backend Settings:
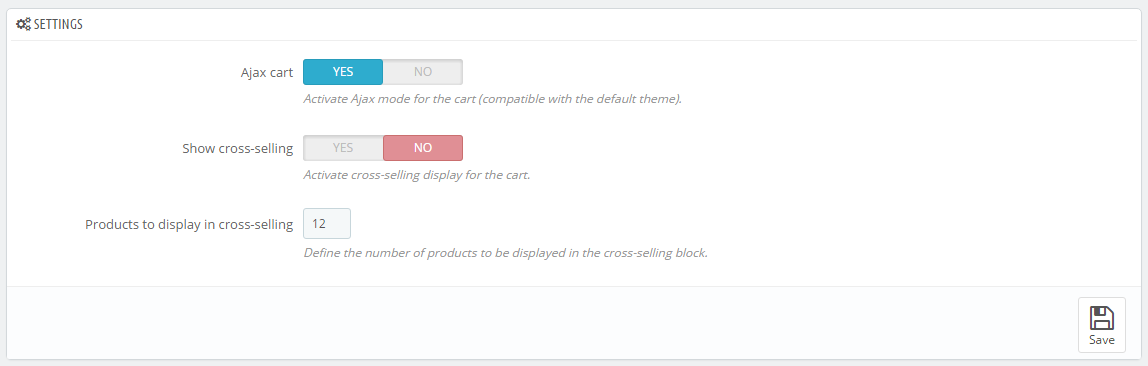
Step 1: In the Pretashop Admin Panel, navigate to Modules and Services >> Modules and Services >> look for “SP Cart Block” module >> click “Configure” button to configure.
![]()
Step 2: In the “SP Cart Block” configuration page, click ![]() button in the right corner to “ADD NEW MODULE”.
button in the right corner to “ADD NEW MODULE”.
Step 3: You could configure this module like the following image.
![]()
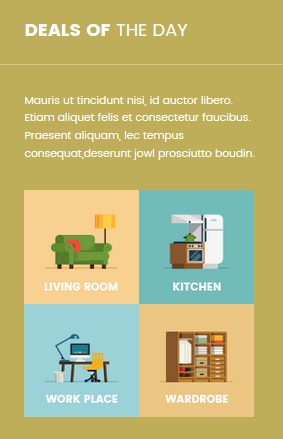
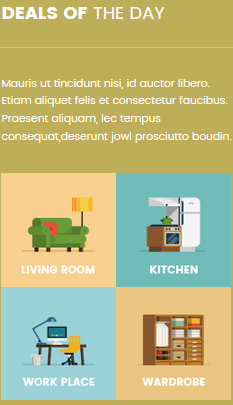
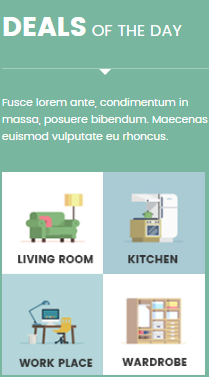
displayDeal
SP Deal – hot deals
Frontend Appearance:
![]()
Backend Settings:
Step 1: In the Pretashop Admin Panel, navigate to Modules and Services >> Modules and Services >> look for “SP Deal” module.
![]()
Step 2: In the “SP Deal” configuration page, click ![]() button in the right corner to “ADD NEW MODULE”.
button in the right corner to “ADD NEW MODULE”.
Step 3: You could configure this module like the following image.
![]()
display Customhtml3
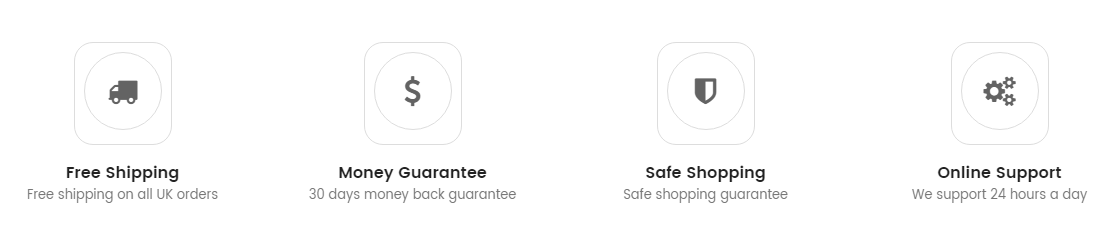
SP Custom HTML – Icon deal
Frontend Appearance:
![]()
Backend Settings:
Step 1: In the Pretashop Admin Panel, navigate to Modules and Services >> Modules and Services >> look for “SP Custom HTML” module >> click “Configure” button to configure.
![]()
Step 2: In the “SP Custom HTML” configuration page, click ![]() button in the right corner to “ADD NEW MODULE”.
button in the right corner to “ADD NEW MODULE”.
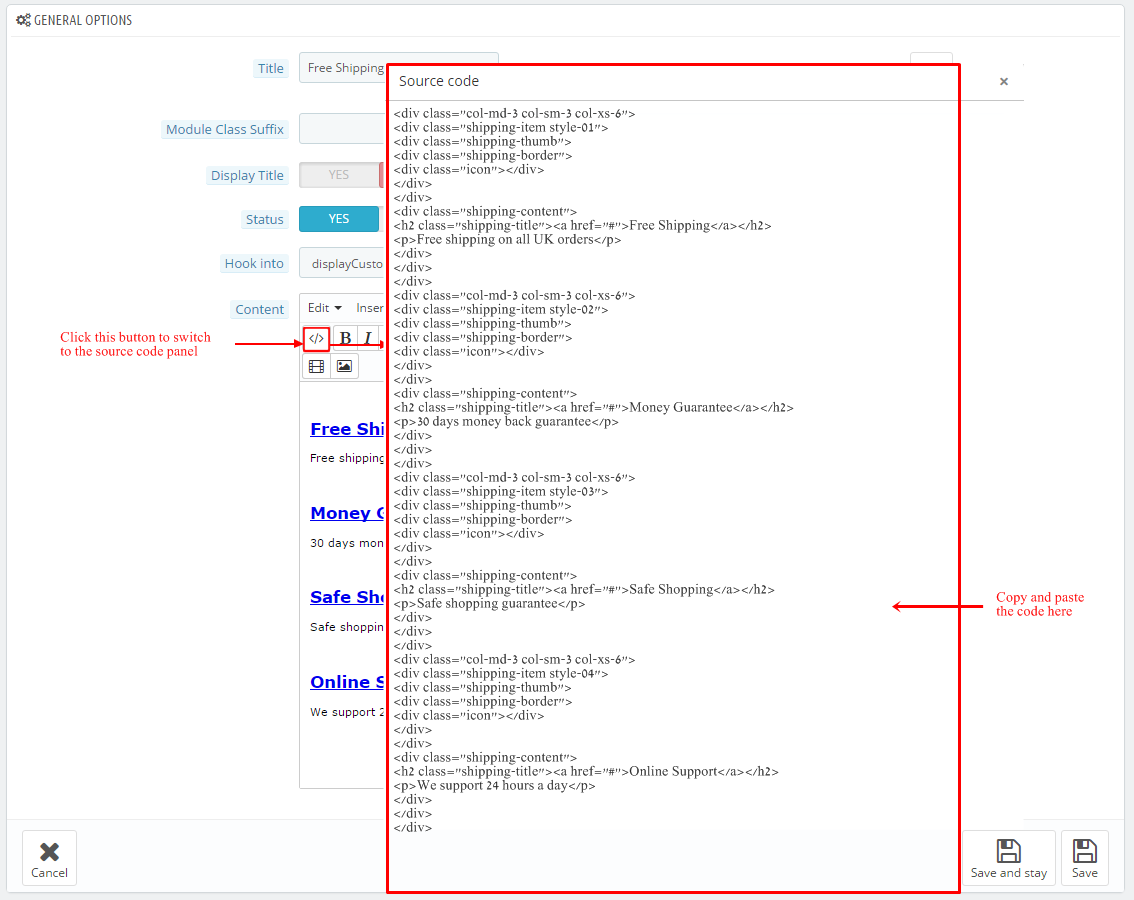
Step 3: You could configure this module like the following image.
![]()
Copy and paste the following code into the content:
<div class="deal-posttext">
<ul>
<li><a href="#"><img src="../themes/sp_topshop/img/cms/plicy-1.png" alt="" /></a></li>
<li><a href="#"><img src="../themes/sp_topshop/img/cms/plicy-2.png" alt="" /></a></li>
<li><a href="#"><img src="../themes/sp_topshop/img/cms/plicy-3.png" alt="" /></a></li>
</ul>
</div>
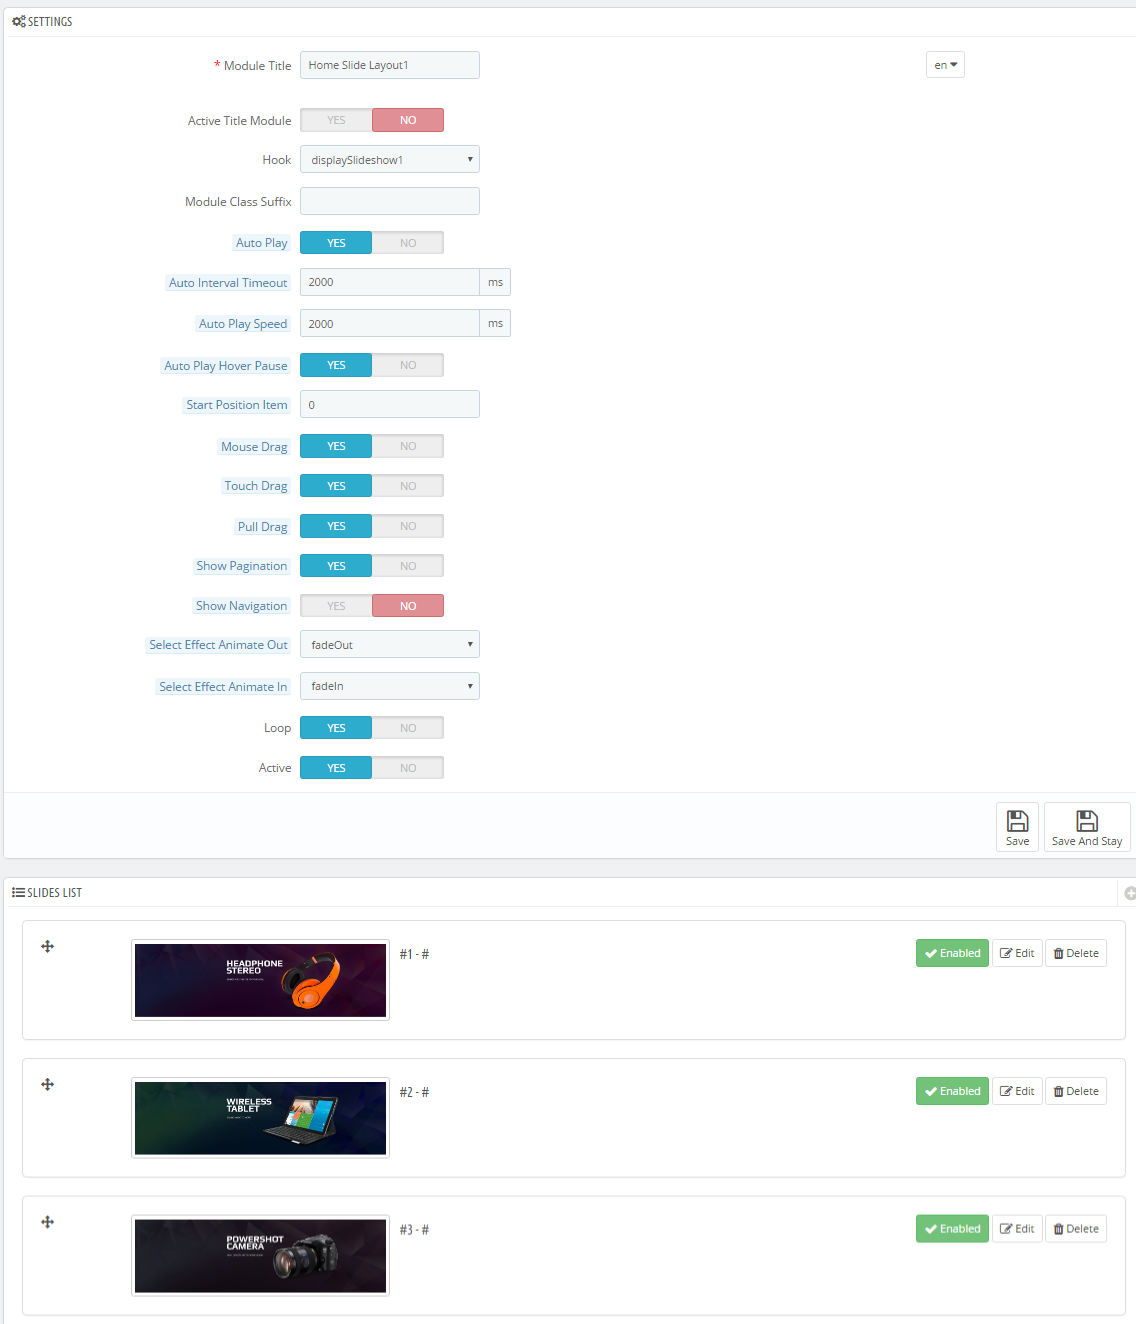
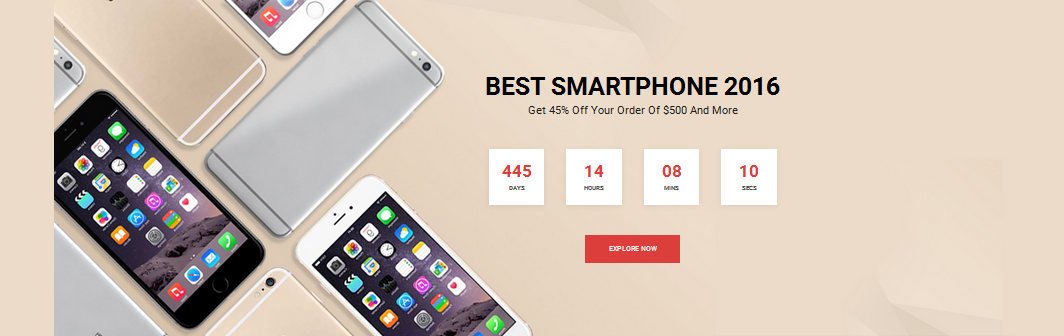
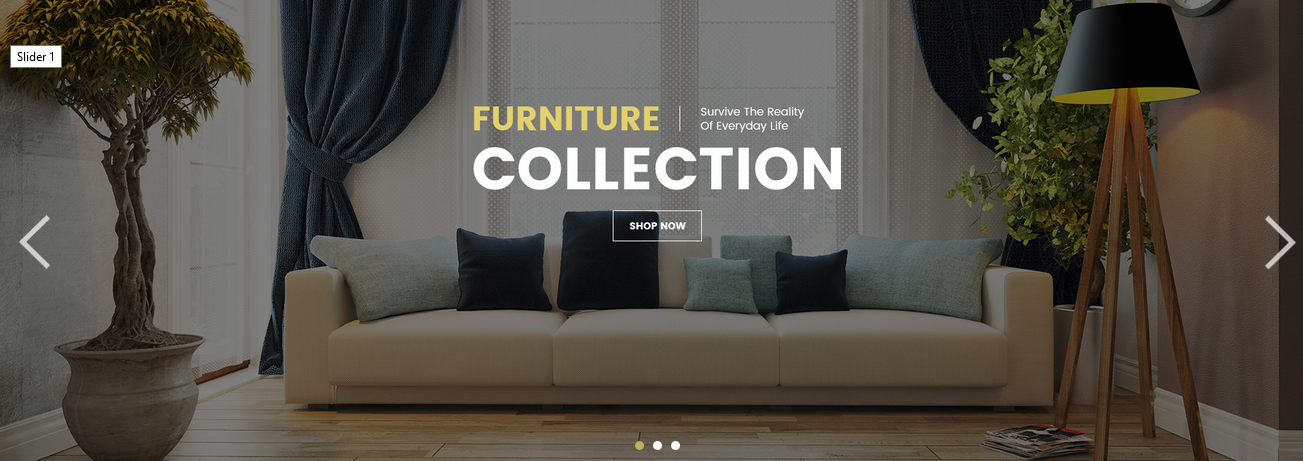
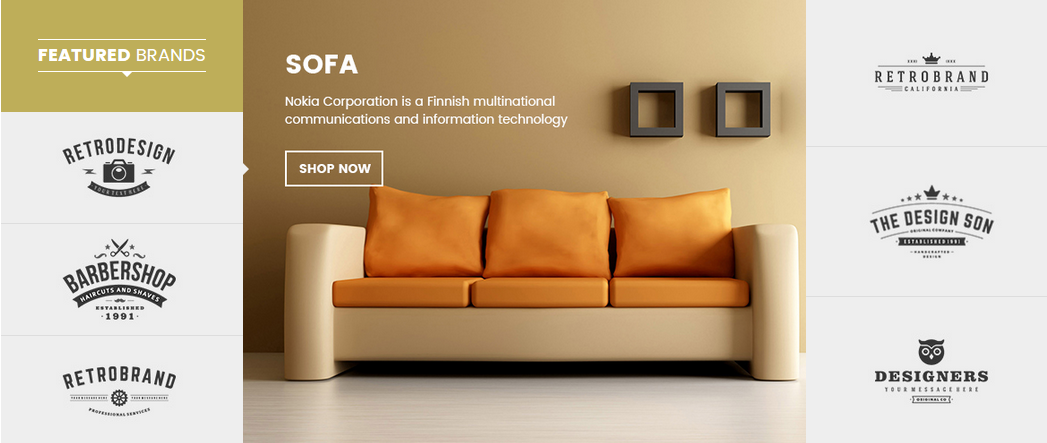
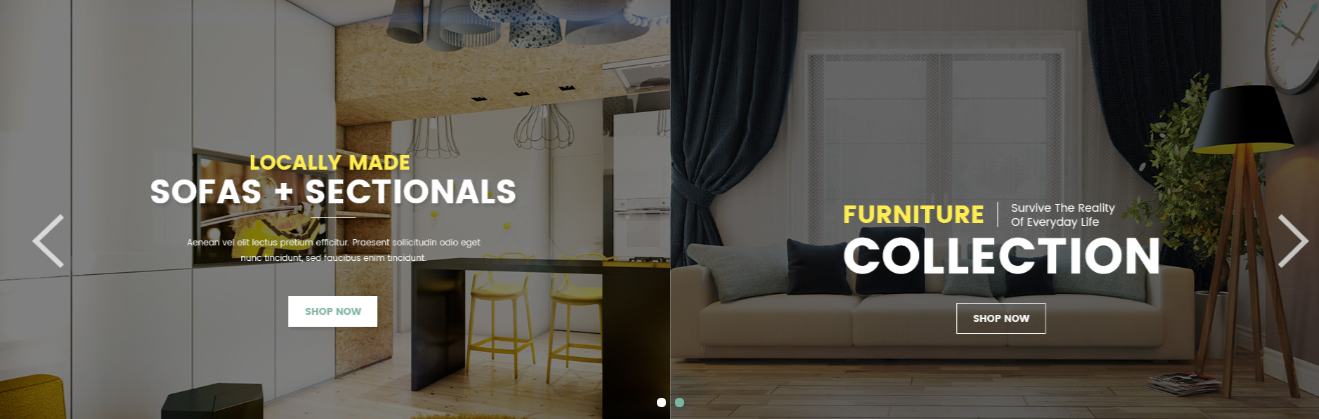
displaySlideShow1
Sp slider for your homepage
Frontend Appearance:
![]()
Backend Settings:
Step 1: In the Pretashop Admin Panel, navigate to Modules and Services >> Modules and Services >> look for “SP Home Slider” module >> click “Configure” button to configure.
![]()
Step 2: In the “SP Slider For Your Homepage” configuration page, click ![]() button in the right corner to “ADD NEW MODULE”.
button in the right corner to “ADD NEW MODULE”.
Step 3: You could configure this module like the following image.
![]()
Step 4: In the last part named Slides List of this configuration page, click ![]() button in the right corner to add new slide and edit slide’s information as follows:
button in the right corner to add new slide and edit slide’s information as follows:
display Customhtml4
SP Custom HTML – Icon deal
Frontend Appearance:
![]()
Backend Settings:
Step 1: In the Pretashop Admin Panel, navigate to Modules and Services >> Modules and Services >> look for “SP Custom HTML” module >> click “Configure” button to configure.
![]()
Step 2: In the “SP Custom HTML” configuration page, click ![]() button in the right corner to “ADD NEW MODULE”.
button in the right corner to “ADD NEW MODULE”.
Step 3: You could configure this module like the following image.
![]()
Copy and paste the following code into the content:
<div class="trending"><a href="#"><img src="../themes/sp_topshop/img/cms/banner01.jpg" alt="" /></a></div>
display Customhtml5
SP Custom HTML – Fashion2
Frontend Appearance:
![]()
Backend Settings:
Step 1: In the Pretashop Admin Panel, navigate to Modules and Services >> Modules and Services >> look for “SP Custom HTML” module >> click “Configure” button to configure.
![]()
Step 2: In the “SP Custom HTML” configuration page, click ![]() button in the right corner to “ADD NEW MODULE”.
button in the right corner to “ADD NEW MODULE”.
Step 3: You could configure this module like the following image.
![]()
Copy and paste the following code into the content:
<div class="trending2"><a href="#"><img src="../themes/sp_topshop/img/cms/banner02.jpg" alt="" /></a></div>
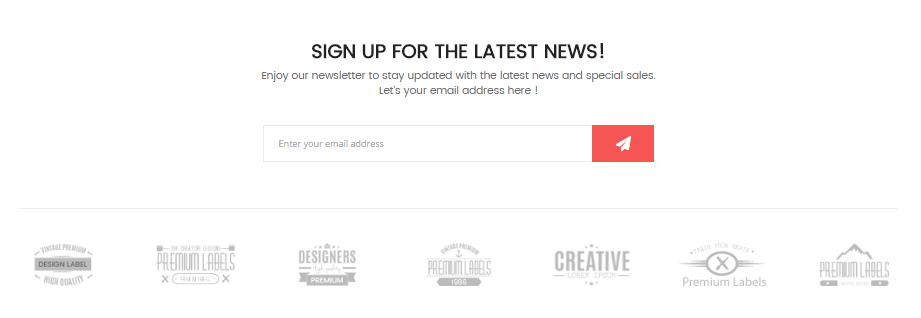
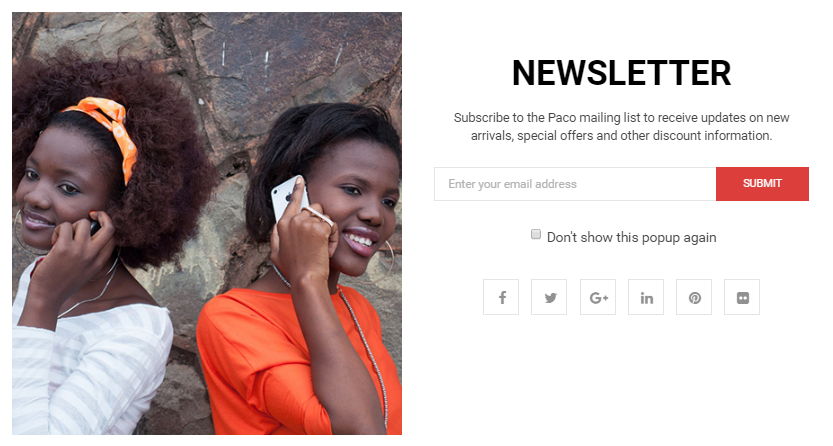
display Newsletter
SP Newsletter Block
Frontend Appearance:
![]()
Backend Settings:
Step 1: In the Pretashop Admin Panel, navigate to Modules and Services >> Modules and Services >> look for “SP Newsletter Block” module.
![]()
Step 2: You could configure its settings like the following image.
![]()
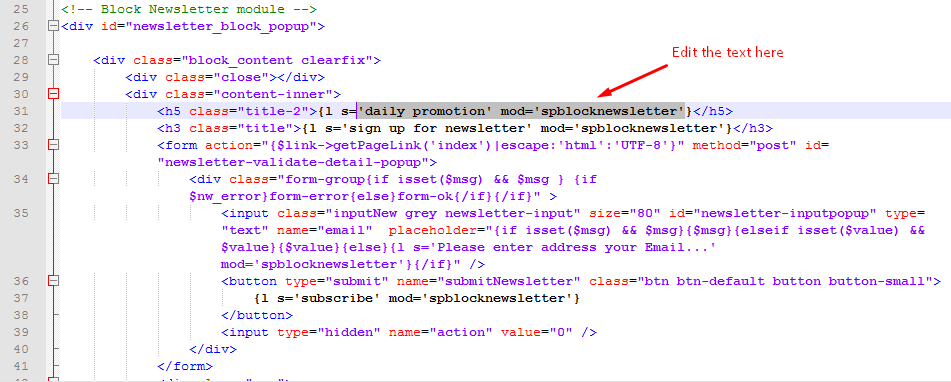
To edit the text in this module, please follow these steps:
In your Website’s Directory, go to themes\sp_topshop\modules\spblocknewsletter folder. To change the text in this module, in this folder, you could open the file named blocknewsletter.tpl by your editor program.
Find and change the text you want to edit, such as: SUBCRIBE EMAIL, Lorem Ipsum is simply dummy text of the printing and typesetting industry dummy, Enter your email address …
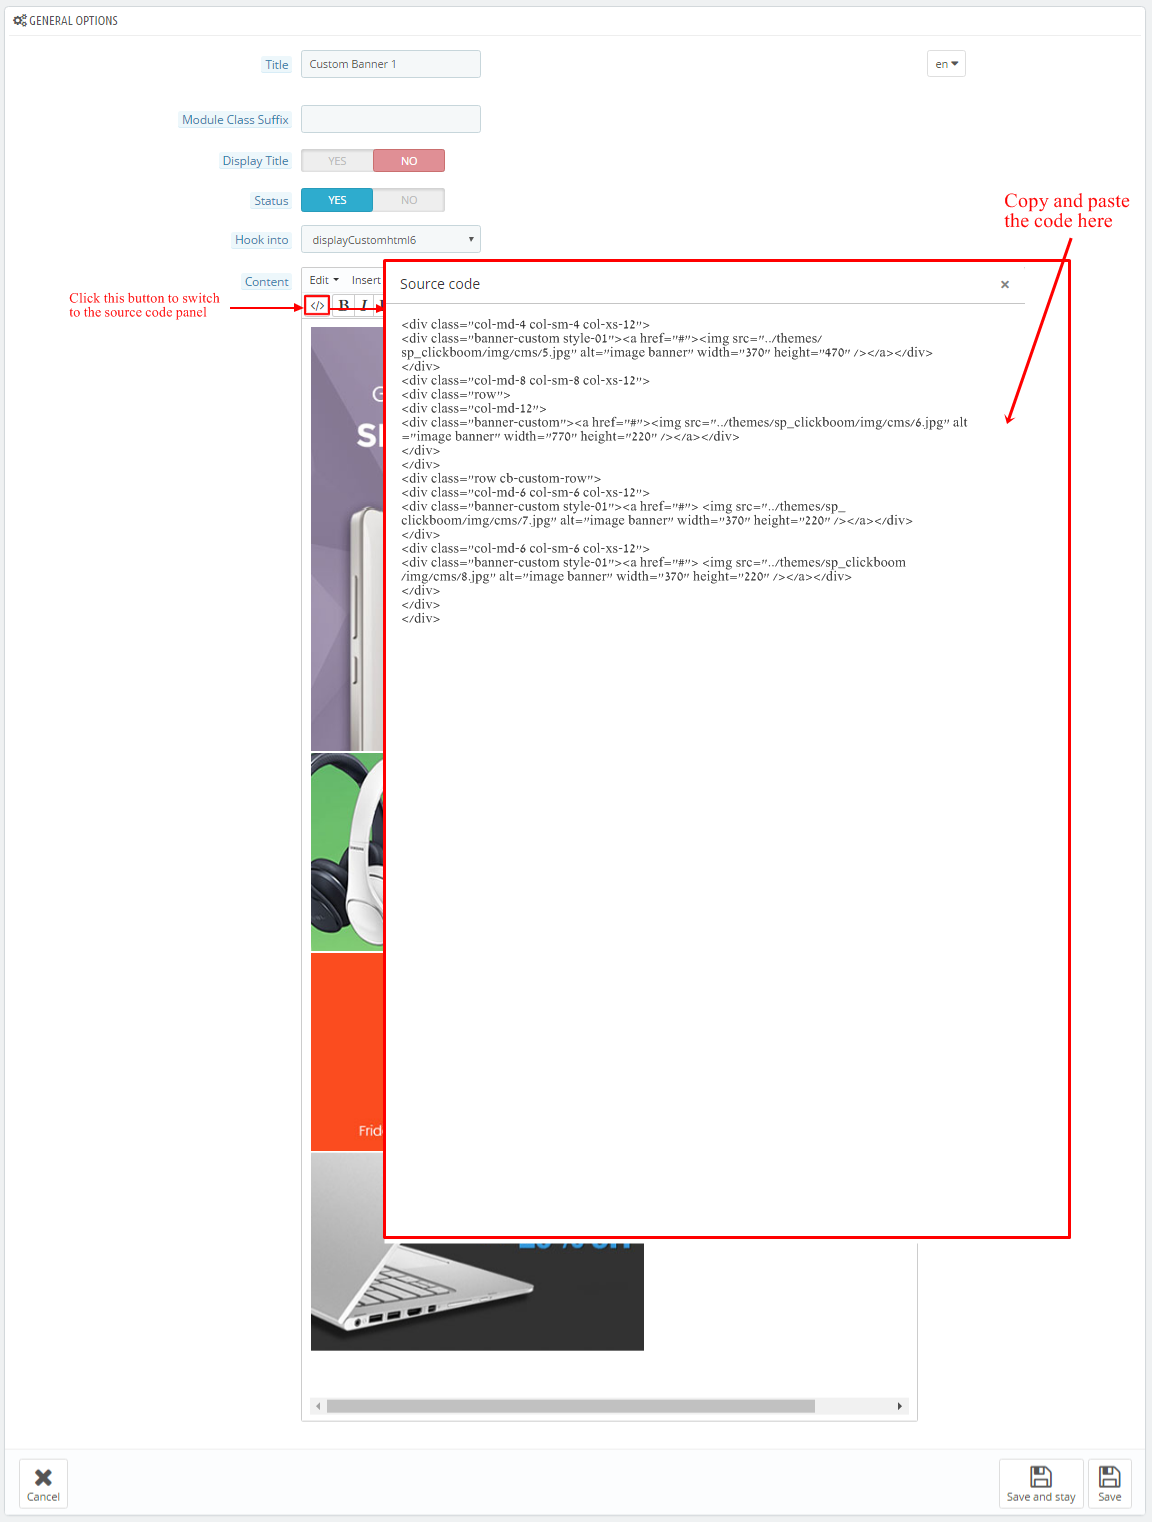
display Customhtml6
SP Custom HTML – Fashion3
Frontend Appearance:
![]()
Backend Settings:
Step 1: In the Pretashop Admin Panel, navigate to Modules and Services >> Modules and Services >> look for “SP Custom HTML” module >> click “Configure” button to configure.
![]()
Step 2: In the “SP Custom HTML” configuration page, click ![]() button in the right corner to “ADD NEW MODULE”.
button in the right corner to “ADD NEW MODULE”.
Step 3: You could configure this module like the following image.
![]()
Copy and paste the following code into the content:
<div class="trending3"><a href="#"><img src="../themes/sp_topshop/img/cms/banner03.jpg" alt="" /></a></div>
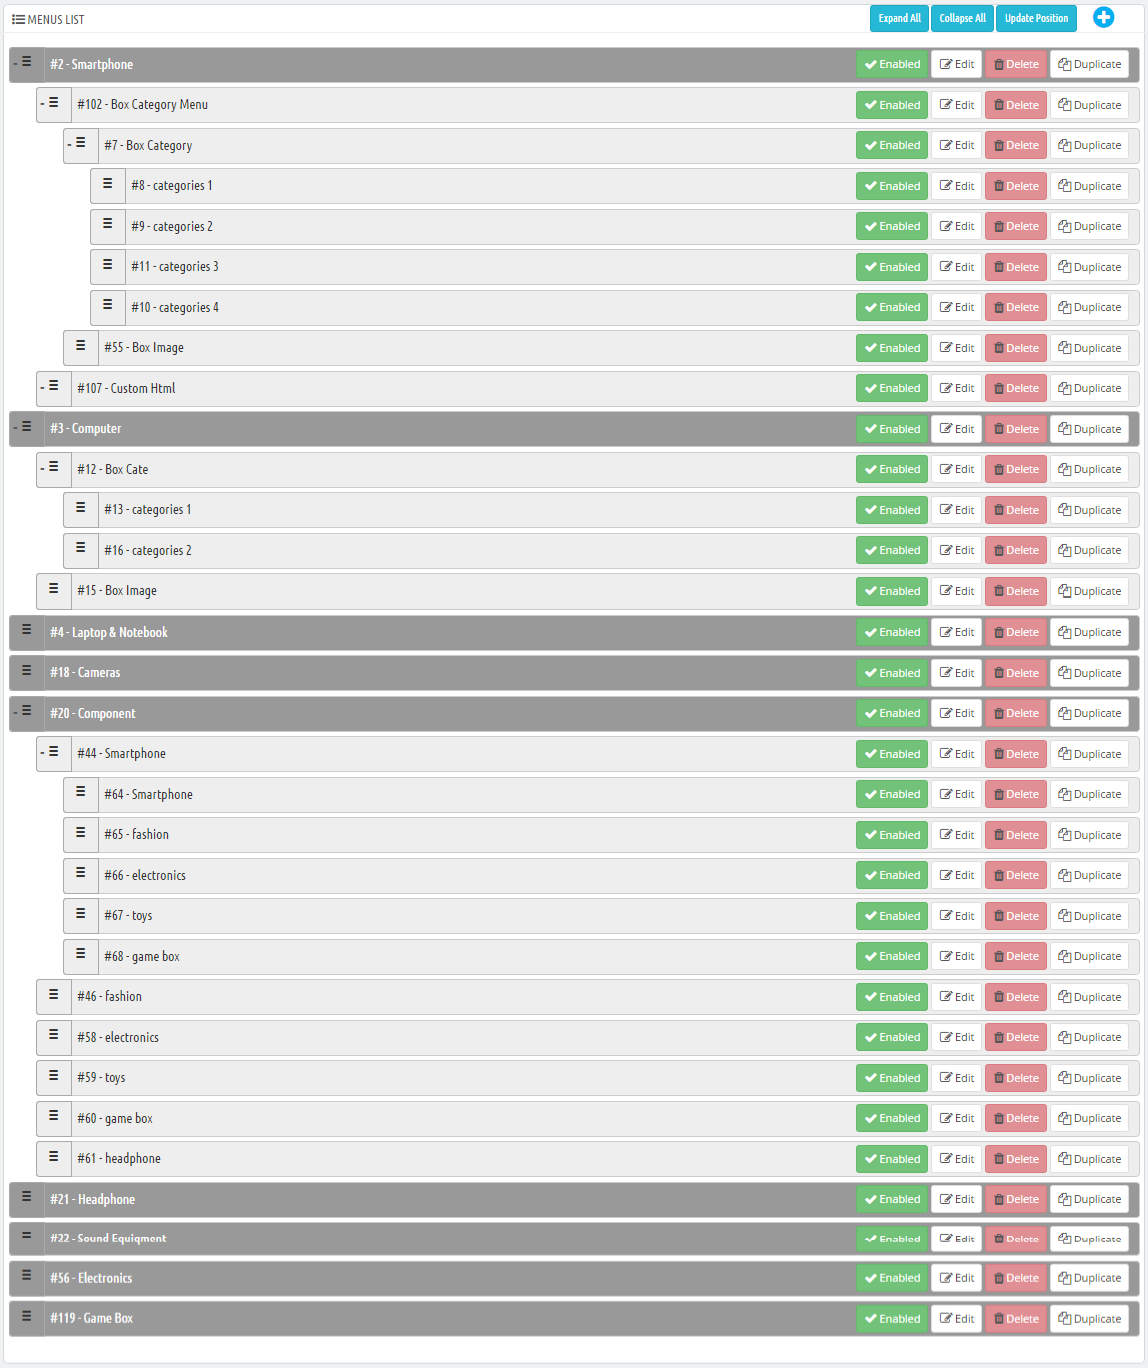
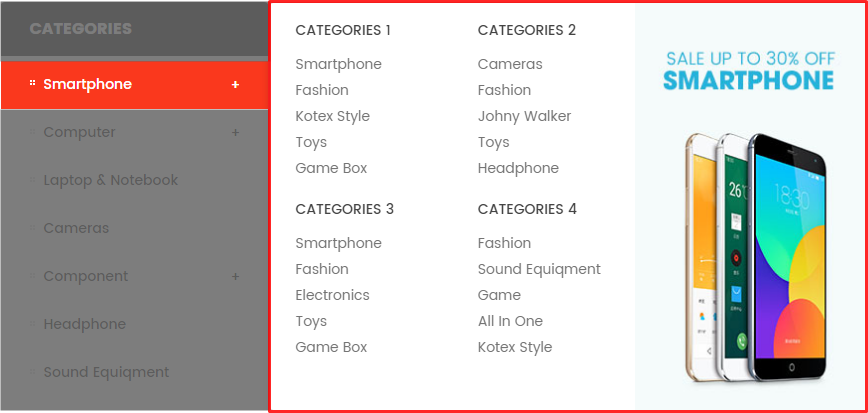
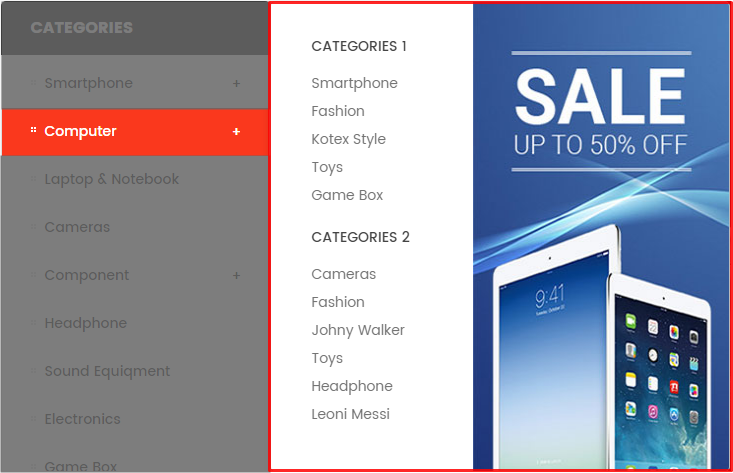
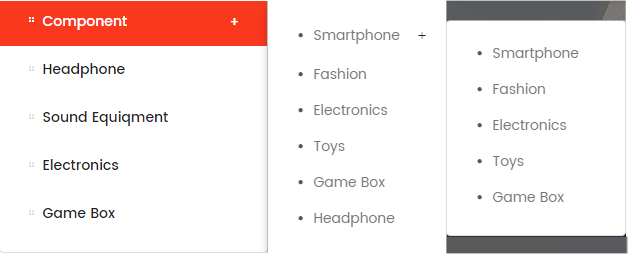
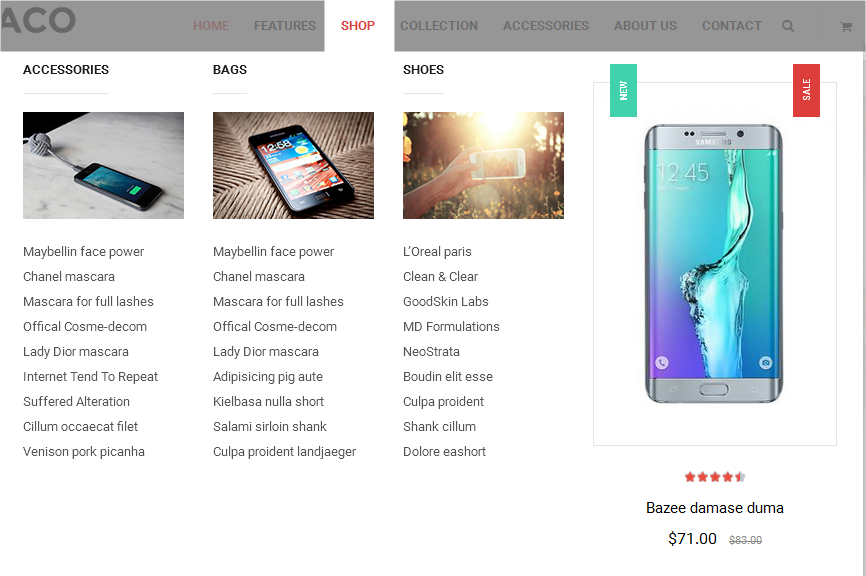
displaySuperCategory1
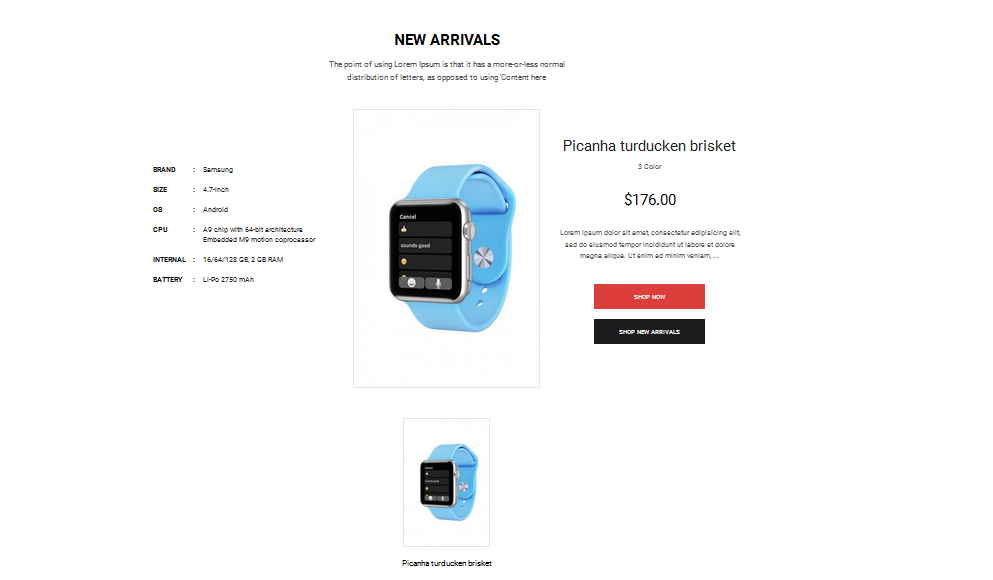
SP Super Category – Super layout1 (1)
Frontend Appearance:
![]()
Backend Settings:
Step 1: In the Pretashop Admin Panel, navigate to Modules and Services >> Modules and Services >> look for “SP Super Category” module.
![]()
Step 2: In the “SP Super Category” configuration page, click ![]() button in the right corner to “ADD NEW MODULE”.
button in the right corner to “ADD NEW MODULE”.
Step 3: You could configure this module like the following image.
![]()
display Customhtml7
SP Custom HTML – Banner Center
Frontend Appearance:
![]()
Backend Settings:
Step 1: In the Pretashop Admin Panel, navigate to Modules and Services >> Modules and Services >> look for “SP Custom HTML” module >> click “Configure” button to configure.
![]()
Step 2: In the “SP Custom HTML” configuration page, click ![]() button in the right corner to “ADD NEW MODULE”.
button in the right corner to “ADD NEW MODULE”.
Step 3: You could configure this module like the following image.
![]()
Copy and paste the following code into the content:
<div class="banner_center"><a href="#"><img src="../themes/sp_topshop/img/cms/banner04.jpg" alt="" /></a></div>
display Customhtml12
SP Custom HTML – Banner Super 1 left
Frontend Appearance:
![]()
Backend Settings:
Step 1: In the Pretashop Admin Panel, navigate to Modules and Services >> Modules and Services >> look for “SP Custom HTML” module >> click “Configure” button to configure.
![]()
Step 2: In the “SP Custom HTML” configuration page, click ![]() button in the right corner to “ADD NEW MODULE”.
button in the right corner to “ADD NEW MODULE”.
Step 3: You could configure this module like the following image.
![]()
Copy and paste the following code into the content:
<div class="banner-c-brand">
<div class="banner"><a class="first-image" title="Static Image" href="#"><img class="img-static" src="../themes/sp_topshop/img/cms/cate_left_1.jpg" alt="Static Image" /></a></div>
<div class="brand">
<ul>
<li><a class="first-image" title="Static Image" href="#"><img class="img-static" src="../themes/sp_topshop/img/cms/brand-c-1.jpg" alt="Static Image" /></a></li>
<li><a class="first-image" title="Static Image" href="#"><img class="img-static" src="../themes/sp_topshop/img/cms/brand-c-2.jpg" alt="Static Image" /></a></li>
<li><a class="first-image" title="Static Image" href="#"><img class="img-static" src="../themes/sp_topshop/img/cms/brand-c-3.jpg" alt="Static Image" /></a></li>
<li><a class="first-image" title="Static Image" href="#"><img class="img-static" src="../themes/sp_topshop/img/cms/brand-c-4.jpg" alt="Static Image" /></a></li>
</ul>
</div>
</div>
display Customhtml11
SP Custom HTML – Banner Super 1 center
Frontend Appearance:
![]()
Backend Settings:
Step 1: In the Pretashop Admin Panel, navigate to Modules and Services >> Modules and Services >> look for “SP Custom HTML” module >> click “Configure” button to configure.
![]()
Step 2: In the “SP Custom HTML” configuration page, click ![]() button in the right corner to “ADD NEW MODULE”.
button in the right corner to “ADD NEW MODULE”.
Step 3: You could configure this module like the following image.
![]()
Copy and paste the following code into the content:
<div class="image"><a href="#"><img src="../themes/sp_topshop/img/cms/cate01.jpg" alt="" /></a></div>
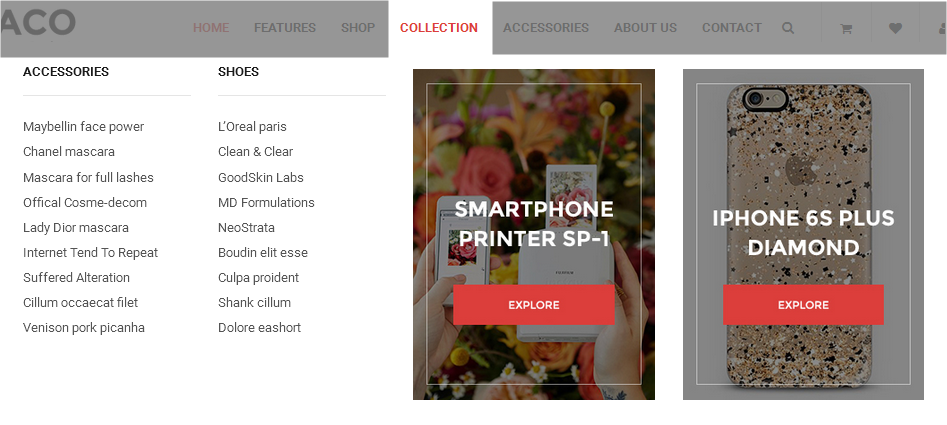
displaySuperCategory2
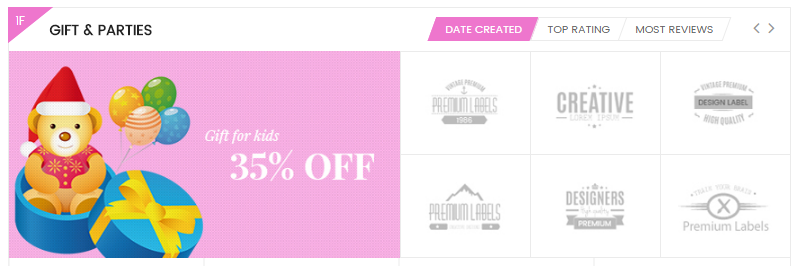
SP Super Category – Fashion & accessories
Frontend Appearance:
![]()
Backend Settings:
Step 1: In the Pretashop Admin Panel, navigate to Modules and Services >> Modules and Services >> look for “SP Super Category” module.
![]()
Step 2: In the “SP Super Category” configuration page, click ![]() button in the right corner to “ADD NEW MODULE”.
button in the right corner to “ADD NEW MODULE”.
Step 3: You could configure this module like the following image.
![]()
display Customhtml13
SP Custom HTML – Banner Super 2 left
Frontend Appearance:
![]()
Backend Settings:
Step 1: In the Pretashop Admin Panel, navigate to Modules and Services >> Modules and Services >> look for “SP Custom HTML” module >> click “Configure” button to configure.
![]()
Step 2: In the “SP Custom HTML” configuration page, click ![]() button in the right corner to “ADD NEW MODULE”.
button in the right corner to “ADD NEW MODULE”.
Step 3: You could configure this module like the following image.
![]()
Copy and paste the following code into the content:
<div class="banner-c-brand">
<div class="banner"><a class="first-image" title="Static Image" href="#"><img class="img-static" src="../themes/sp_topshop/img/cms/cate_left_2.jpg" alt="Static Image" /></a></div>
<div class="brand">
<ul>
<li><a class="first-image" title="Static Image" href="#"><img class="img-static" src="../themes/sp_topshop/img/cms/brand-c-1.jpg" alt="Static Image" /></a></li>
<li><a class="first-image" title="Static Image" href="#"><img class="img-static" src="../themes/sp_topshop/img/cms/brand-c-2.jpg" alt="Static Image" /></a></li>
<li><a class="first-image" title="Static Image" href="#"><img class="img-static" src="../themes/sp_topshop/img/cms/brand-c-3.jpg" alt="Static Image" /></a></li>
<li><a class="first-image" title="Static Image" href="#"><img class="img-static" src="../themes/sp_topshop/img/cms/brand-c-4.jpg" alt="Static Image" /></a></li>
</ul>
</div>
</div>
display Customhtml14
SP Custom HTML – Banner Super 2 center
Frontend Appearance:
![]()
Backend Settings:
Step 1: In the Pretashop Admin Panel, navigate to Modules and Services >> Modules and Services >> look for “SP Custom HTML” module >> click “Configure” button to configure.
![]()
Step 2: In the “SP Custom HTML” configuration page, click ![]() button in the right corner to “ADD NEW MODULE”.
button in the right corner to “ADD NEW MODULE”.
Step 3: You could configure this module like the following image.
![]()
Copy and paste the following code into the content:
<div class="image"><a href="#"><img src="../themes/sp_topshop/img/cms/cate02.jpg" alt="" /></a></div>
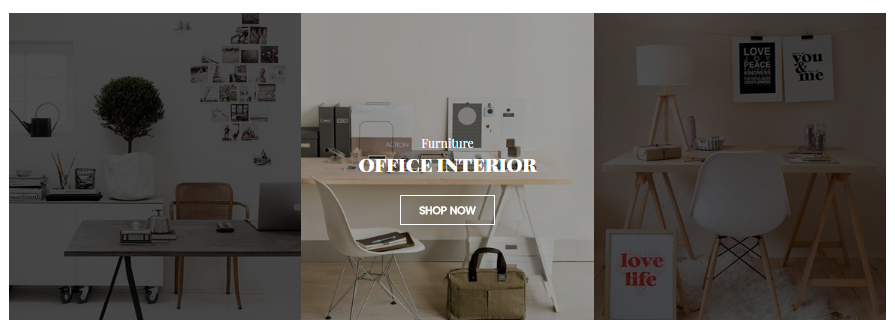
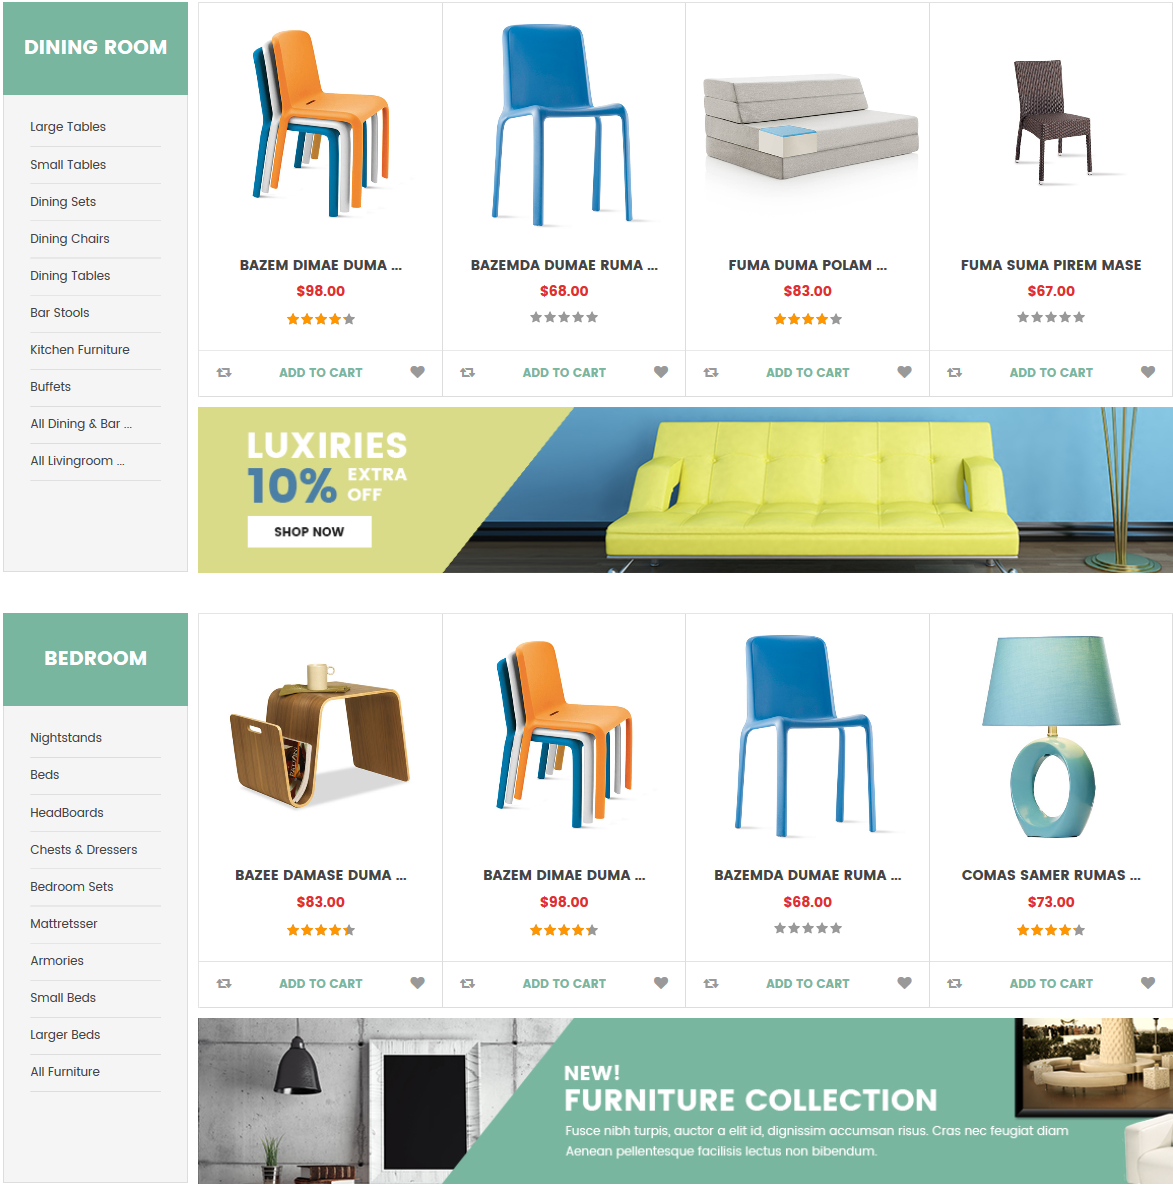
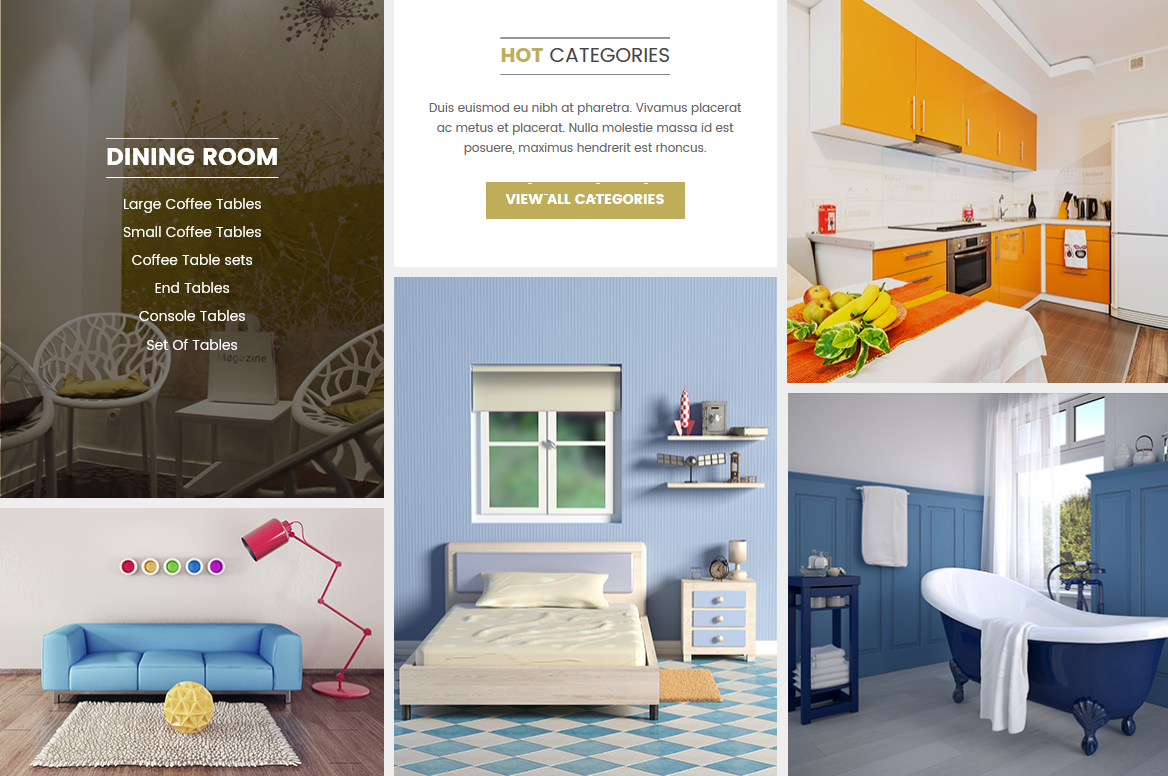
displaySuperCategory3
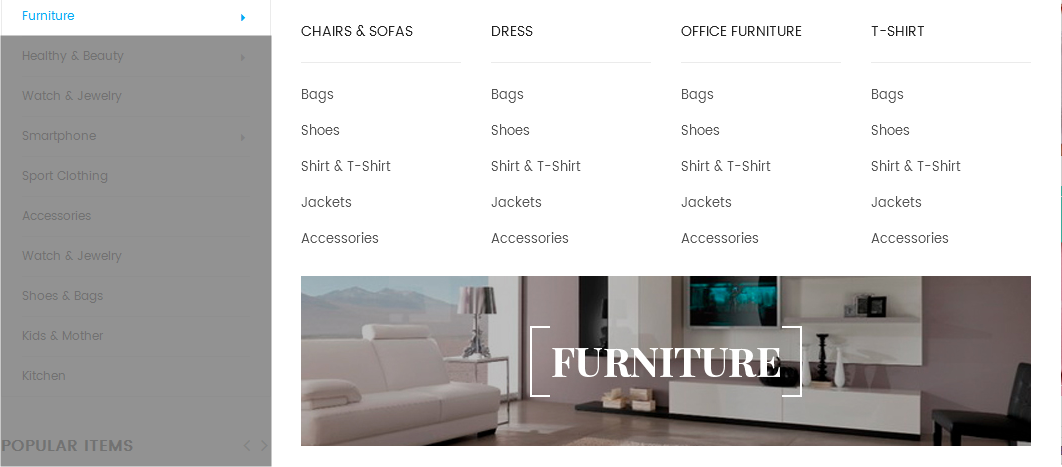
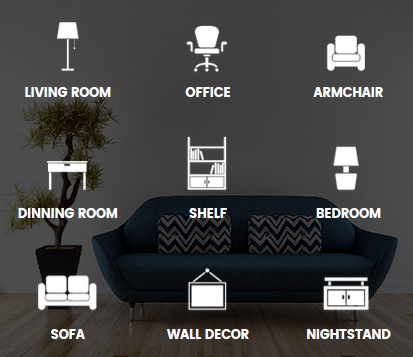
SP Super Category – Furniture
Frontend Appearance:
![]()
Backend Settings:
Step 1: In the Pretashop Admin Panel, navigate to Modules and Services >> Modules and Services >> look for “SP Super Category” module.
![]()
Step 2: In the “SP Super Category” configuration page, click ![]() button in the right corner to “ADD NEW MODULE”.
button in the right corner to “ADD NEW MODULE”.
Step 3: You could configure this module like the following image.
![]()
display Customhtml15
SP Custom HTML – Banner Super 3 left
Frontend Appearance:
![]()
Backend Settings:
Step 1: In the Pretashop Admin Panel, navigate to Modules and Services >> Modules and Services >> look for “SP Custom HTML” module >> click “Configure” button to configure.
![]()
Step 2: In the “SP Custom HTML” configuration page, click ![]() button in the right corner to “ADD NEW MODULE”.
button in the right corner to “ADD NEW MODULE”.
Step 3: You could configure this module like the following image.
![]()
Copy and paste the following code into the content:
<div class="banner-c-brand">
<div class="banner"><a class="first-image" title="Static Image" href="#"><img class="img-static" src="../themes/sp_topshop/img/cms/cate_left_3.jpg" alt="Static Image" /></a></div>
<div class="brand">
<ul>
<li><a class="first-image" title="Static Image" href="#"><img class="img-static" src="../themes/sp_topshop/img/cms/brand-c-1.jpg" alt="Static Image" /></a></li>
<li><a class="first-image" title="Static Image" href="#"><img class="img-static" src="../themes/sp_topshop/img/cms/brand-c-2.jpg" alt="Static Image" /></a></li>
<li><a class="first-image" title="Static Image" href="#"><img class="img-static" src="../themes/sp_topshop/img/cms/brand-c-3.jpg" alt="Static Image" /></a></li>
<li><a class="first-image" title="Static Image" href="#"><img class="img-static" src="../themes/sp_topshop/img/cms/brand-c-4.jpg" alt="Static Image" /></a></li>
</ul>
</div>
</div>
display Customhtml16
SP Custom HTML – Banner Super 3 center
Frontend Appearance:
![]()
Backend Settings:
Step 1: In the Pretashop Admin Panel, navigate to Modules and Services >> Modules and Services >> look for “SP Custom HTML” module >> click “Configure” button to configure.
![]()
Step 2: In the “SP Custom HTML” configuration page, click ![]() button in the right corner to “ADD NEW MODULE”.
button in the right corner to “ADD NEW MODULE”.
Step 3: You could configure this module like the following image.
![]()
Copy and paste the following code into the content:
<div class="image"><a href="#"><img src="../themes/sp_topshop/img/cms/cate03.jpg" alt="" /></a></div>
displaySuperCategory4
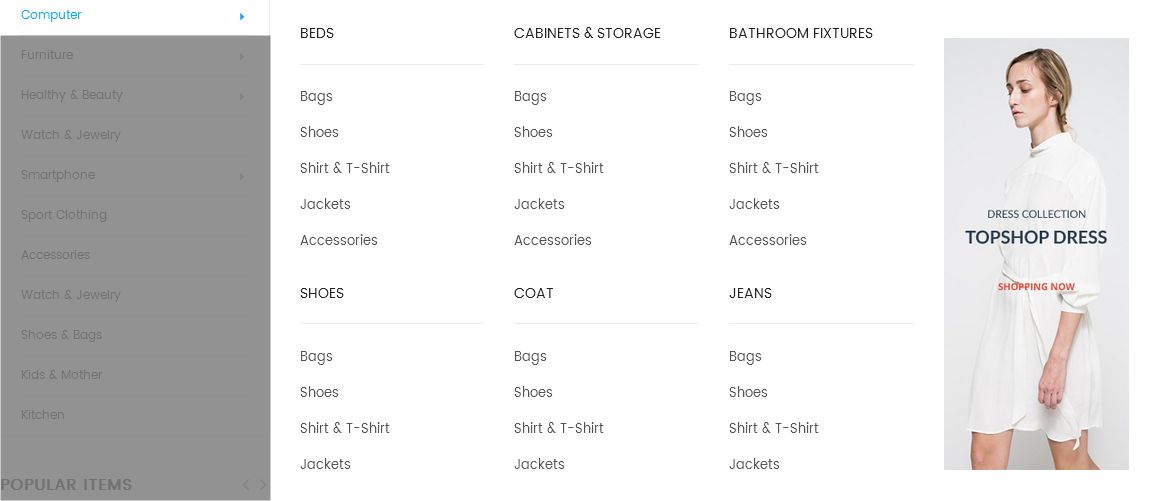
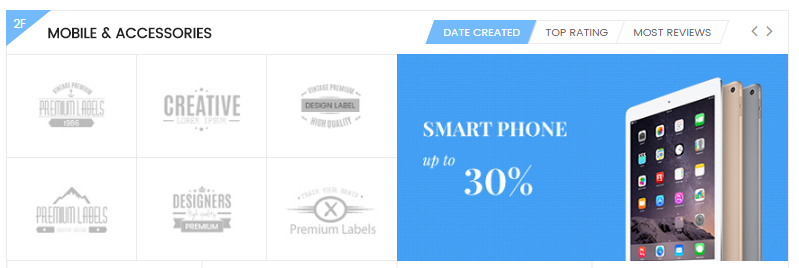
SP Super Category – Computer & Accessories
Frontend Appearance:
![]()
Backend Settings:
Step 1: In the Pretashop Admin Panel, navigate to Modules and Services >> Modules and Services >> look for “SP Super Category” module.
![]()
Step 2: In the “SP Super Category” configuration page, click ![]() button in the right corner to “ADD NEW MODULE”.
button in the right corner to “ADD NEW MODULE”.
Step 3: You could configure this module like the following image.
![]()
display Customhtml17
SP Custom HTML – Banner Super 4 left
Frontend Appearance:
![]()
Backend Settings:
Step 1: In the Pretashop Admin Panel, navigate to Modules and Services >> Modules and Services >> look for “SP Custom HTML” module >> click “Configure” button to configure.
![]()
Step 2: In the “SP Custom HTML” configuration page, click ![]() button in the right corner to “ADD NEW MODULE”.
button in the right corner to “ADD NEW MODULE”.
Step 3: You could configure this module like the following image.
![]()
Copy and paste the following code into the content:
<div class="banner-c-brand">
<div class="banner"><a class="first-image" title="Static Image" href="#"><img class="img-static" src="../themes/sp_topshop/img/cms/cate_left_4.jpg" alt="Static Image" /></a></div>
<div class="brand">
<ul>
<li><a class="first-image" title="Static Image" href="#"><img class="img-static" src="../themes/sp_topshop/img/cms/brand-c-1.jpg" alt="Static Image" /></a></li>
<li><a class="first-image" title="Static Image" href="#"><img class="img-static" src="../themes/sp_topshop/img/cms/brand-c-2.jpg" alt="Static Image" /></a></li>
<li><a class="first-image" title="Static Image" href="#"><img class="img-static" src="../themes/sp_topshop/img/cms/brand-c-3.jpg" alt="Static Image" /></a></li>
<li><a class="first-image" title="Static Image" href="#"><img class="img-static" src="../themes/sp_topshop/img/cms/brand-c-4.jpg" alt="Static Image" /></a></li>
</ul>
</div>
</div>
display Customhtml18
SP Custom HTML – Banner Super 4 center
Frontend Appearance:
![]()
Backend Settings:
Step 1: In the Pretashop Admin Panel, navigate to Modules and Services >> Modules and Services >> look for “SP Custom HTML” module >> click “Configure” button to configure.
![]()
Step 2: In the “SP Custom HTML” configuration page, click ![]() button in the right corner to “ADD NEW MODULE”.
button in the right corner to “ADD NEW MODULE”.
Step 3: You could configure this module like the following image.
![]()
Copy and paste the following code into the content:
<div class="image"><a href="#"><img src="../themes/sp_topshop/img/cms/cate04.jpg" alt="" /></a></div>
displaySuperCategory5
SP Super Category – Computer & Accessories
Frontend Appearance:
![]()
Backend Settings:
Step 1: In the Pretashop Admin Panel, navigate to Modules and Services >> Modules and Services >> look for “SP Super Category” module.
![]()
Step 2: In the “SP Super Category” configuration page, click ![]() button in the right corner to “ADD NEW MODULE”.
button in the right corner to “ADD NEW MODULE”.
Step 3: You could configure this module like the following image.
![]()
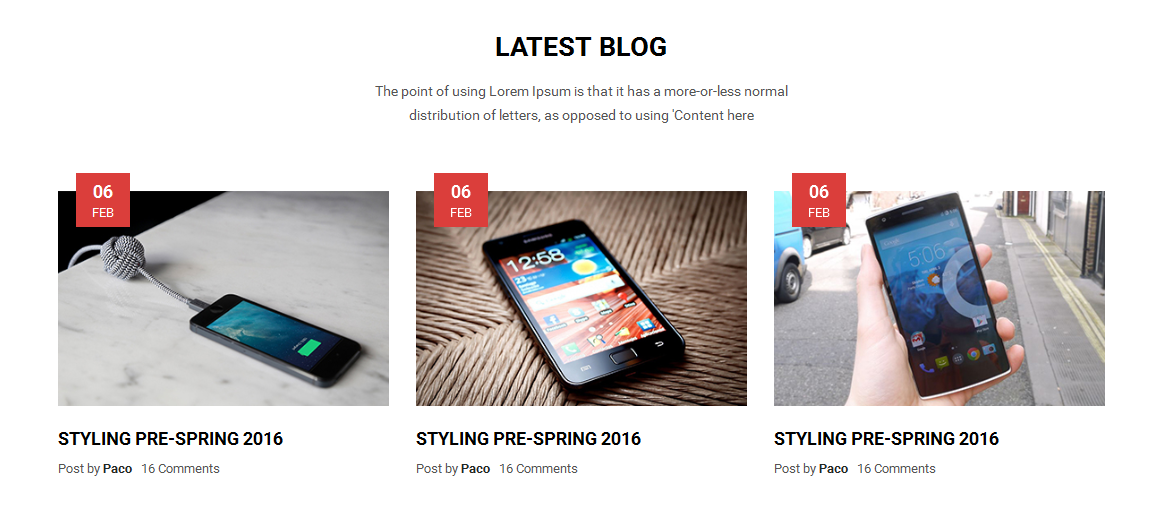
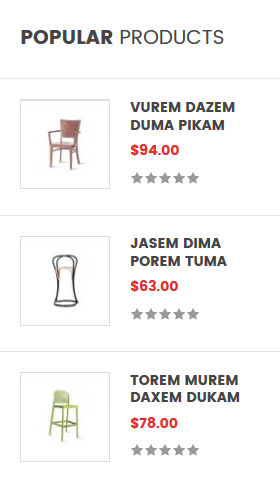
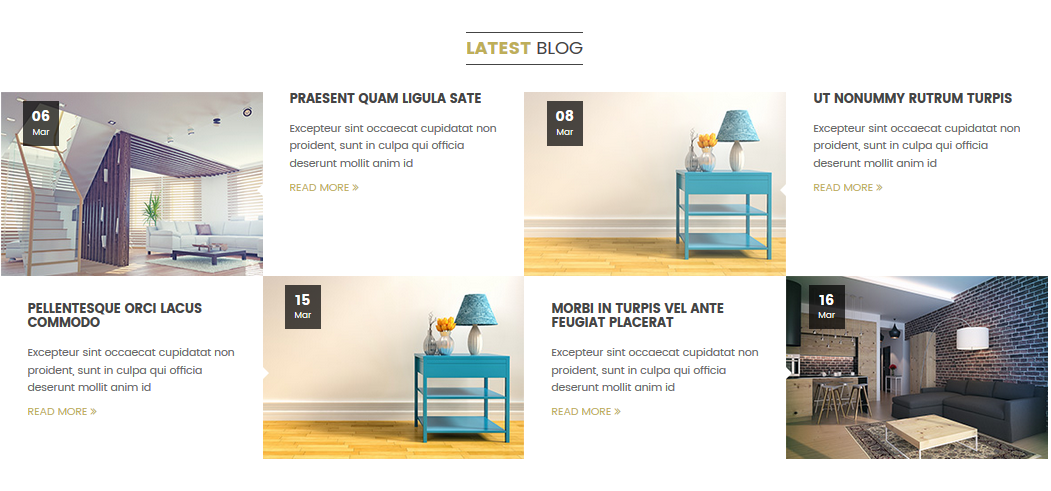
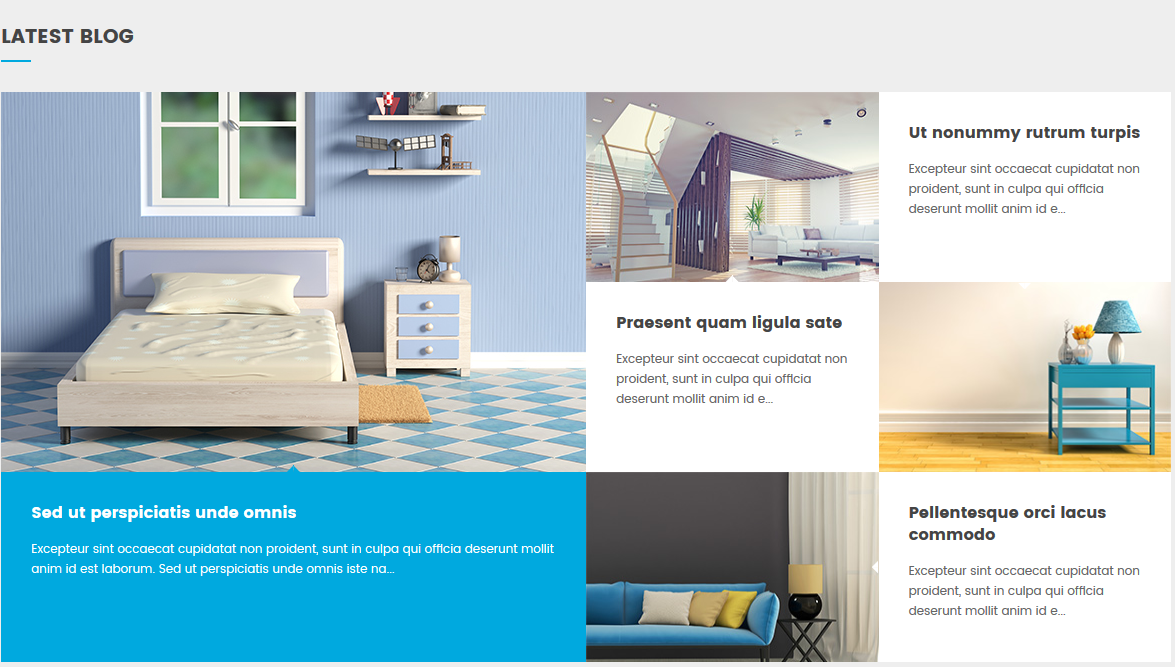
display Home News
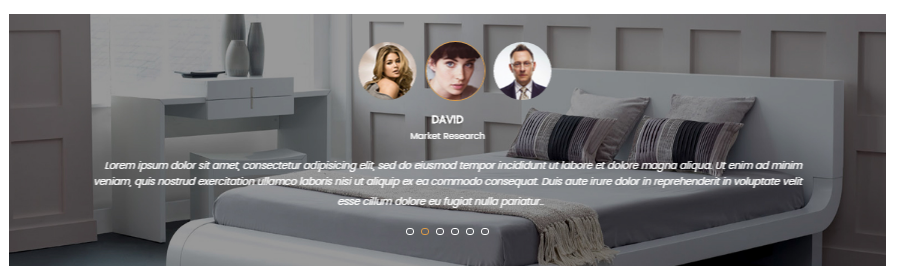
SP SmartBlog Home Lastest
Frontend Appearance:
![]()
Backend Settings:
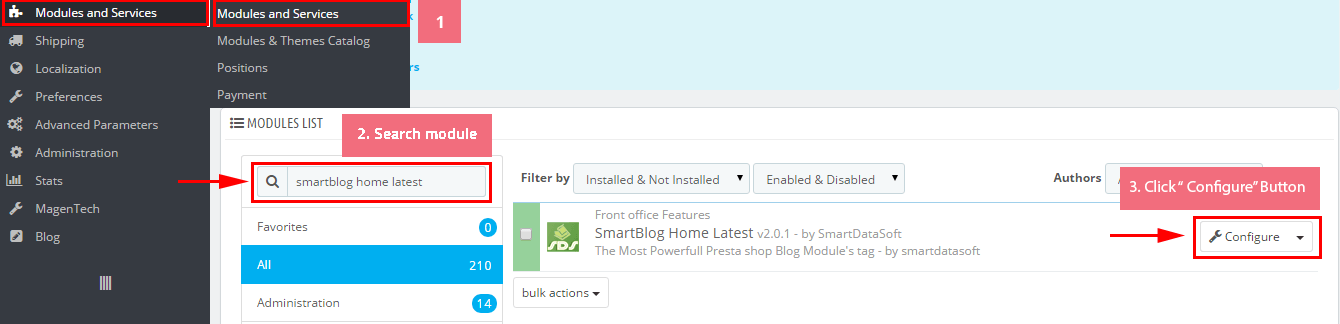
Step 1: In the Pretashop Admin Panel, navigate to Modules and Services >> Modules and Services >> look for “SmartBlog Home Lastest” module.
![]()
Step 2: You could configure this module like the following image.
![]()
displayManufacturer
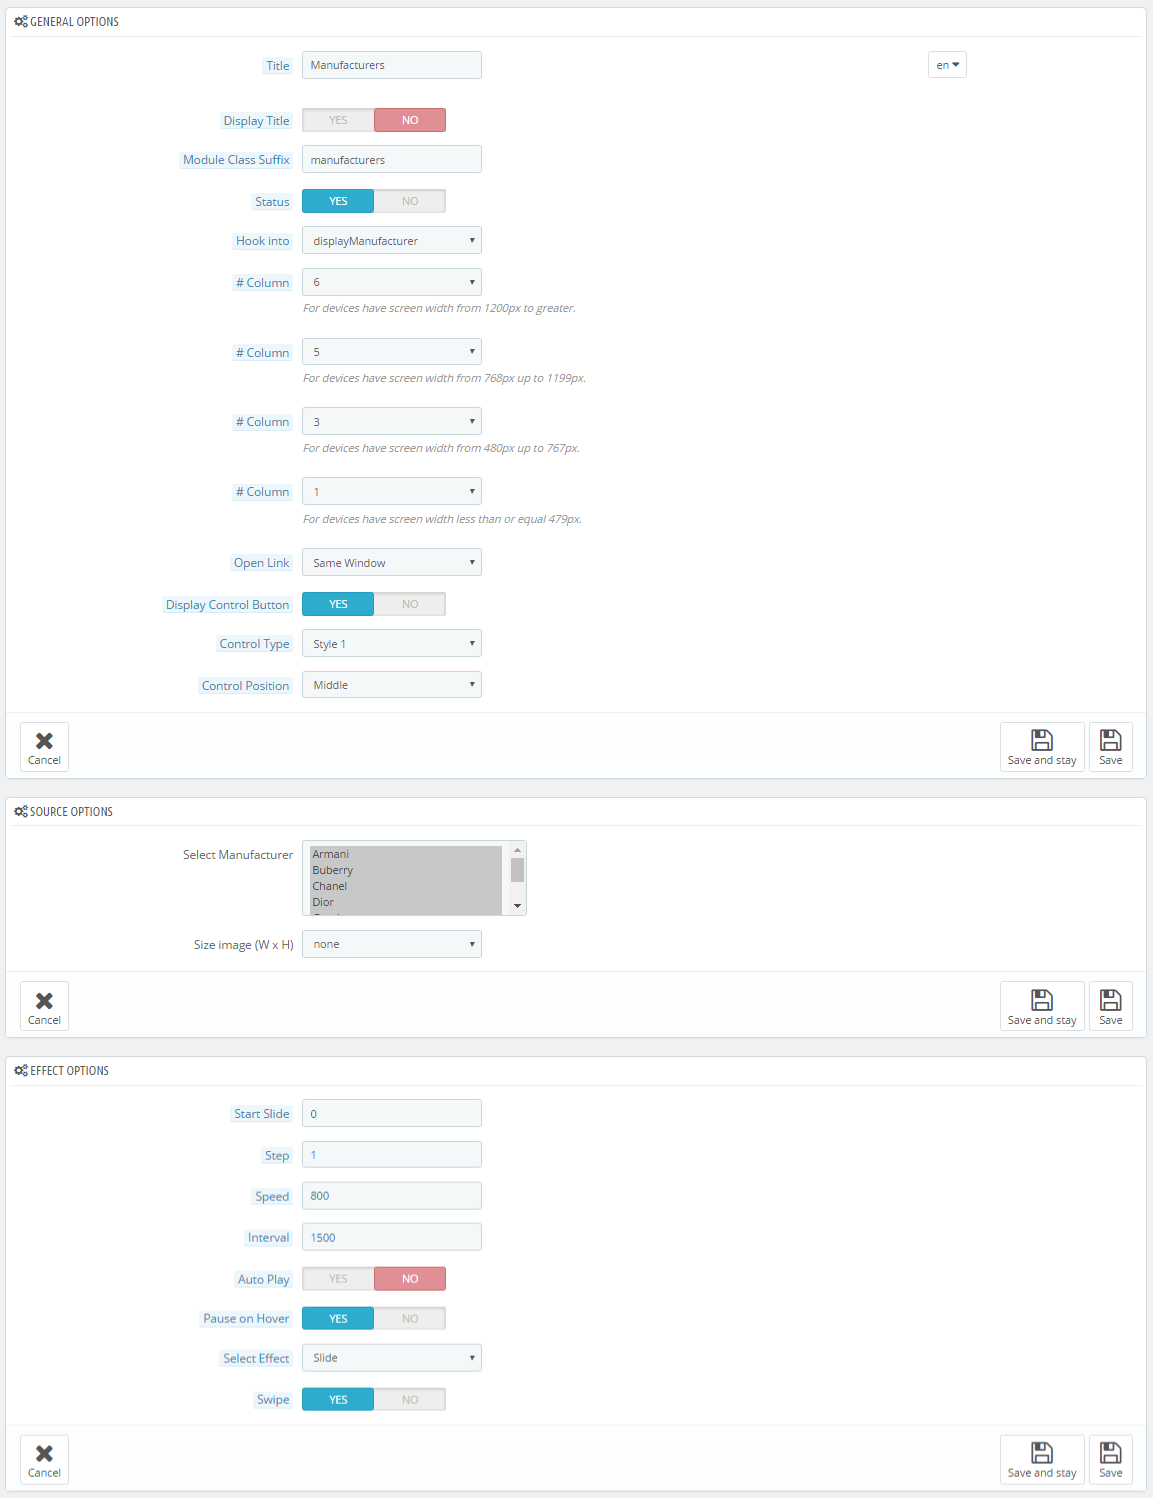
SP Manufacture Slider – Manufacturers
Frontend Appearance:
![]()
Backend Settings:
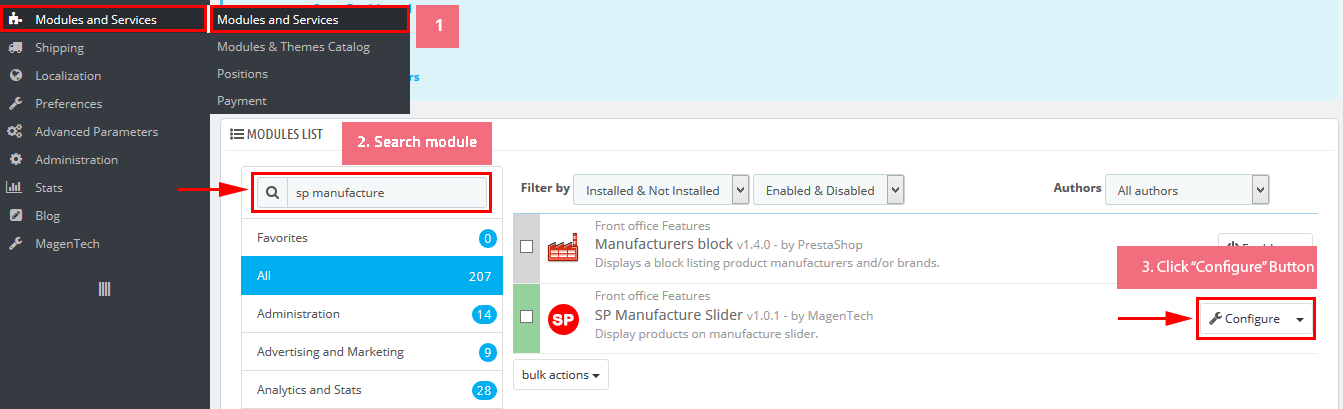
Step 1: In the Pretashop Admin Panel, navigate to Modules and Services >> Modules and Services >> look for “SP Manufacture Slider” module.
![]()
Step 2: In the “SP Deal” configuration page, click ![]() button in the right corner to “ADD NEW MODULE”.
button in the right corner to “ADD NEW MODULE”.
Step 3: You could configure this module like the following image.
![]()
display Customhtml8
SP Custom HTML – Logo info footer
Frontend Appearance:
![]()
Backend Settings:
Step 1: In the Pretashop Admin Panel, navigate to Modules and Services >> Modules and Services >> look for “SP Custom HTML” module >> click “Configure” button to configure.
![]()
Step 2: In the “SP Custom HTML” configuration page, click ![]() button in the right corner to “ADD NEW MODULE”.
button in the right corner to “ADD NEW MODULE”.
Step 3: You could configure this module like the following image.
![]()
Copy and paste the following code into the content:
<div class="logo_bgr">
<div class="img_logo"></div>
<div class="pre_text">There are many variations of passages of Lorem Ipsum available, but the majority have suffered alteration in some form, by injected humour, or randomised words which dont look even slightly believable. If you are going to use a passage of Lorem Ipsum, you need to be sure there isnt anything embarrassing hidden in the middle of text.</div>
</div>
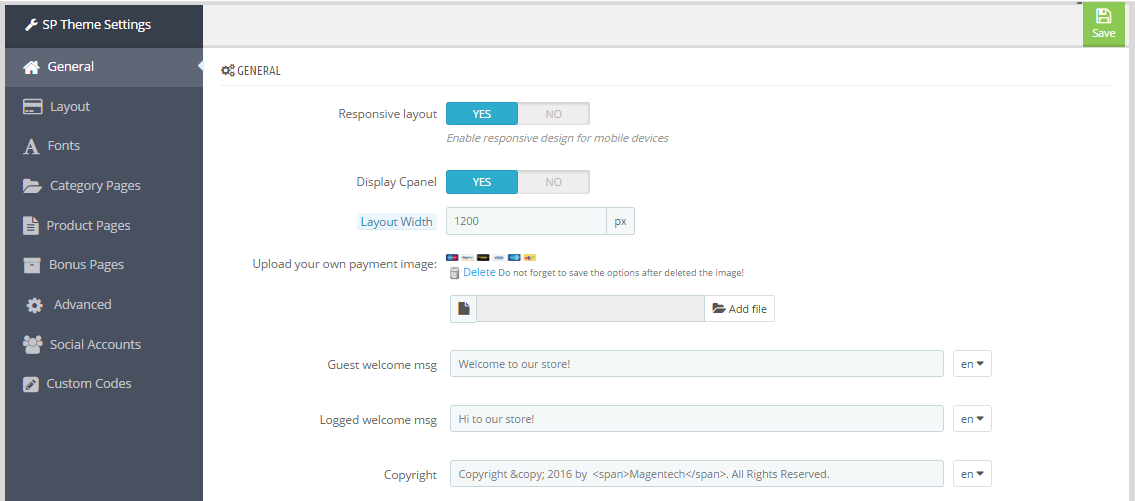
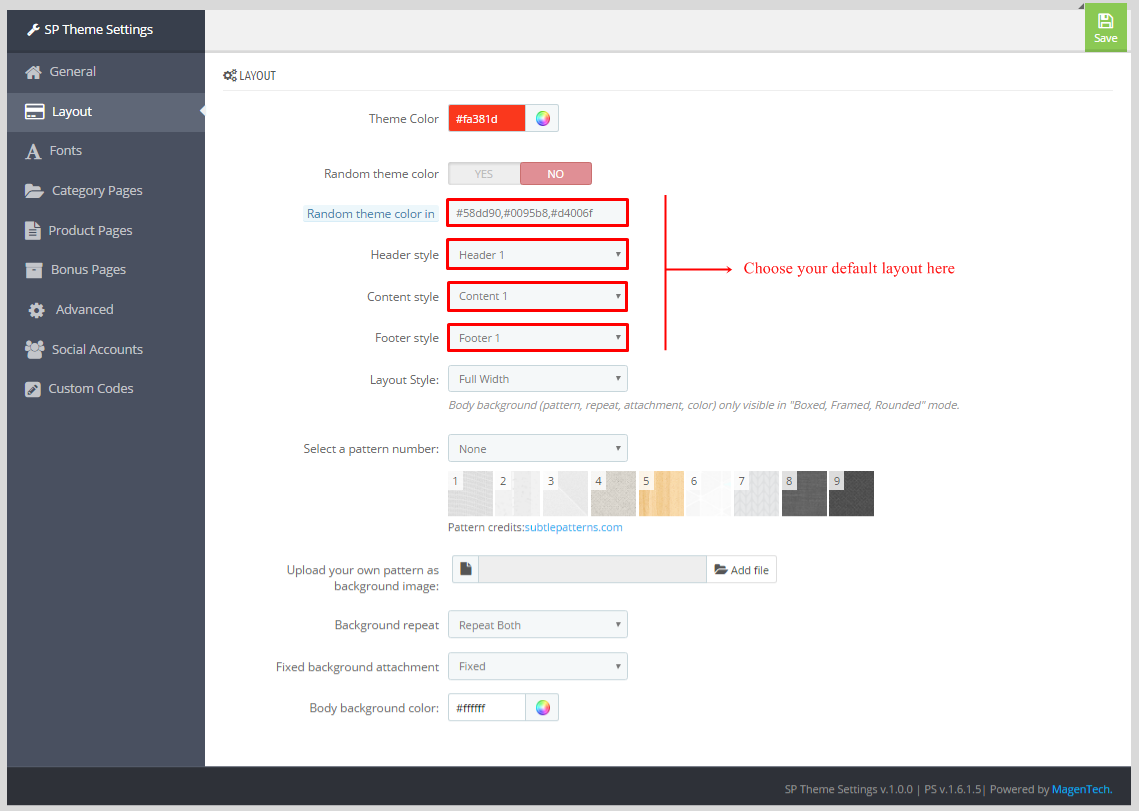
SP Theme Configuration
Frontend Appearance:
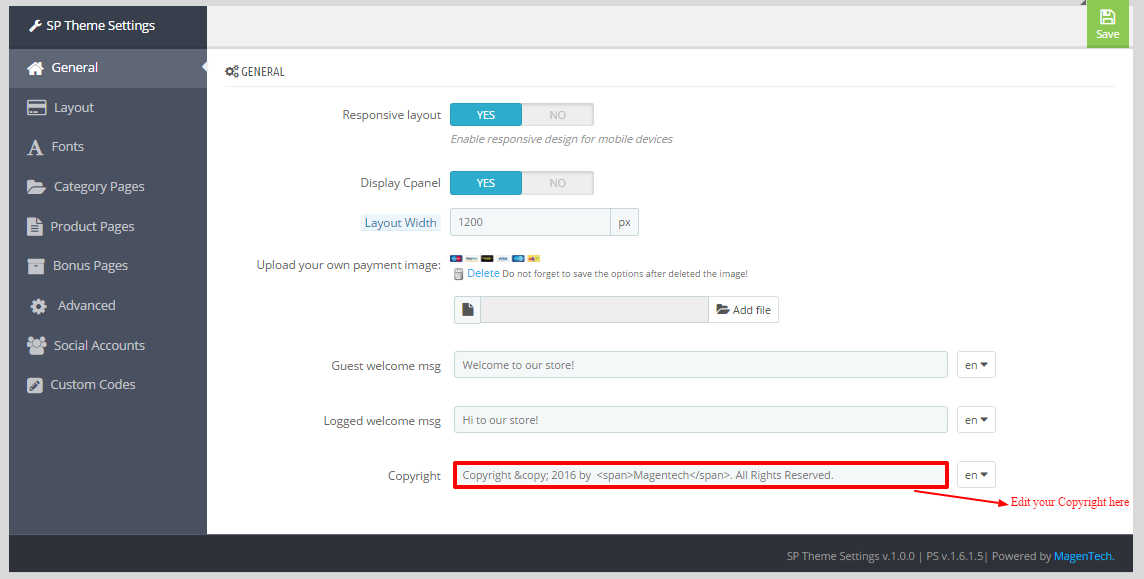
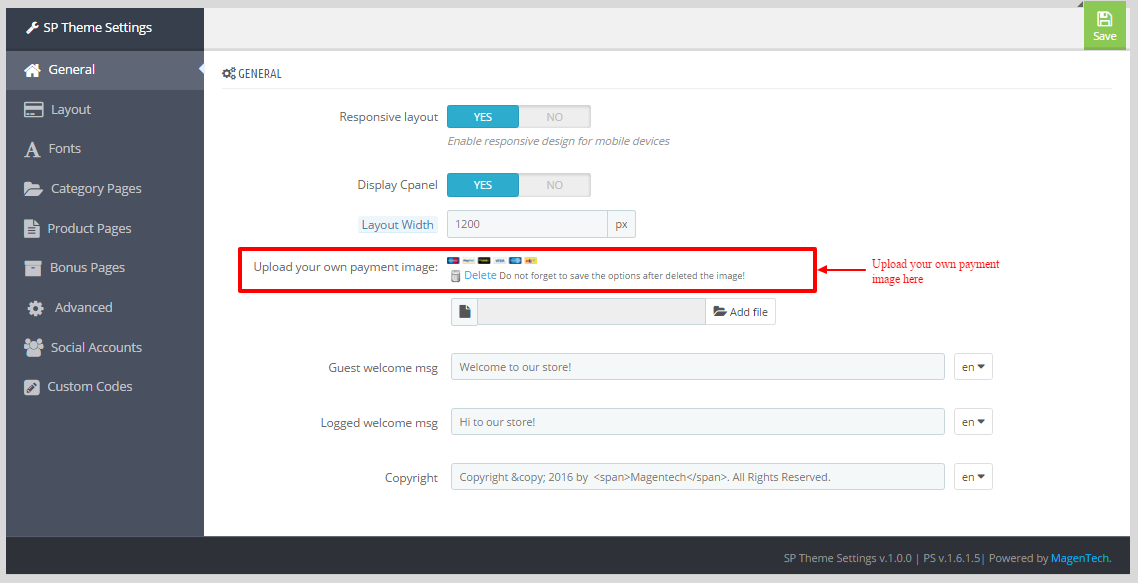
![]()
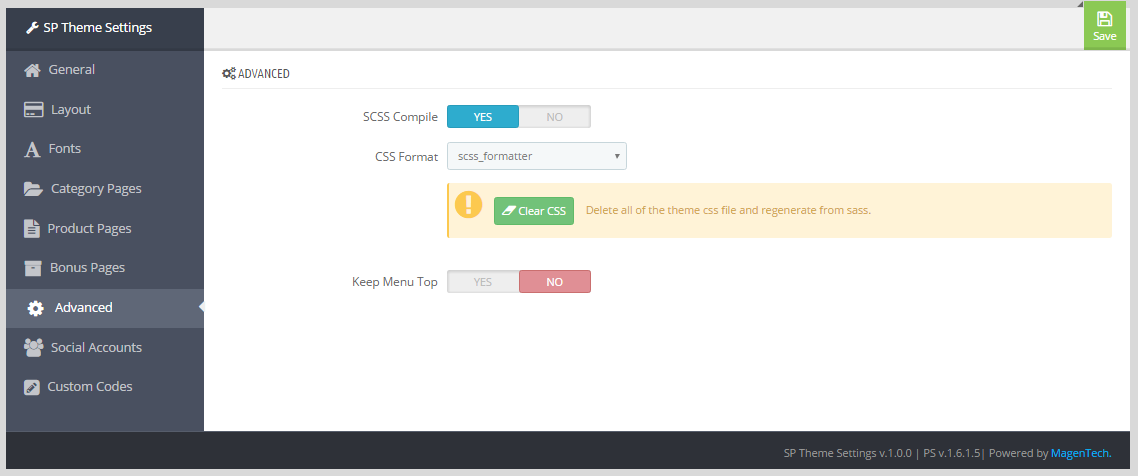
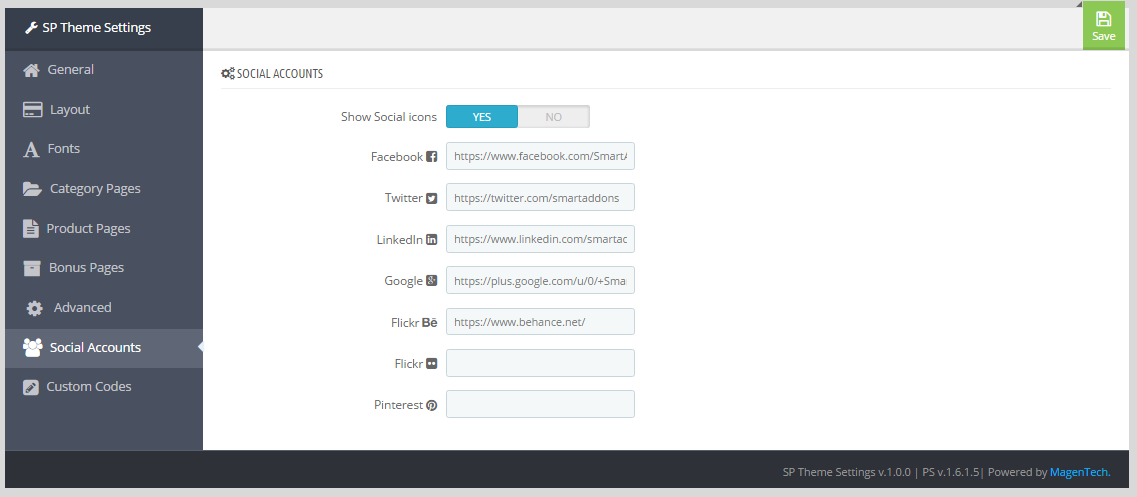
Backend Settings: Go Here to see the backend settings.
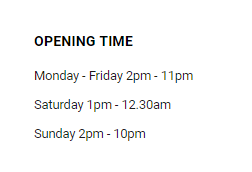
Contact Information Block
Frontend Appearance:
![]()
Backend Settings:
Step 1: In the Pretashop Admin Panel, navigate to Modules and Services >> Modules and Services >> look for “Contact Information Block” module.
![]()
Step 2: You could configure this module like the following image.
![]()
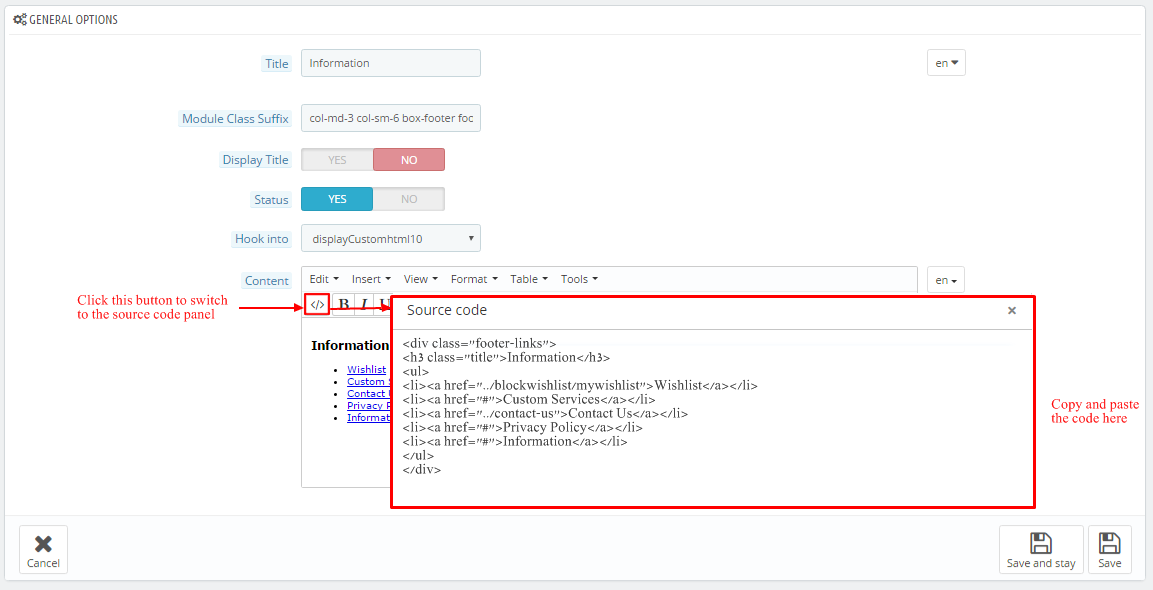
display Customhtml9
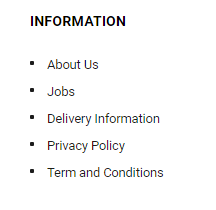
SP Custom HTML – Information
Frontend Appearance:
![]()
Backend Settings:
Step 1: In the Pretashop Admin Panel, navigate to Modules and Services >> Modules and Services >> look for “SP Custom HTML” module >> click “Configure” button to configure.
![]()
Step 2: In the “SP Custom HTML” configuration page, click ![]() button in the right corner to “ADD NEW MODULE”.
button in the right corner to “ADD NEW MODULE”.
Step 3: You could configure this module like the following image.
![]()
Copy and paste the following code into the content:
<ul>
<li><a href="#">About Us</a></li>
<li><a href="#">Jobs</a></li>
<li><a href="#">Delivery Information</a></li>
<li><a href="#">Privacy Policy</a></li>
<li><a href="#">Term and Conditions</a></li>
</ul>
display Customhtml10
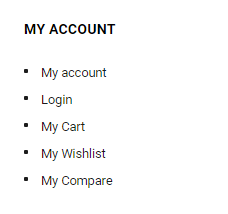
SP Custom HTML – My Account
Frontend Appearance:
![]()
Backend Settings:
Step 1: In the Pretashop Admin Panel, navigate to Modules and Services >> Modules and Services >> look for “SP Custom HTML” module >> click “Configure” button to configure.
![]()
Step 2: In the “SP Custom HTML” configuration page, click ![]() button in the right corner to “ADD NEW MODULE”.
button in the right corner to “ADD NEW MODULE”.
Step 3: You could configure this module like the following image.
![]()
Copy and paste the following code into the content:
<ul>
<li><a href="#">My Account</a></li>
<li><a href="#">Log in</a></li>
<li><a href="#">My Cart</a></li>
<li><a href="#">My Wishlist</a></li>
<li><a href="#">My Compare</a></li>
</ul>
displayTag
SP Tags Block
Frontend Appearance:
![]()
Backend Settings:
Step 1: In the Pretashop Admin Panel, navigate to Modules and Services >> Modules and Services >> look for “SP Tags Block” module.
![]()
Step 2: You could configure this module like the following image.
![]()
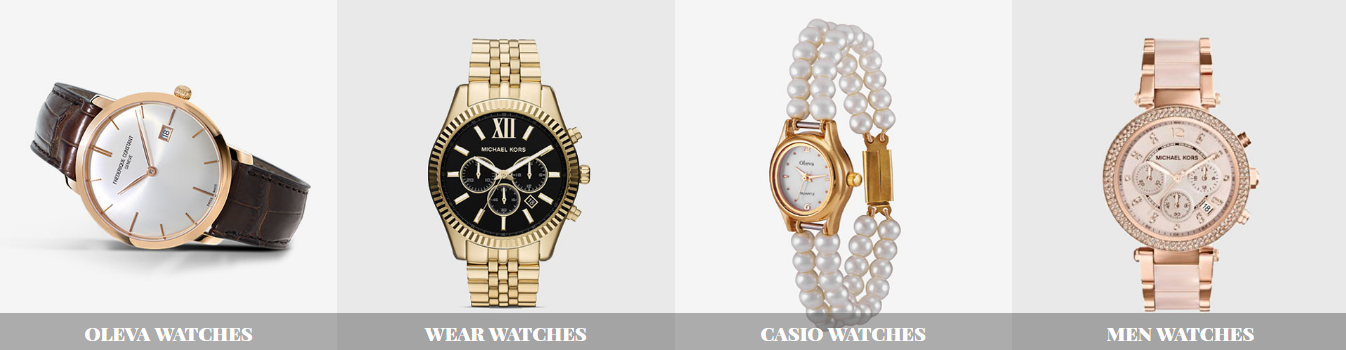
SP Custom HTML – Menu Footer
Frontend Appearance:
![]()
Backend Settings:
Step 1: In the Pretashop Admin Panel, navigate to Modules and Services >> Modules and Services >> look for “SP Custom HTML” module >> click “Configure” button to configure.
![]()
Step 2: In the “SP Custom HTML” configuration page, click ![]() button in the right corner to “ADD NEW MODULE”.
button in the right corner to “ADD NEW MODULE”.
Step 3: You could configure this module like the following image.
![]()
Copy and paste the following code into the content:
<div class="menu-footer"><a class="titile_cate" href="#">WATCHES :</a>
<ul>
<li><a href="#">Watches</a></li>
<li><a href="#">Titan Watches</a></li>
<li><a href="#">Casio Watches</a></li>
<li><a href="#">Fastrack Watches</a></li>
<li><a href="#">Timex Watches</a></li>
<li><a href="#">Fossil Watches</a></li>
<li><a href="#">Diesel Watches </a></li>
<li><a href="#">Luxury Watches</a></li>
<li><a href="#">View all</a></li>
</ul>
</div>
<div class="menu-footer"><a class="titile_cate" href="#">CLOTHING :</a>
<ul>
<li><a href="#">Shirts</a></li>
<li><a href="#">Jeans</a></li>
<li><a href="#">T shirts</a></li>
<li><a href="#">Kurtis</a></li>
<li><a href="#">Sarees</a></li>
<li><a href="#">Levis Jeans </a></li>
<li><a href="#">Killer Jeans</a></li>
<li><a href="#">Pepe Jeans</a></li>
<li><a href="#">Arrow Shirts</a></li>
<li><a href="#">Ethnic Wear</a></li>
<li><a href="#">Formal Shirts</a></li>
<li><a href="#">Peter England Shirts</a></li>
<li><a href="#">View all</a></li>
</ul>
</div>
<div class="menu-footer"><a class="titile_cate" href="#">FOOTWEAR :</a>
<ul>
<li><a href="#">Shoes</a></li>
<li><a href="#">Casual Shoes</a></li>
<li><a href="#">Adidas Shoes</a></li>
<li><a href="#">Gas Shoes</a></li>
<li><a href="#">Puma Shoes</a></li>
<li><a href="#">Reebok Shoes</a></li>
<li><a href="#">Woodland Shoes</a></li>
<li><a href="#">Red tape Shoes</a></li>
<li><a href="#">Nike Shoes</a></li>
<li><a href="#">View all</a></li>
</ul>
</div>
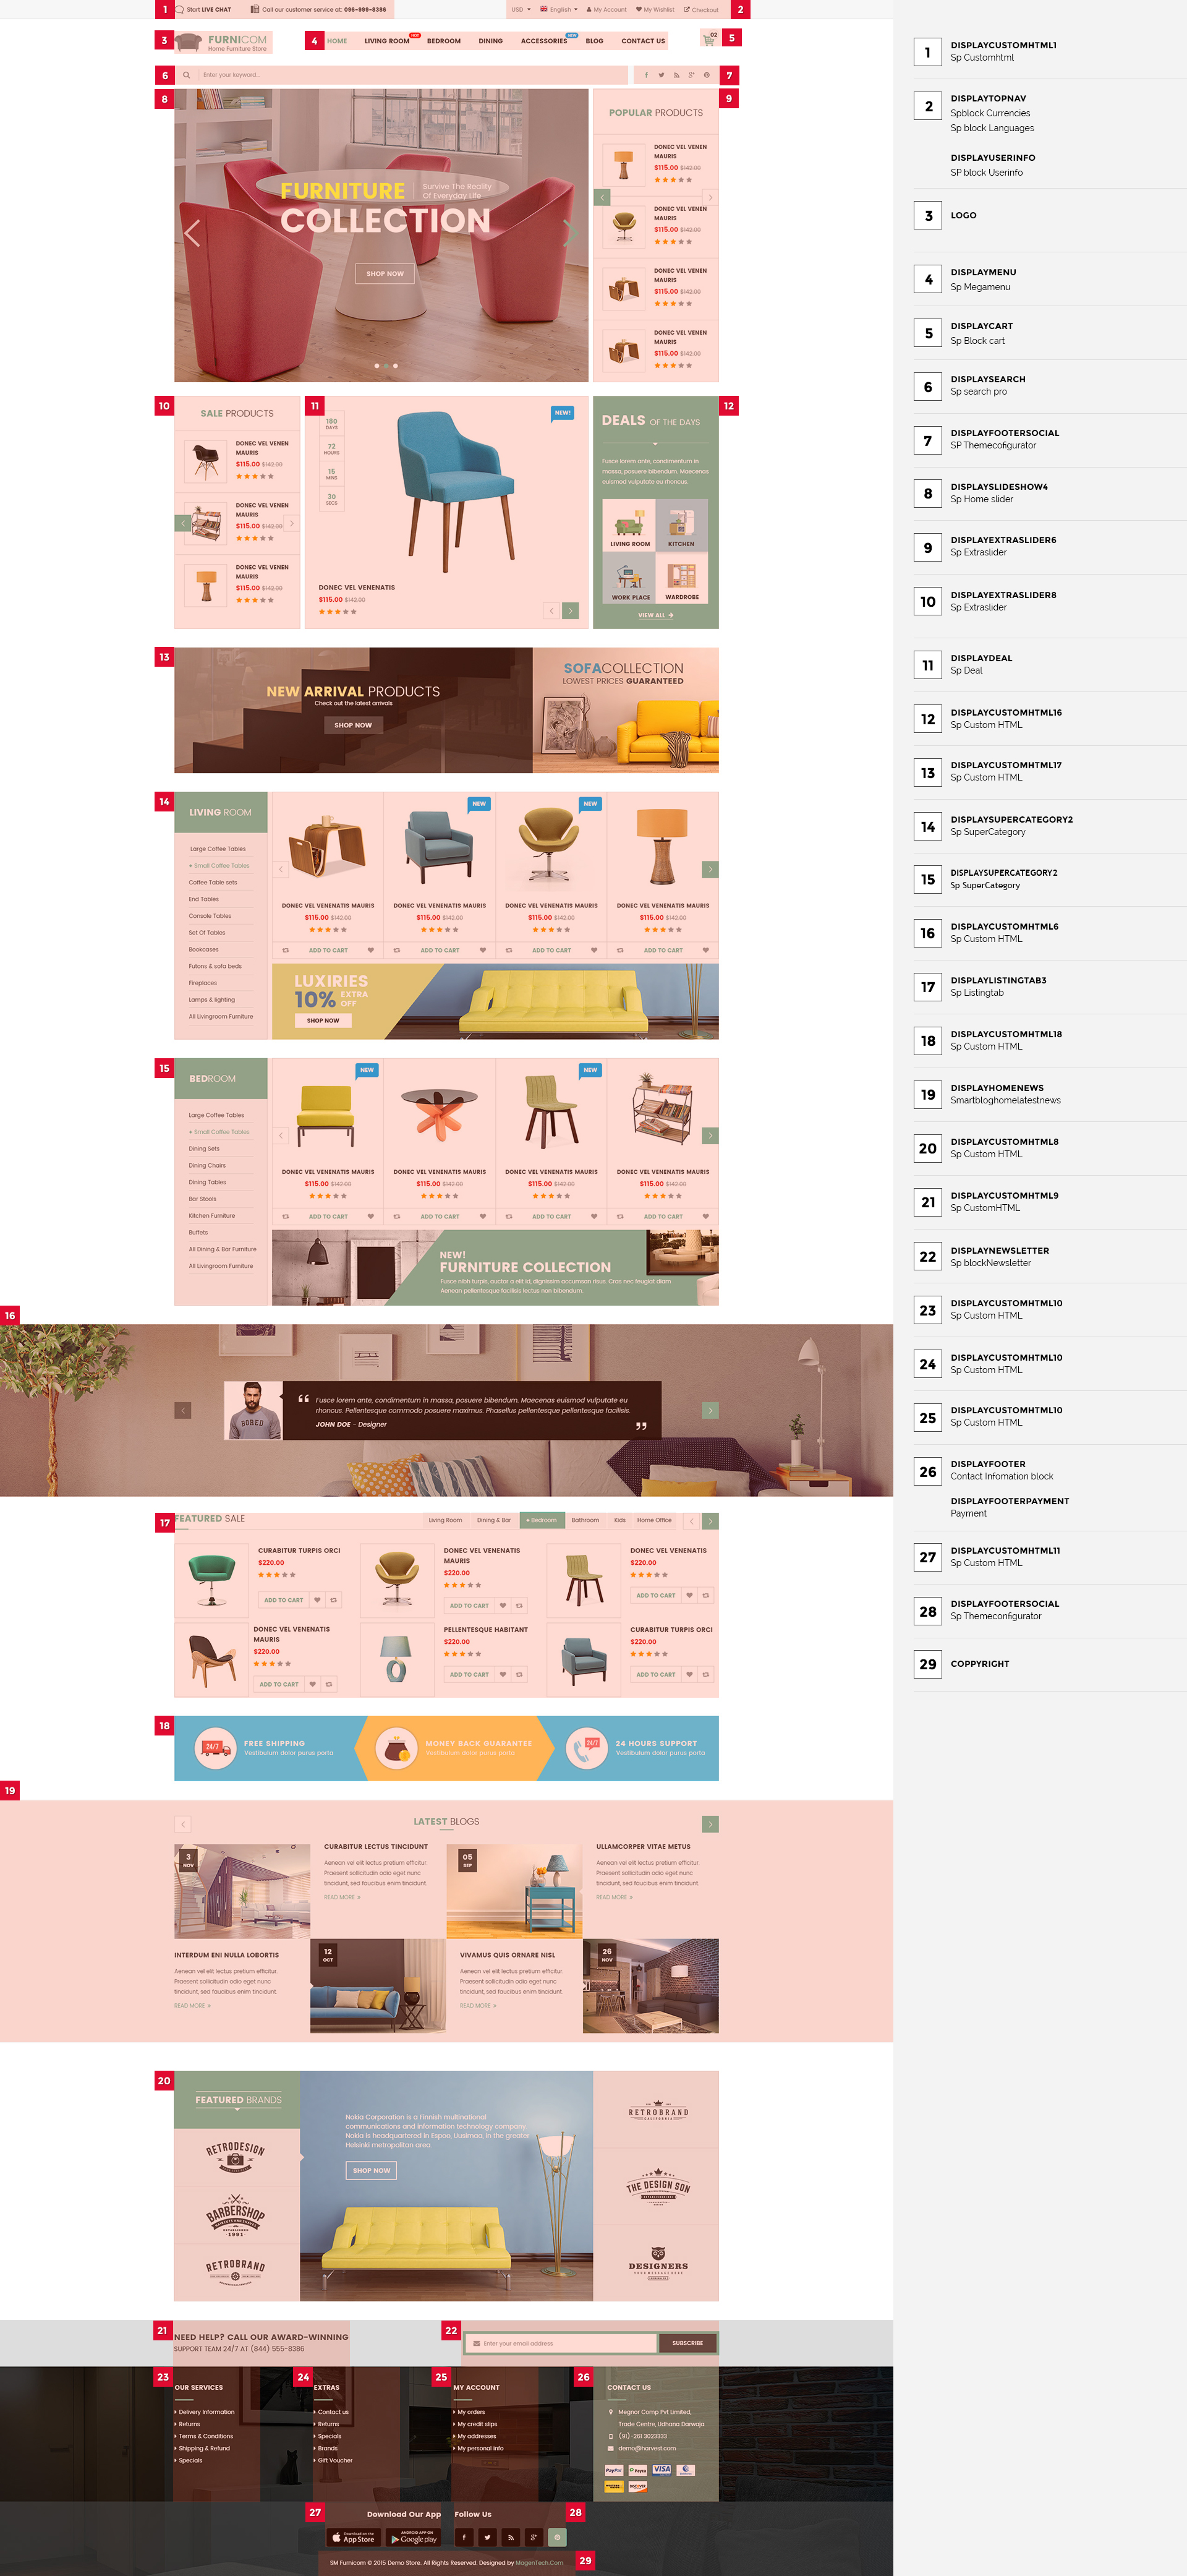
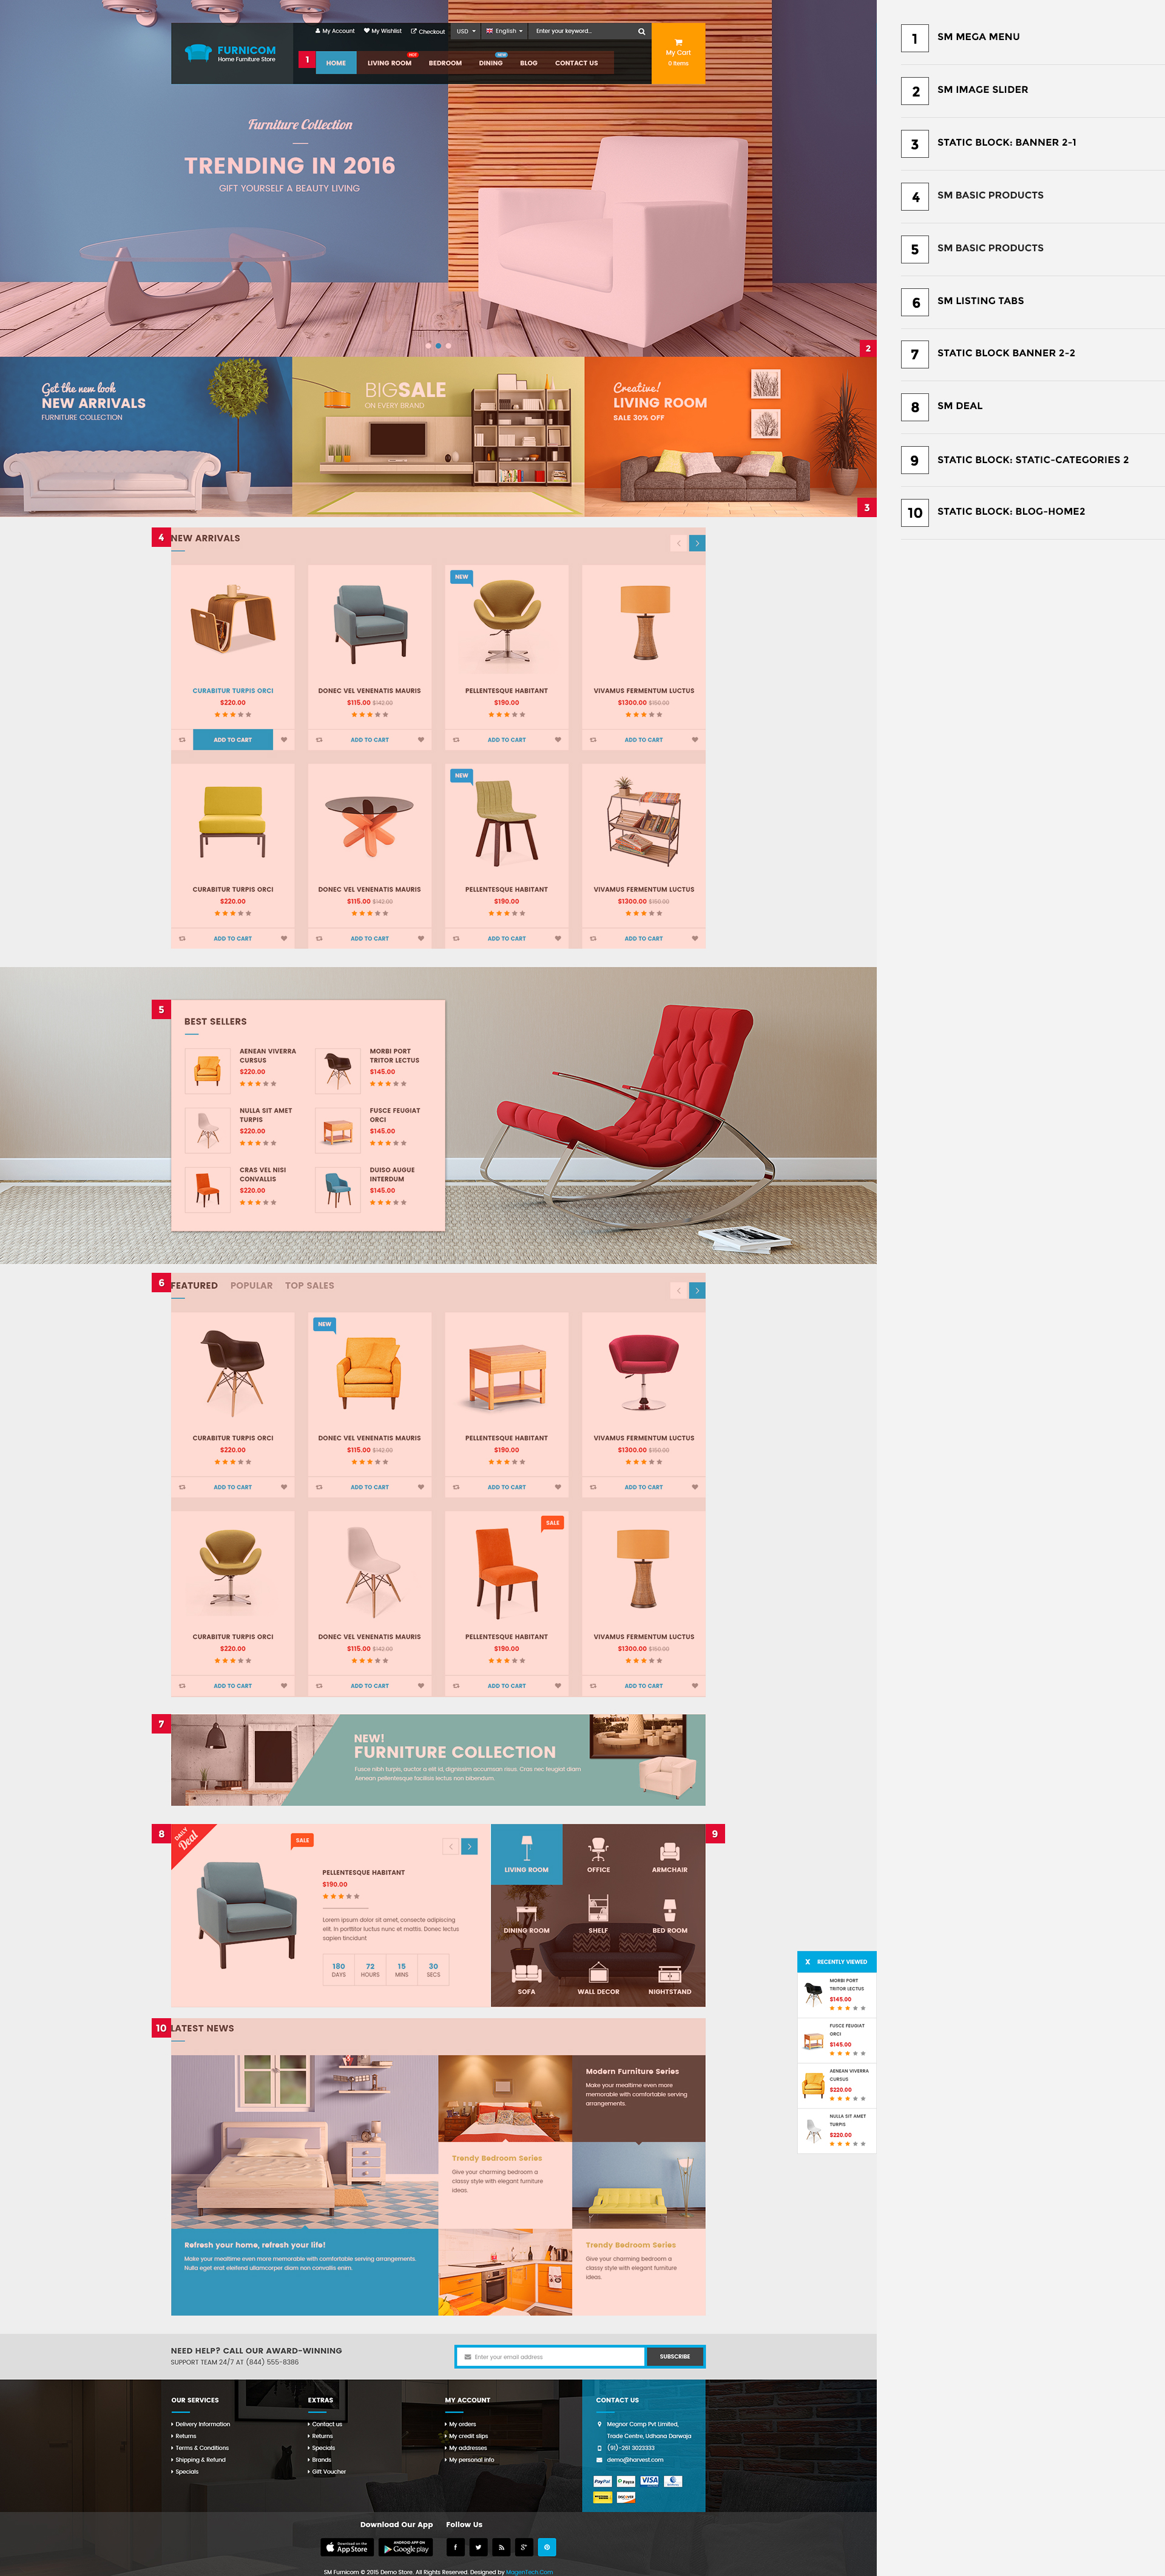
6.2 SP Topshop Layout 2
![home-layout2]()
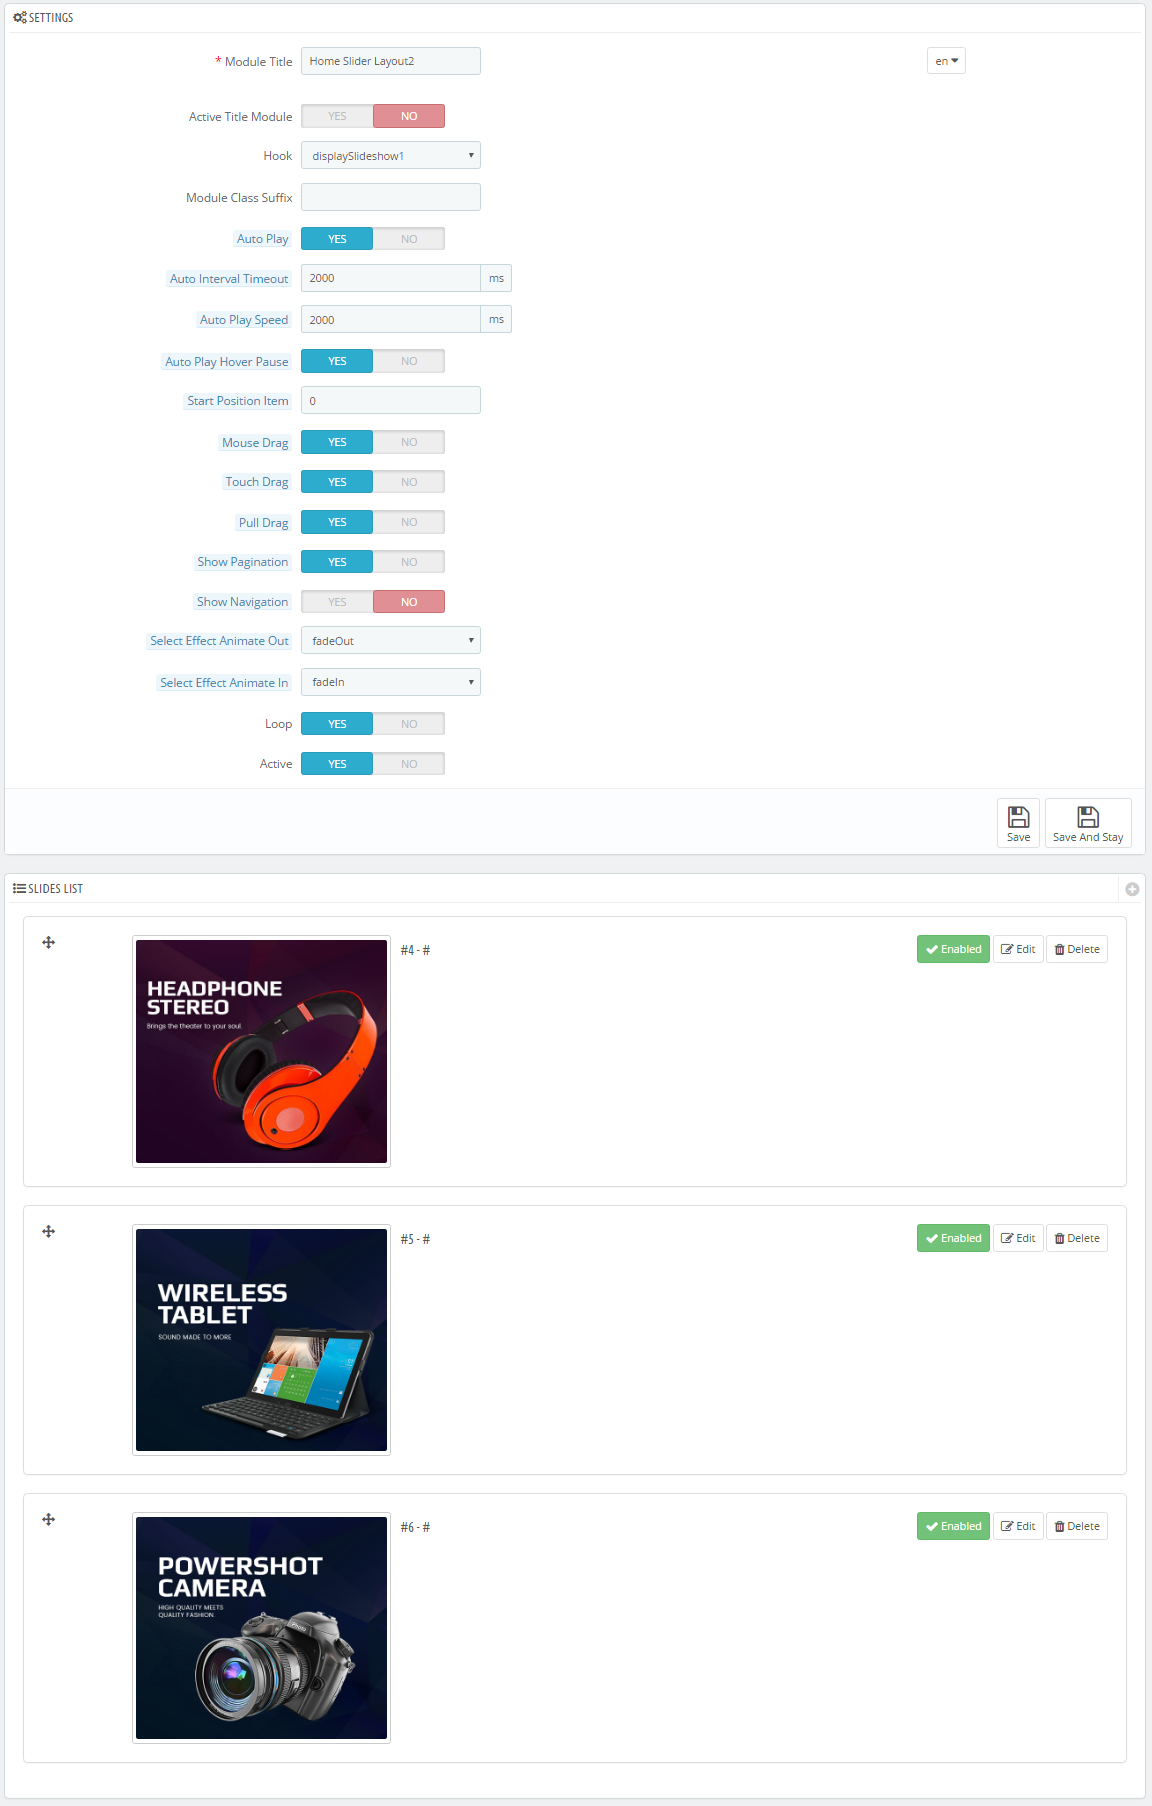
displaySlideShow2
Sp slider for your homepage
Frontend Appearance:
![]()
Backend Settings:
Step 1: In the Pretashop Admin Panel, navigate to Modules and Services >> Modules and Services >> look for “SP Home Slider” module >> click “Configure” button to configure.
![]()
Step 2: In the “SP Slider For Your Homepage” configuration page, click ![]() button in the right corner to “ADD NEW MODULE”.
button in the right corner to “ADD NEW MODULE”.
Step 3: You could configure this module like the following image.
![]()
Step 4: In the last part named Slides List of this configuration page, click ![]() button in the right corner to add new slide and edit slide’s information as follows:
button in the right corner to add new slide and edit slide’s information as follows:
- Sample 4: Please click Here to view
- Sample 5: Please click Here to view
- Sample 6: Please click Here to view
display CustomHTML19
SP Custom HTML – Fashion4 layout2
Frontend Appearance:
![]()
Backend Settings:
Step 1: In the Pretashop Admin Panel, navigate to Modules and Services >> Modules and Services >> look for “SP Custom HTML” module >> click “Configure” button to configure.
![]()
Step 2: In the “SP Custom HTML” configuration page, click ![]() button in the right corner to “ADD NEW MODULE”.
button in the right corner to “ADD NEW MODULE”.
Step 3: You could configure this module like the following image.
![]()
Copy and paste the following code into the content:
<div class="trending2"><a href="#"><img src="../themes/sp_topshop/img/cms/banner05.jpg" alt="" /></a></div>
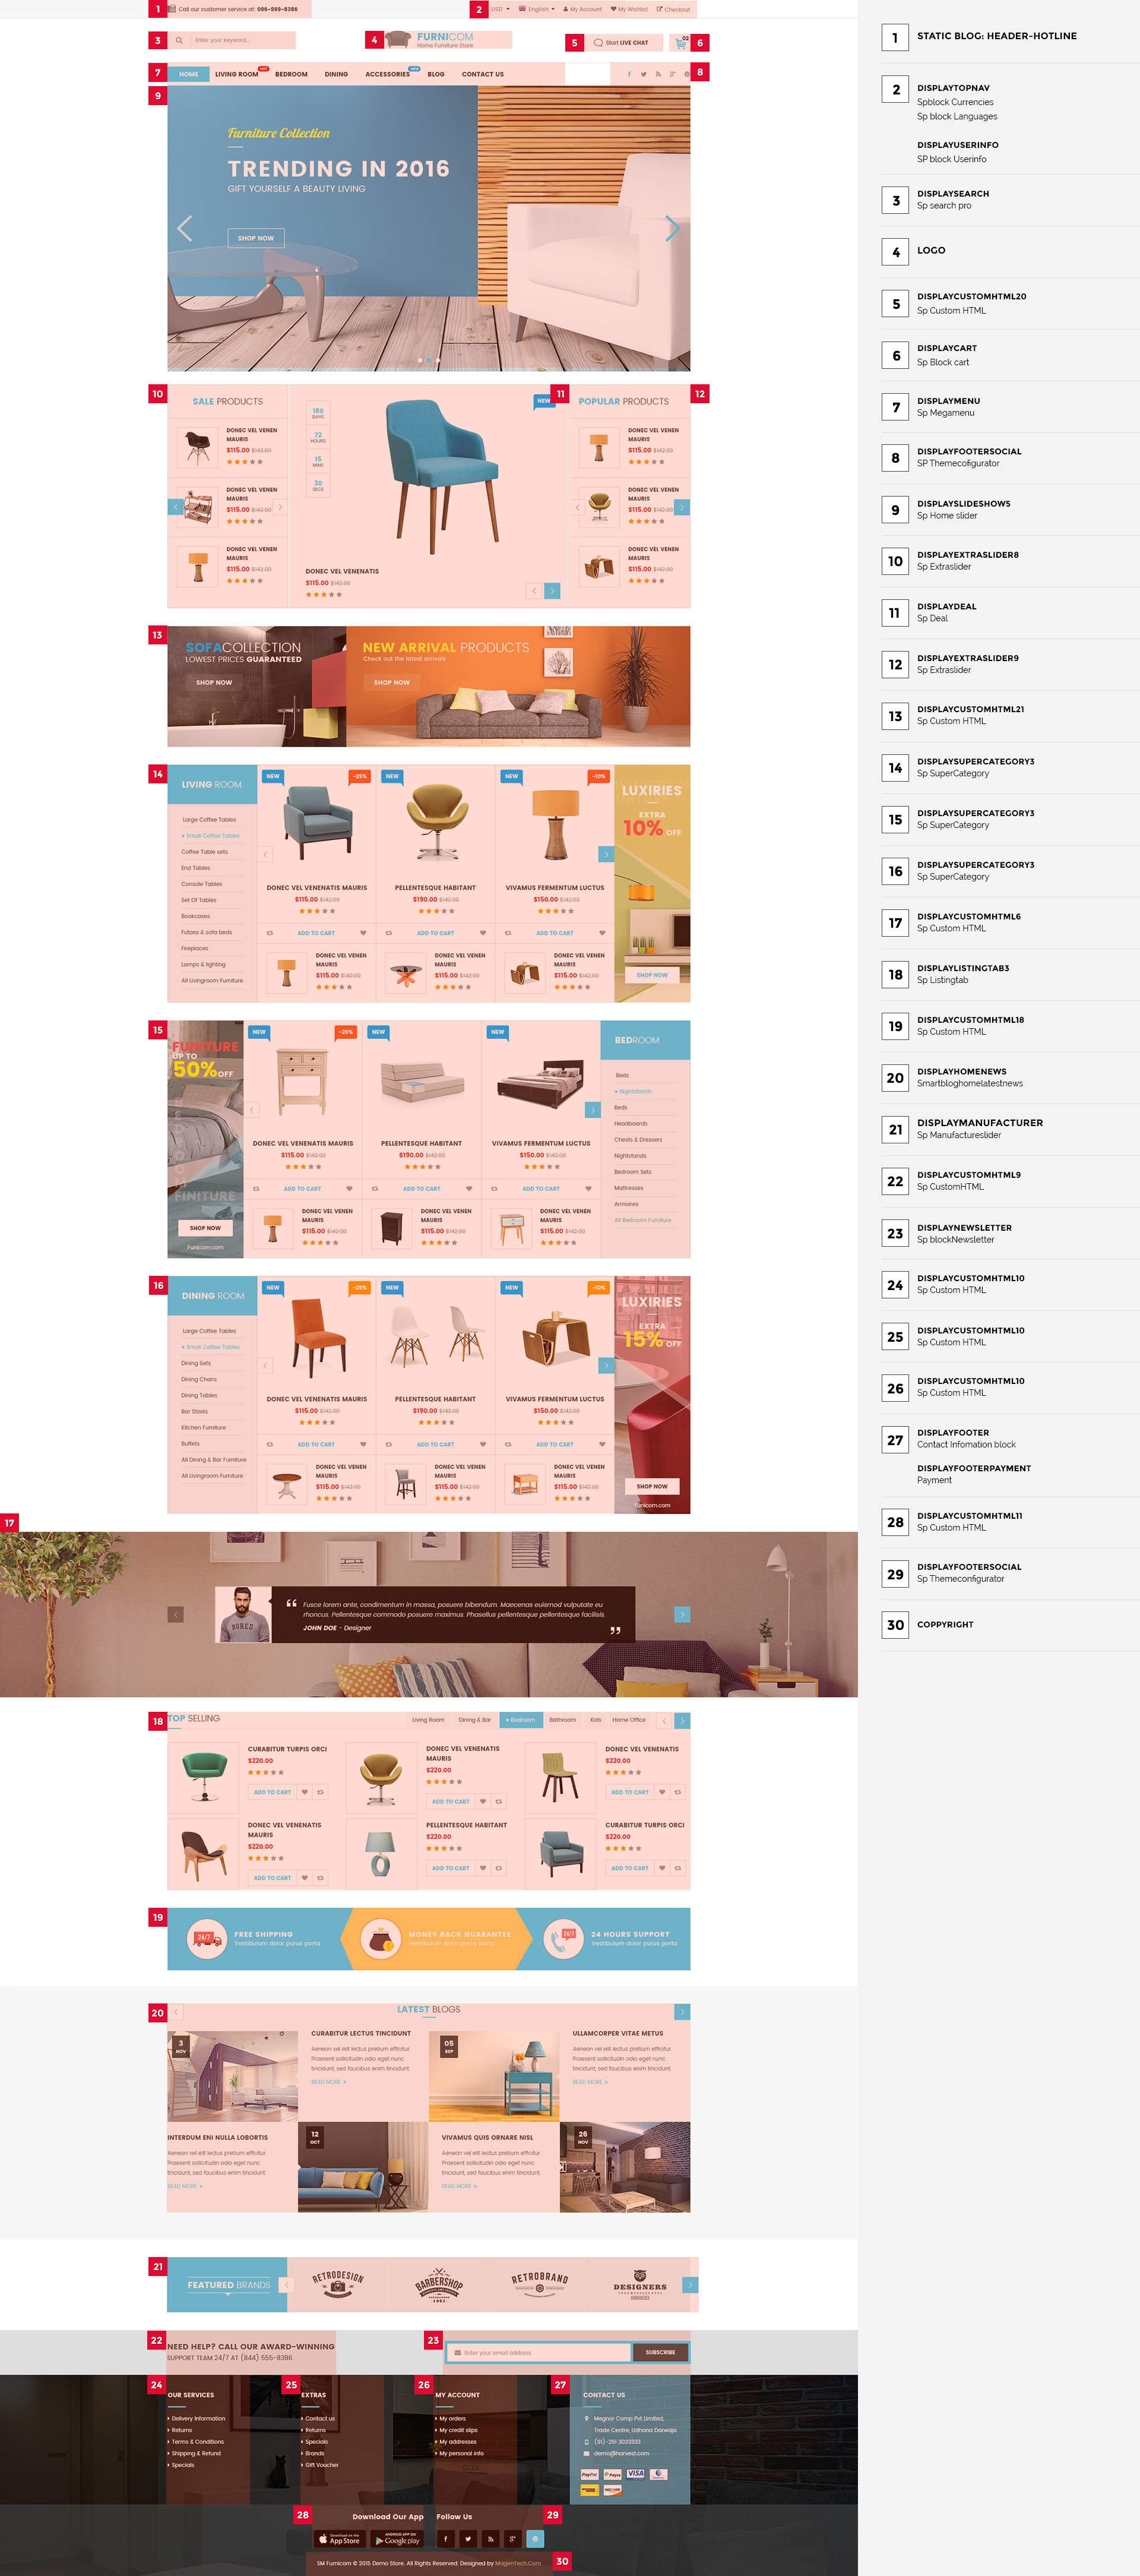
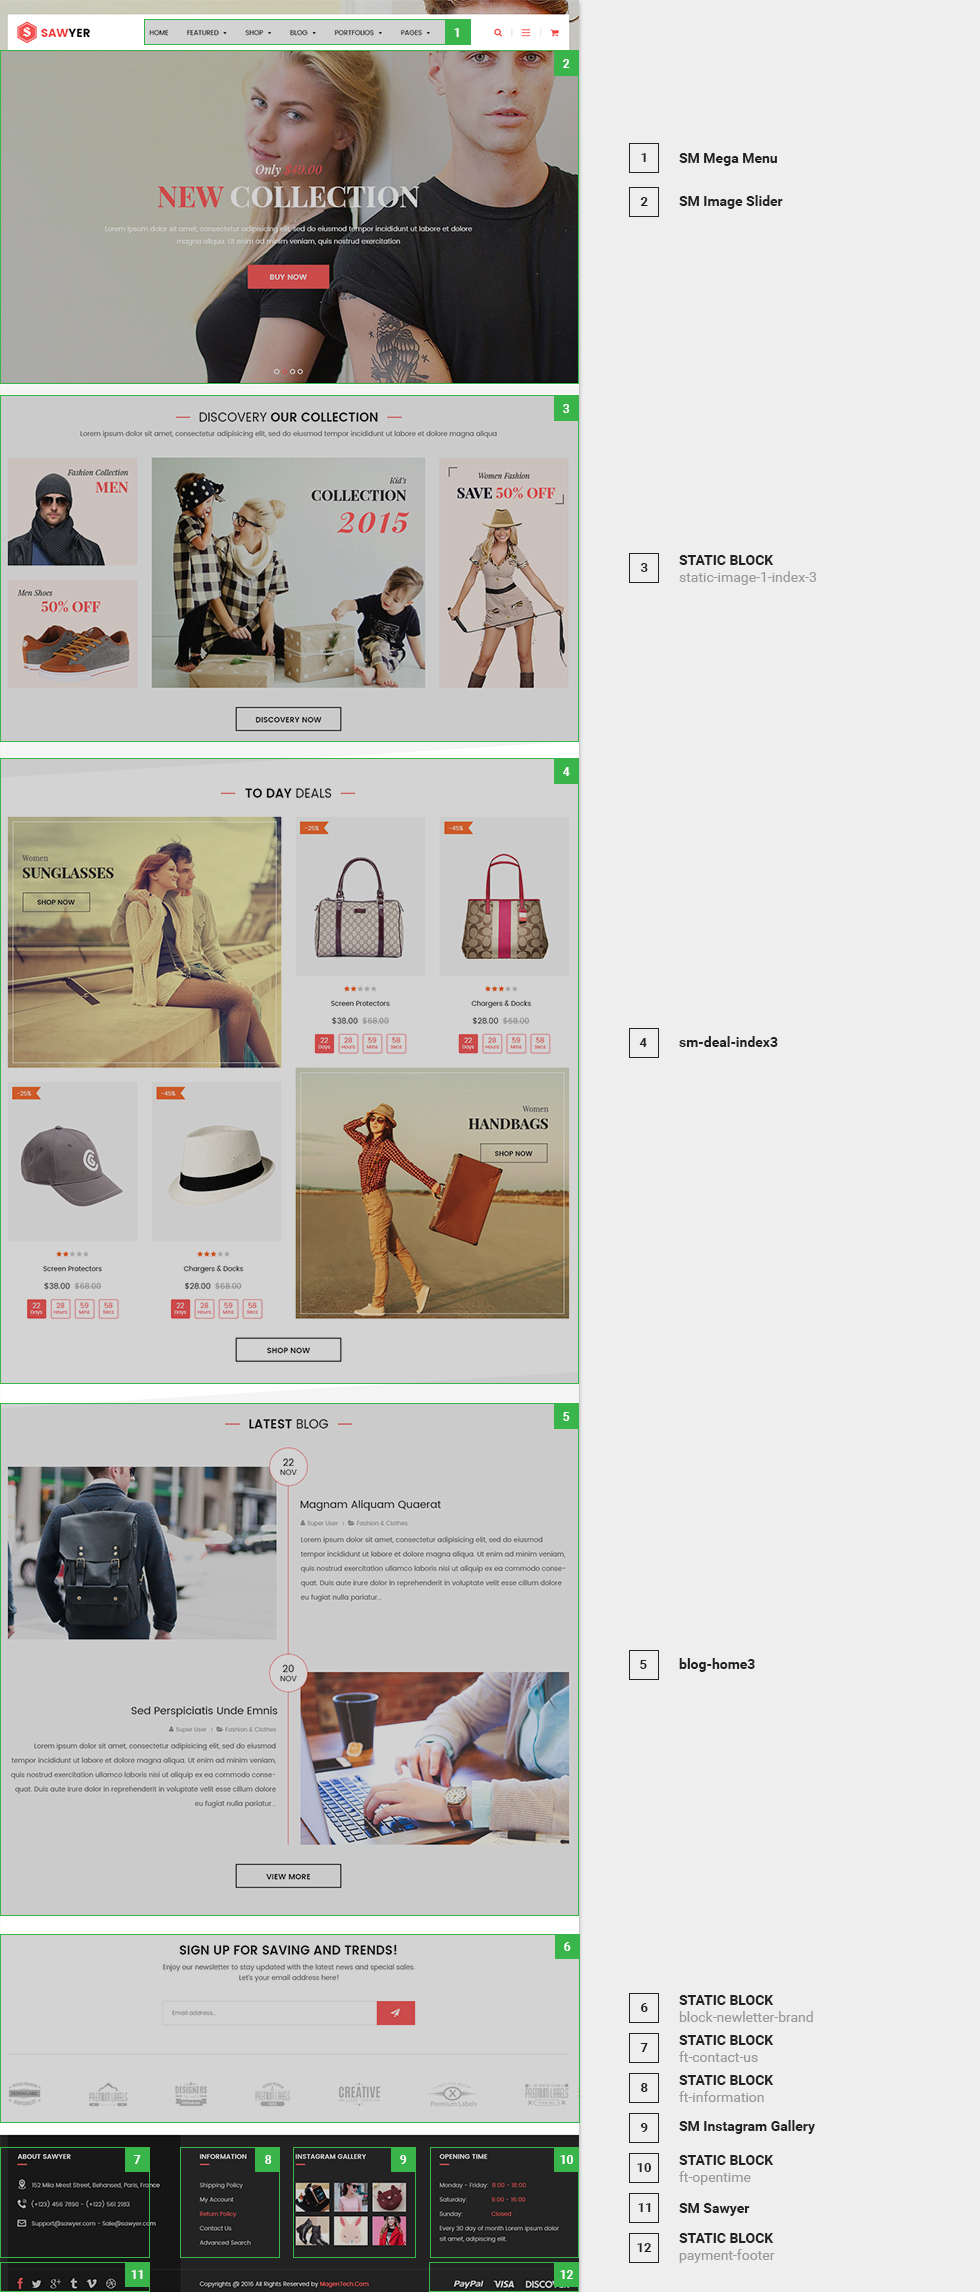
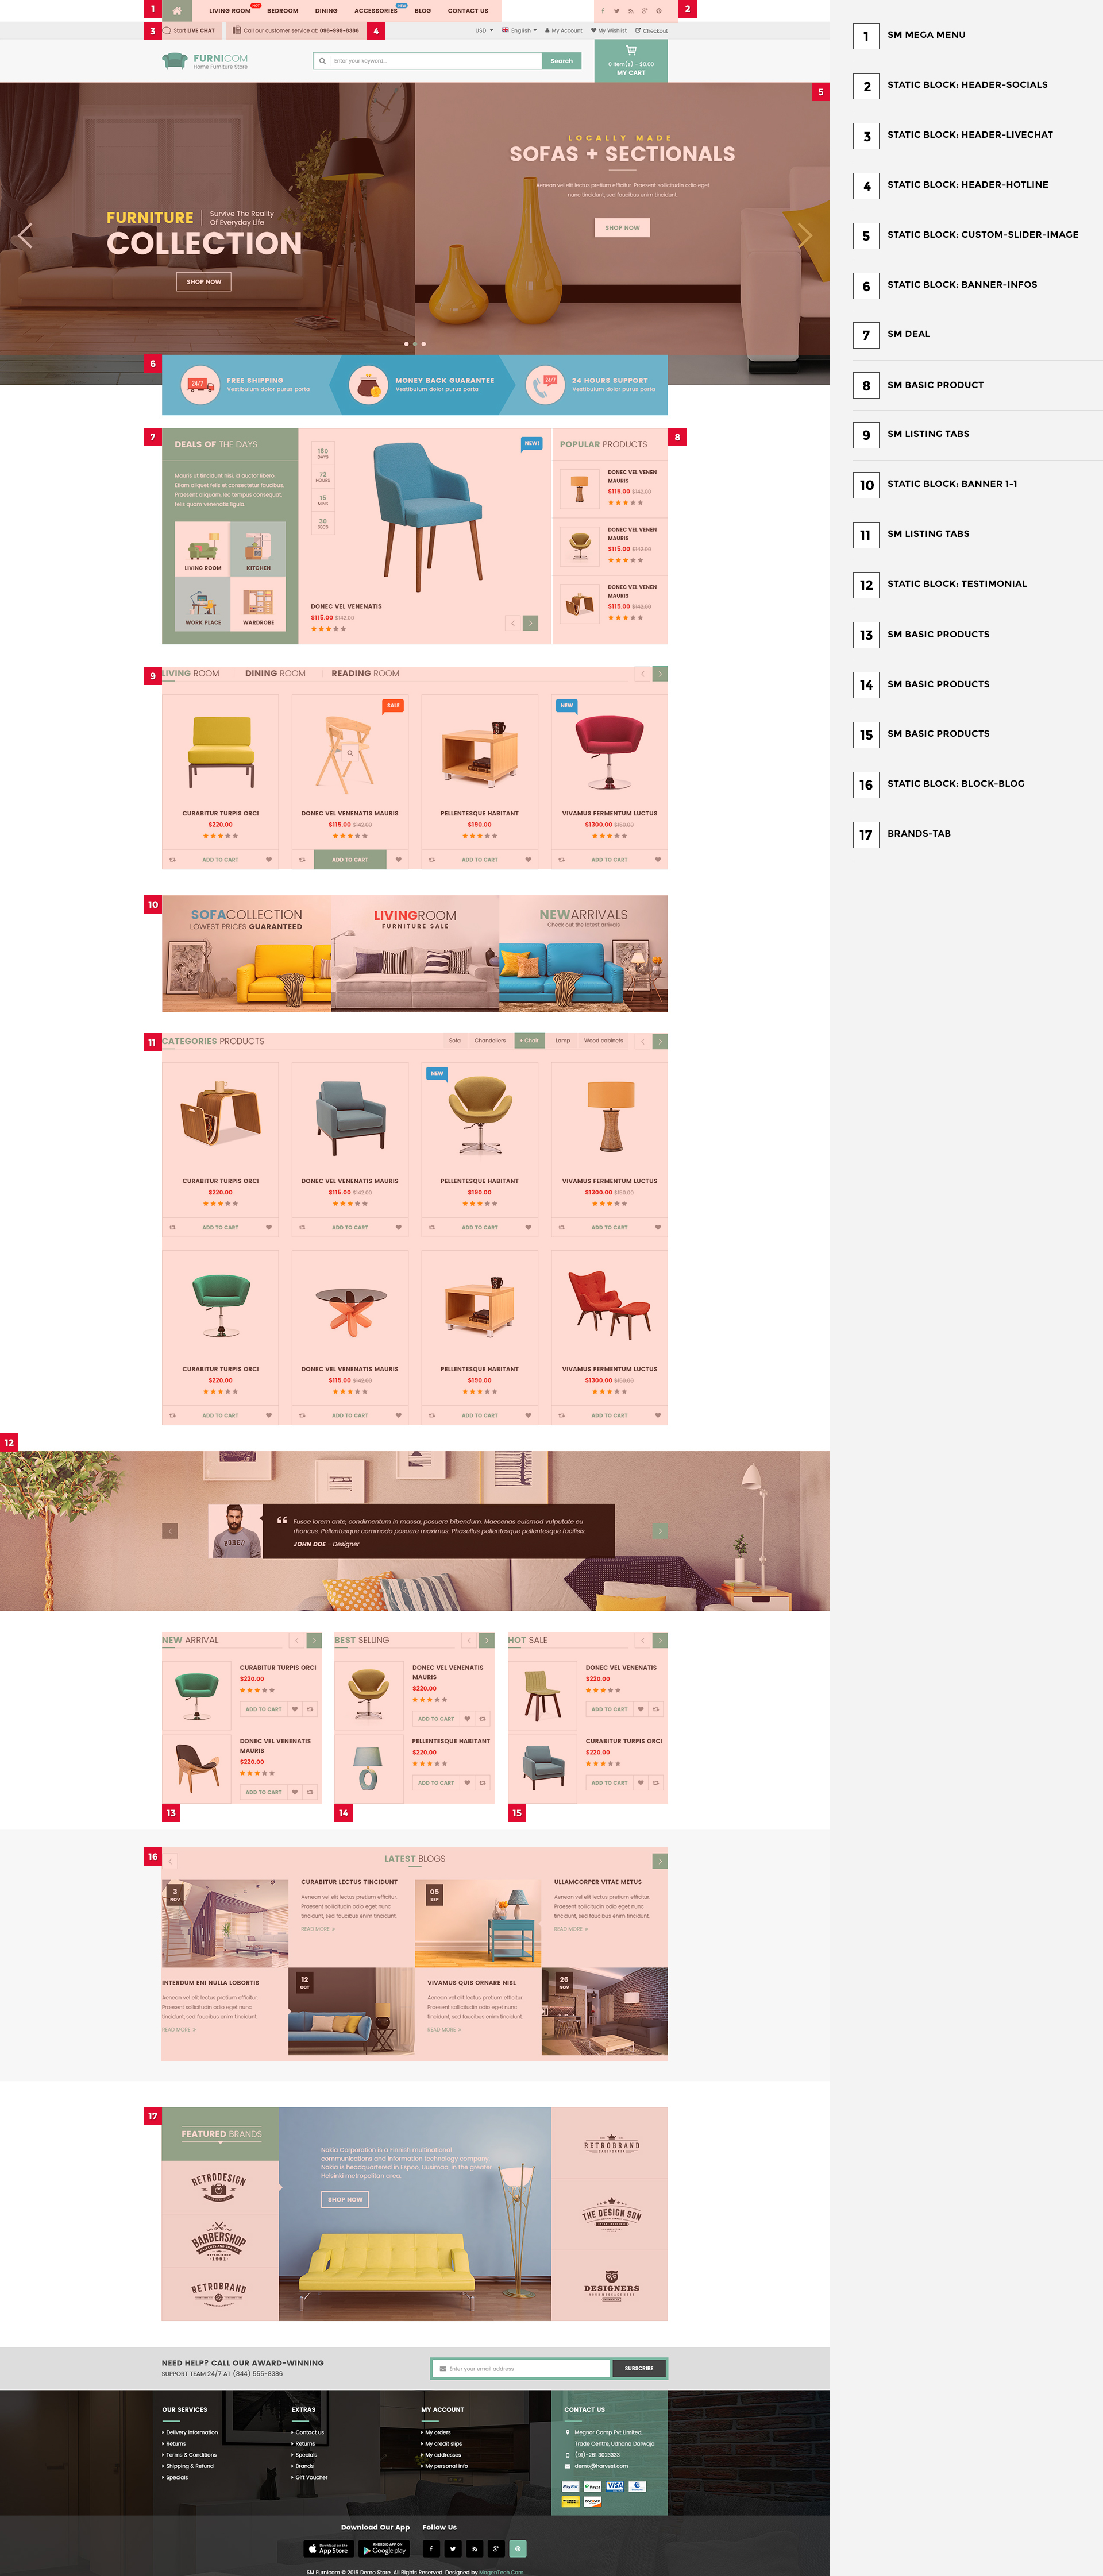
6.3 SP Topshop Layout 3
![home-layout3]()
displaySlideShow3
Sp slider for your homepage
Frontend Appearance:
![]()
Backend Settings:
Step 1: In the Pretashop Admin Panel, navigate to Modules and Services >> Modules and Services >> look for “SP Home Slider” module >> click “Configure” button to configure.
![]()
Step 2: In the “SP Slider For Your Homepage” configuration page, click ![]() button in the right corner to “ADD NEW MODULE”.
button in the right corner to “ADD NEW MODULE”.
Step 3: You could configure this module like the following image.
![]()
Step 4: In the last part named Slides List of this configuration page, click ![]() button in the right corner to add new slide and edit slide’s information as follows:
button in the right corner to add new slide and edit slide’s information as follows:
- Sample 7: Please click Here to view
Copy and paste the following code into the source code field:
- Sample 8: Please click Here to view
Note: The code in the source code field of sample 8 could be the same as that of the sample 7
- Sample 9: Please click Here to view
Note: The code in the source code field of sample 9 could be the same as that of the sample 7
display CustomHTML20
SP Custom HTML – Banner right slider layout2
Frontend Appearance:
![]()
Backend Settings:
Step 1: In the Pretashop Admin Panel, navigate to Modules and Services >> Modules and Services >> look for “SP Custom HTML” module >> click “Configure” button to configure.
![]()
Step 2: In the “SP Custom HTML” configuration page, click ![]() button in the right corner to “ADD NEW MODULE”.
button in the right corner to “ADD NEW MODULE”.
Step 3: You could configure this module like the following image.
![]()
Copy and paste the following code into the content:
<div class="banner-slider">
<div class="img1"><a href="#"><img src="../themes/sp_topshop/img/cms/banner06.jpg" alt="" /></a></div>
<div class="img2"><a href="#"><img src="../themes/sp_topshop/img/cms/banner07.jpg" alt="" /></a></div>
</div>
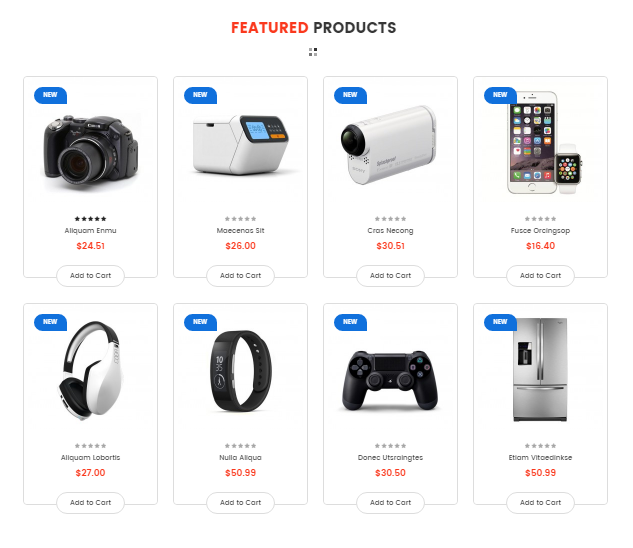
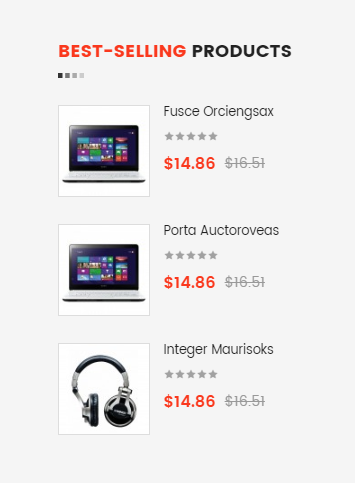
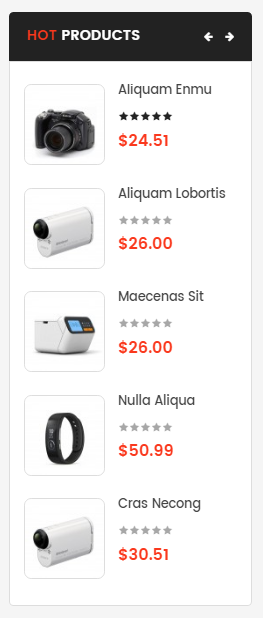
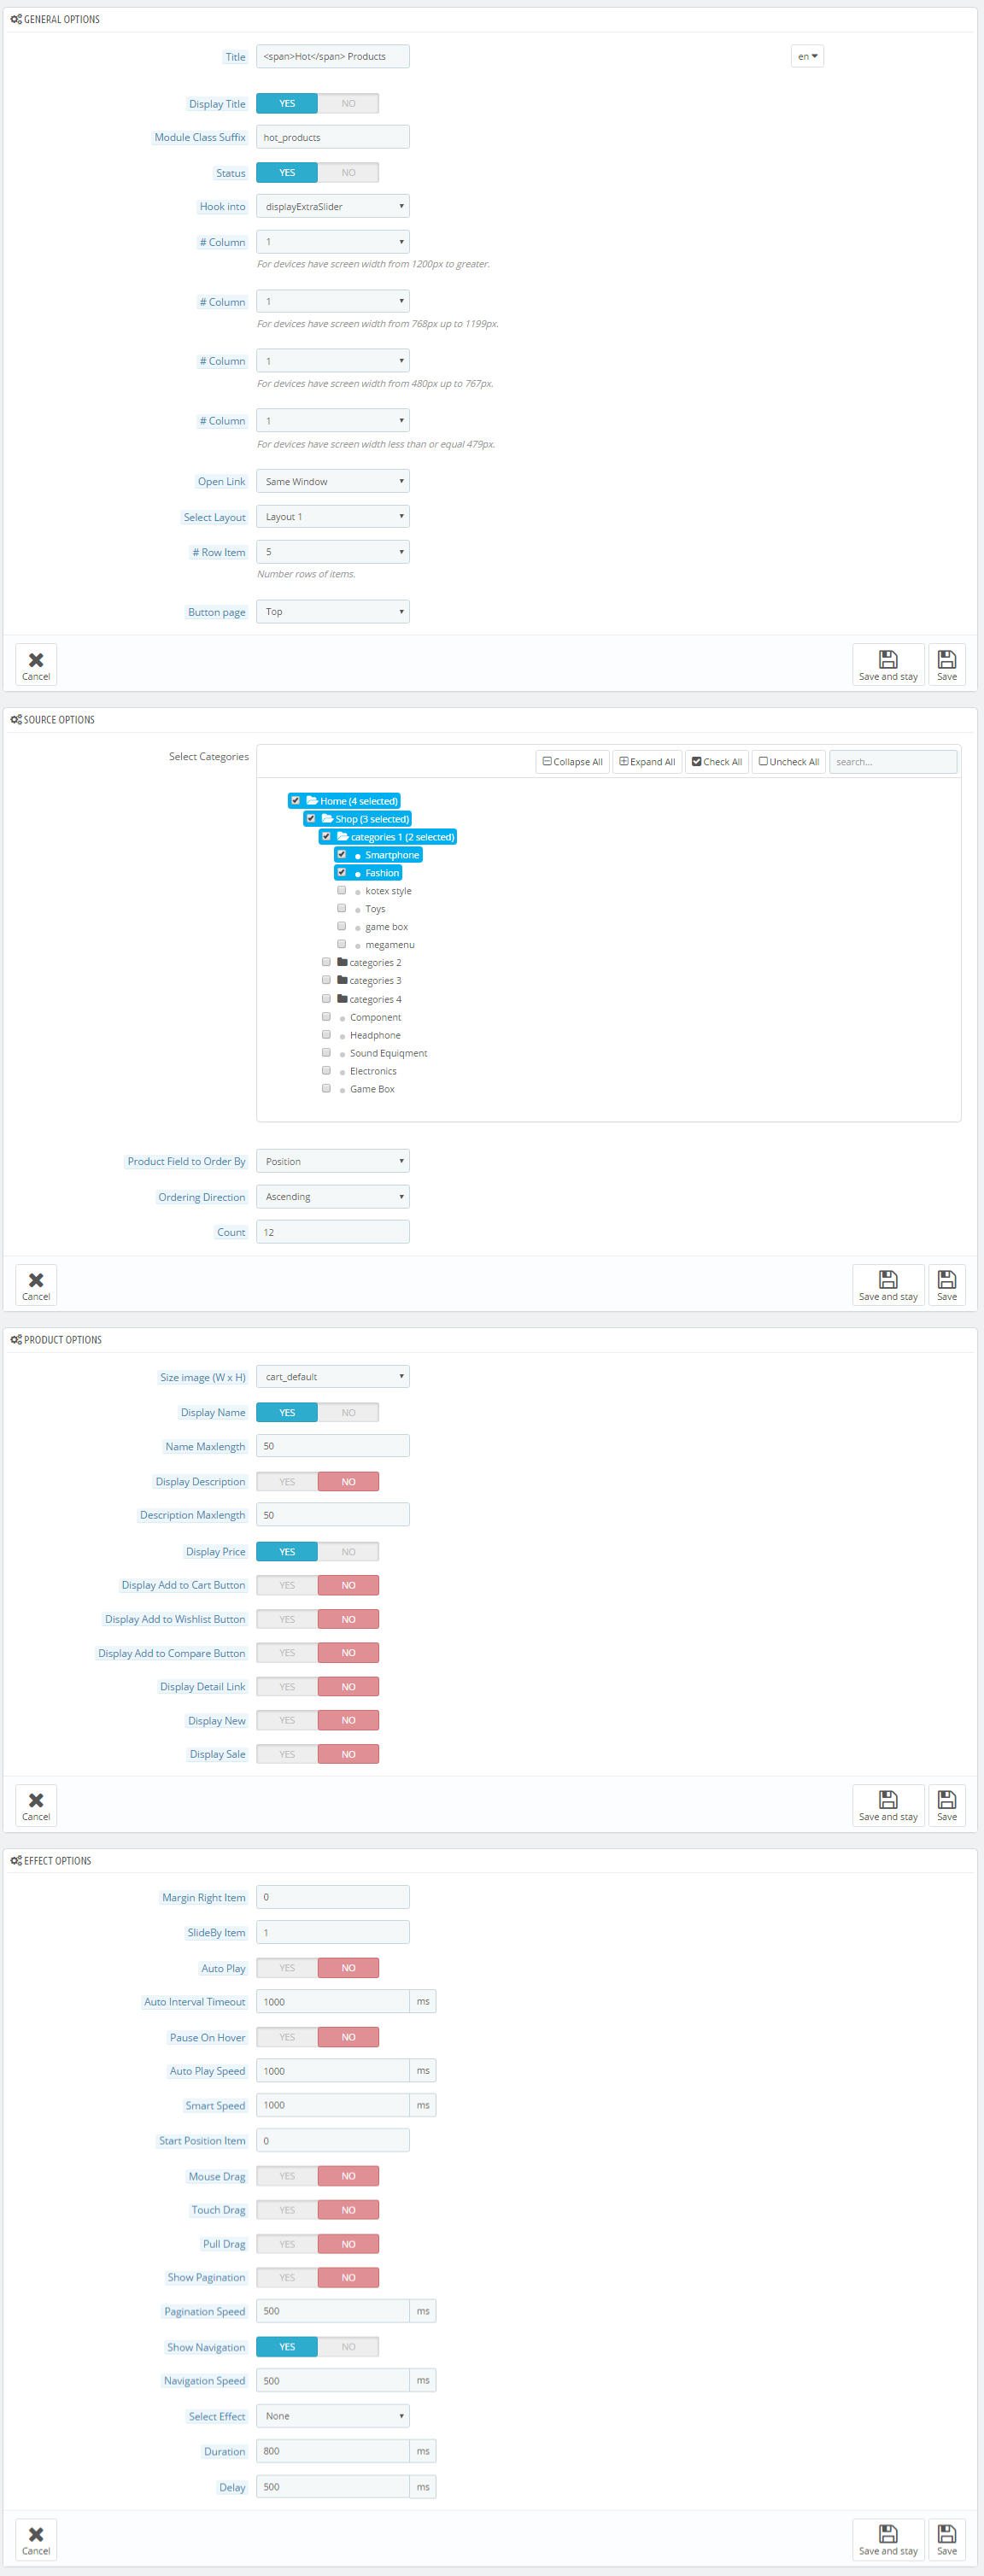
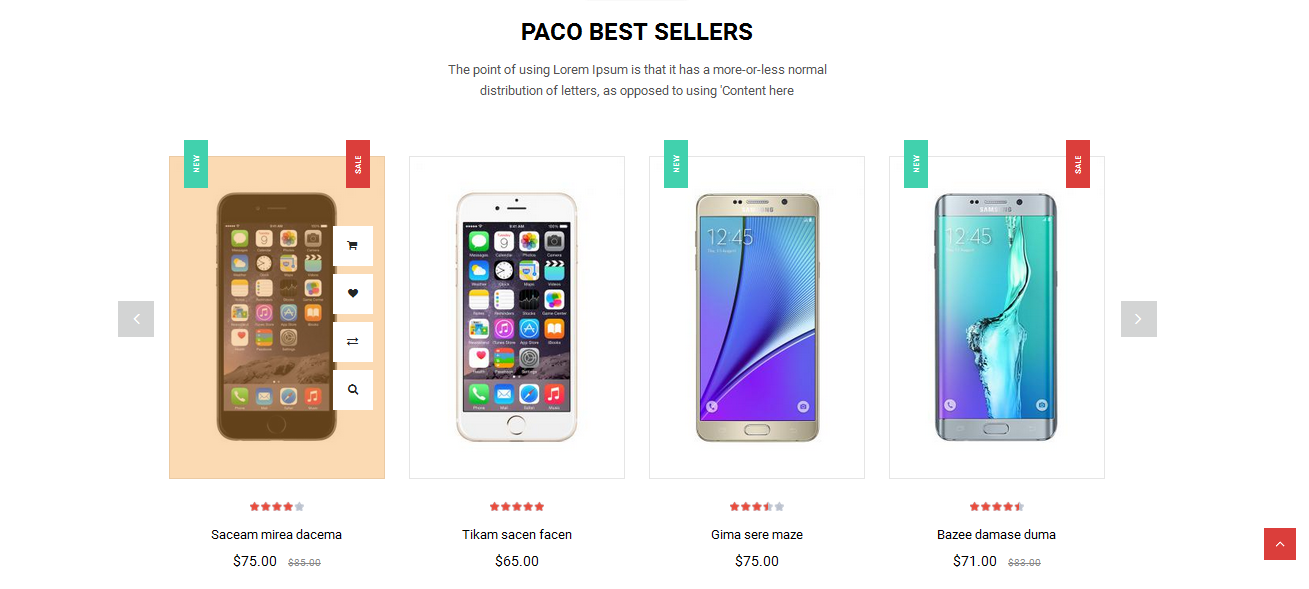
SP Extra Slider – Featured Products
Frontend Appearance:
![]()
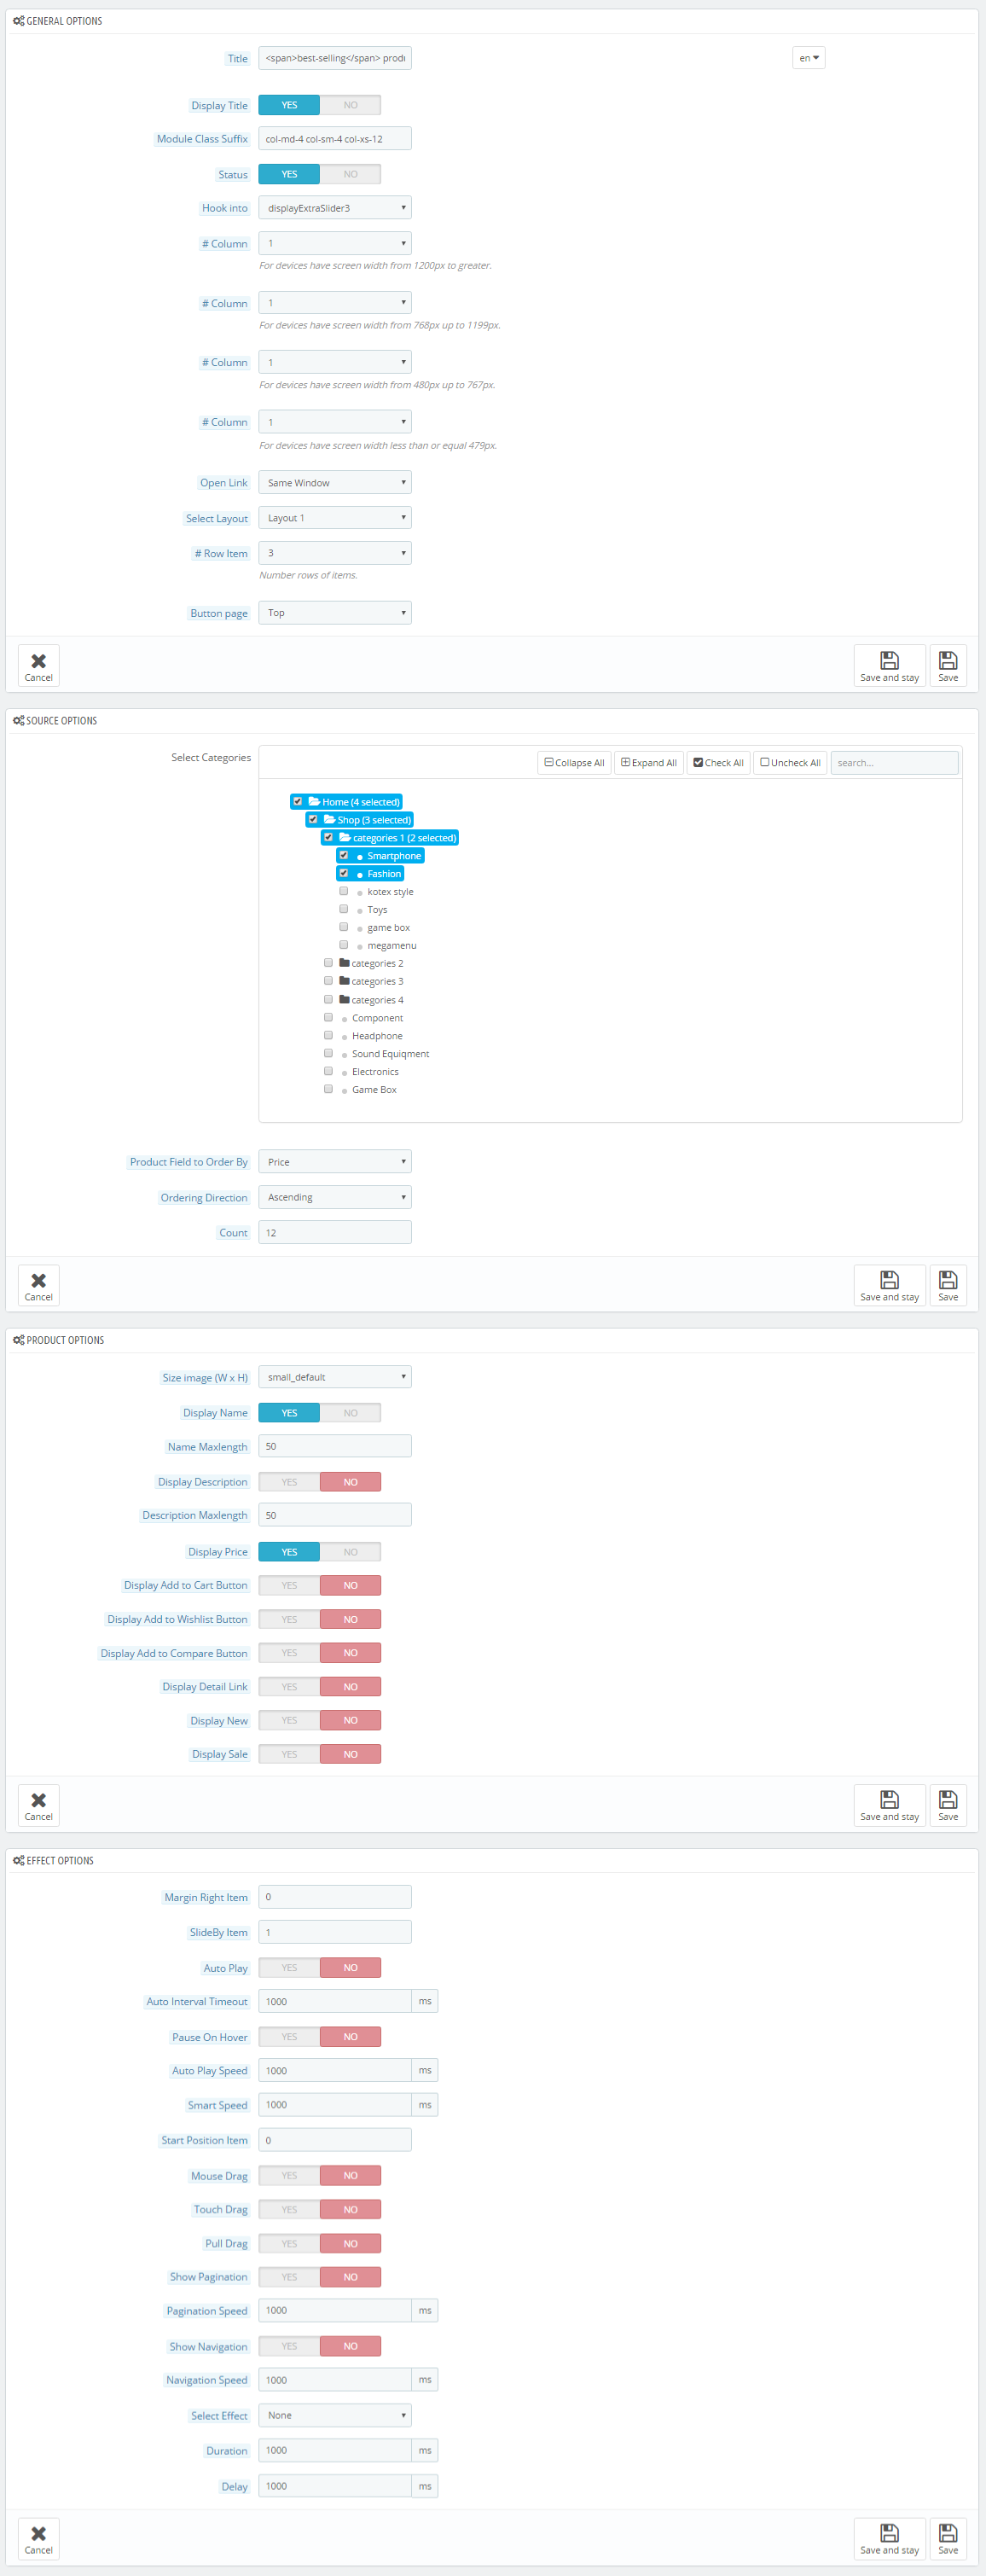
Backend Settings:
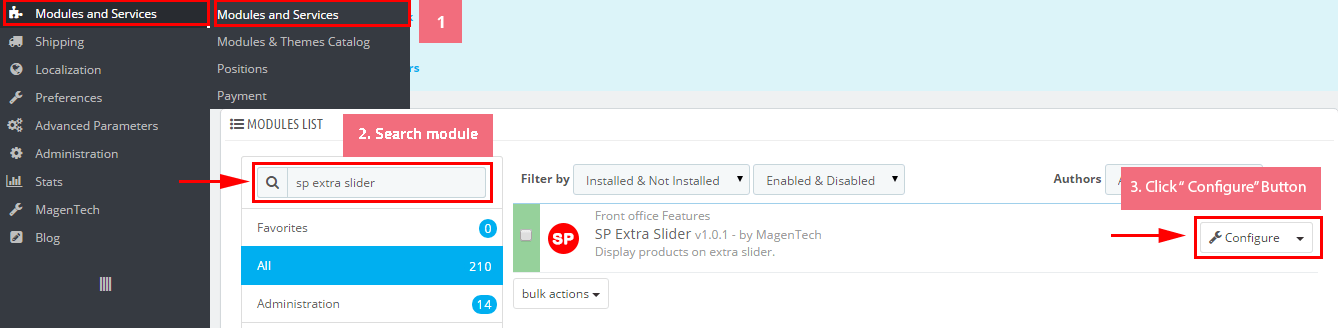
Step 1: In the Pretashop Admin Panel, navigate to Modules and Services >> Modules and Services >> look for “SP Extra Slider” module.
![]()
Step 2: In the “SP Extra Slider” configuration page, click ![]() button in the right corner to “ADD NEW MODULE”.
button in the right corner to “ADD NEW MODULE”.
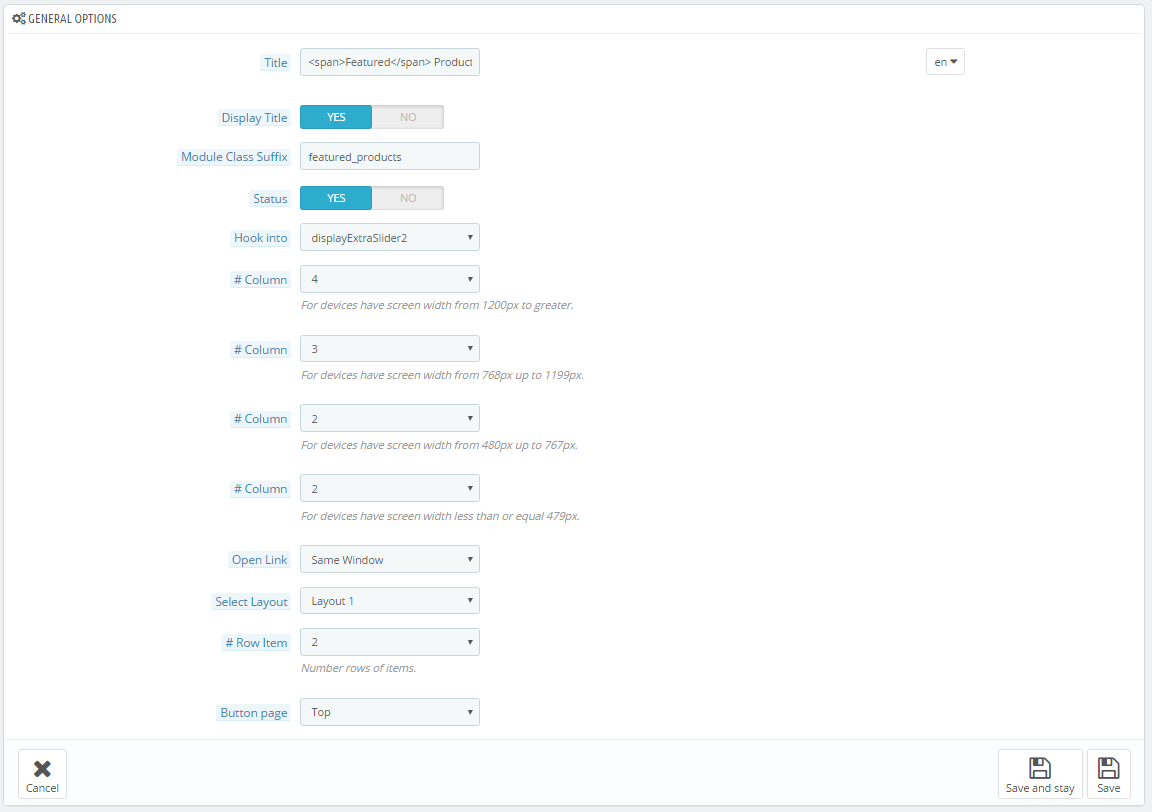
Step 3: You could configure this module like the following image.
![]()
displayDeal2
SP Deal – hot deals
Frontend Appearance:
![]()
Backend Settings:
Step 1: In the Pretashop Admin Panel, navigate to Modules and Services >> Modules and Services >> look for “SP Deal” module.
![]()
Step 2: In the “SP Deal” configuration page, click ![]() button in the right corner to “ADD NEW MODULE”.
button in the right corner to “ADD NEW MODULE”.
Step 3: You could configure this module like the following image.
![]()
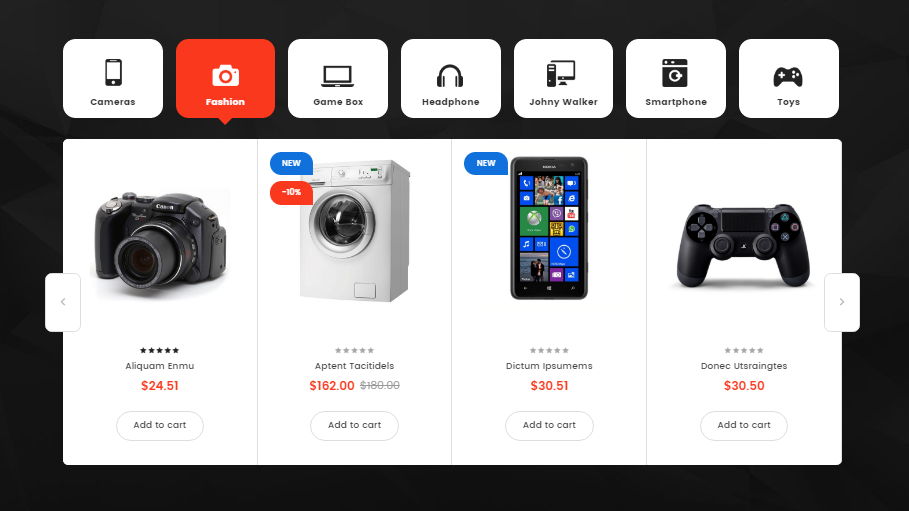
SP Extra Slider – Bestseller
Frontend Appearance:
![]()
Backend Settings:
Step 1: In the Pretashop Admin Panel, navigate to Modules and Services >> Modules and Services >> look for “SP Extra Slider” module.
![]()
Step 2: In the “SP Extra Slider” configuration page, click ![]() button in the right corner to “ADD NEW MODULE”.
button in the right corner to “ADD NEW MODULE”.
Step 3: You could configure this module like the following image.
![]()
displaySuperCategory6
SP Super Category – Fashion & accessories
Frontend Appearance:
![]()
Backend Settings:
Step 1: In the Pretashop Admin Panel, navigate to Modules and Services >> Modules and Services >> look for “SP Super Category” module.
![]()
Step 2: In the “SP Super Category” configuration page, click ![]() button in the right corner to “ADD NEW MODULE”.
button in the right corner to “ADD NEW MODULE”.
Step 3: You could configure this module like the following image.
![]()
display CustomHTML21
SP Custom HTML – Banner left layout3
Frontend Appearance:
![]()
Backend Settings:
Step 1: In the Pretashop Admin Panel, navigate to Modules and Services >> Modules and Services >> look for “SP Custom HTML” module >> click “Configure” button to configure.
![]()
Step 2: In the “SP Custom HTML” configuration page, click ![]() button in the right corner to “ADD NEW MODULE”.
button in the right corner to “ADD NEW MODULE”.
Step 3: You could configure this module like the following image.
![]()
Copy and paste the following code into the content:
<div class="banner-left"><a href="#"><img src="../themes/sp_topshop/img/cms/banner08.jpg" alt="" /></a></div>
displaySuperCategory7
SP Super Category – Furniture
Frontend Appearance:
![]()
Backend Settings:
Step 1: In the Pretashop Admin Panel, navigate to Modules and Services >> Modules and Services >> look for “SP Super Category” module.
![]()
Step 2: In the “SP Super Category” configuration page, click ![]() button in the right corner to “ADD NEW MODULE”.
button in the right corner to “ADD NEW MODULE”.
Step 3: You could configure this module like the following image.
![]()
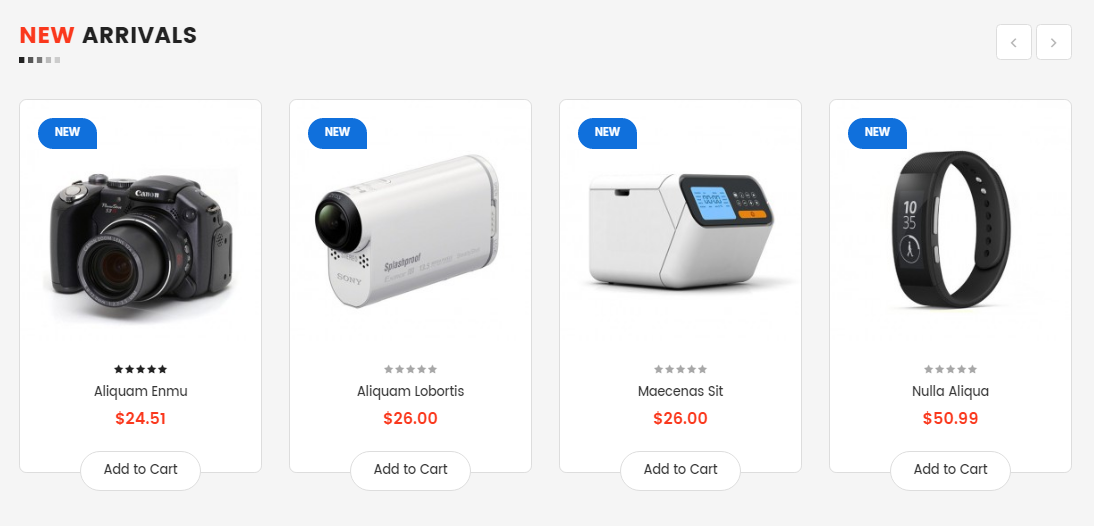
SP Extra Slider – New Products
Frontend Appearance:
![]()
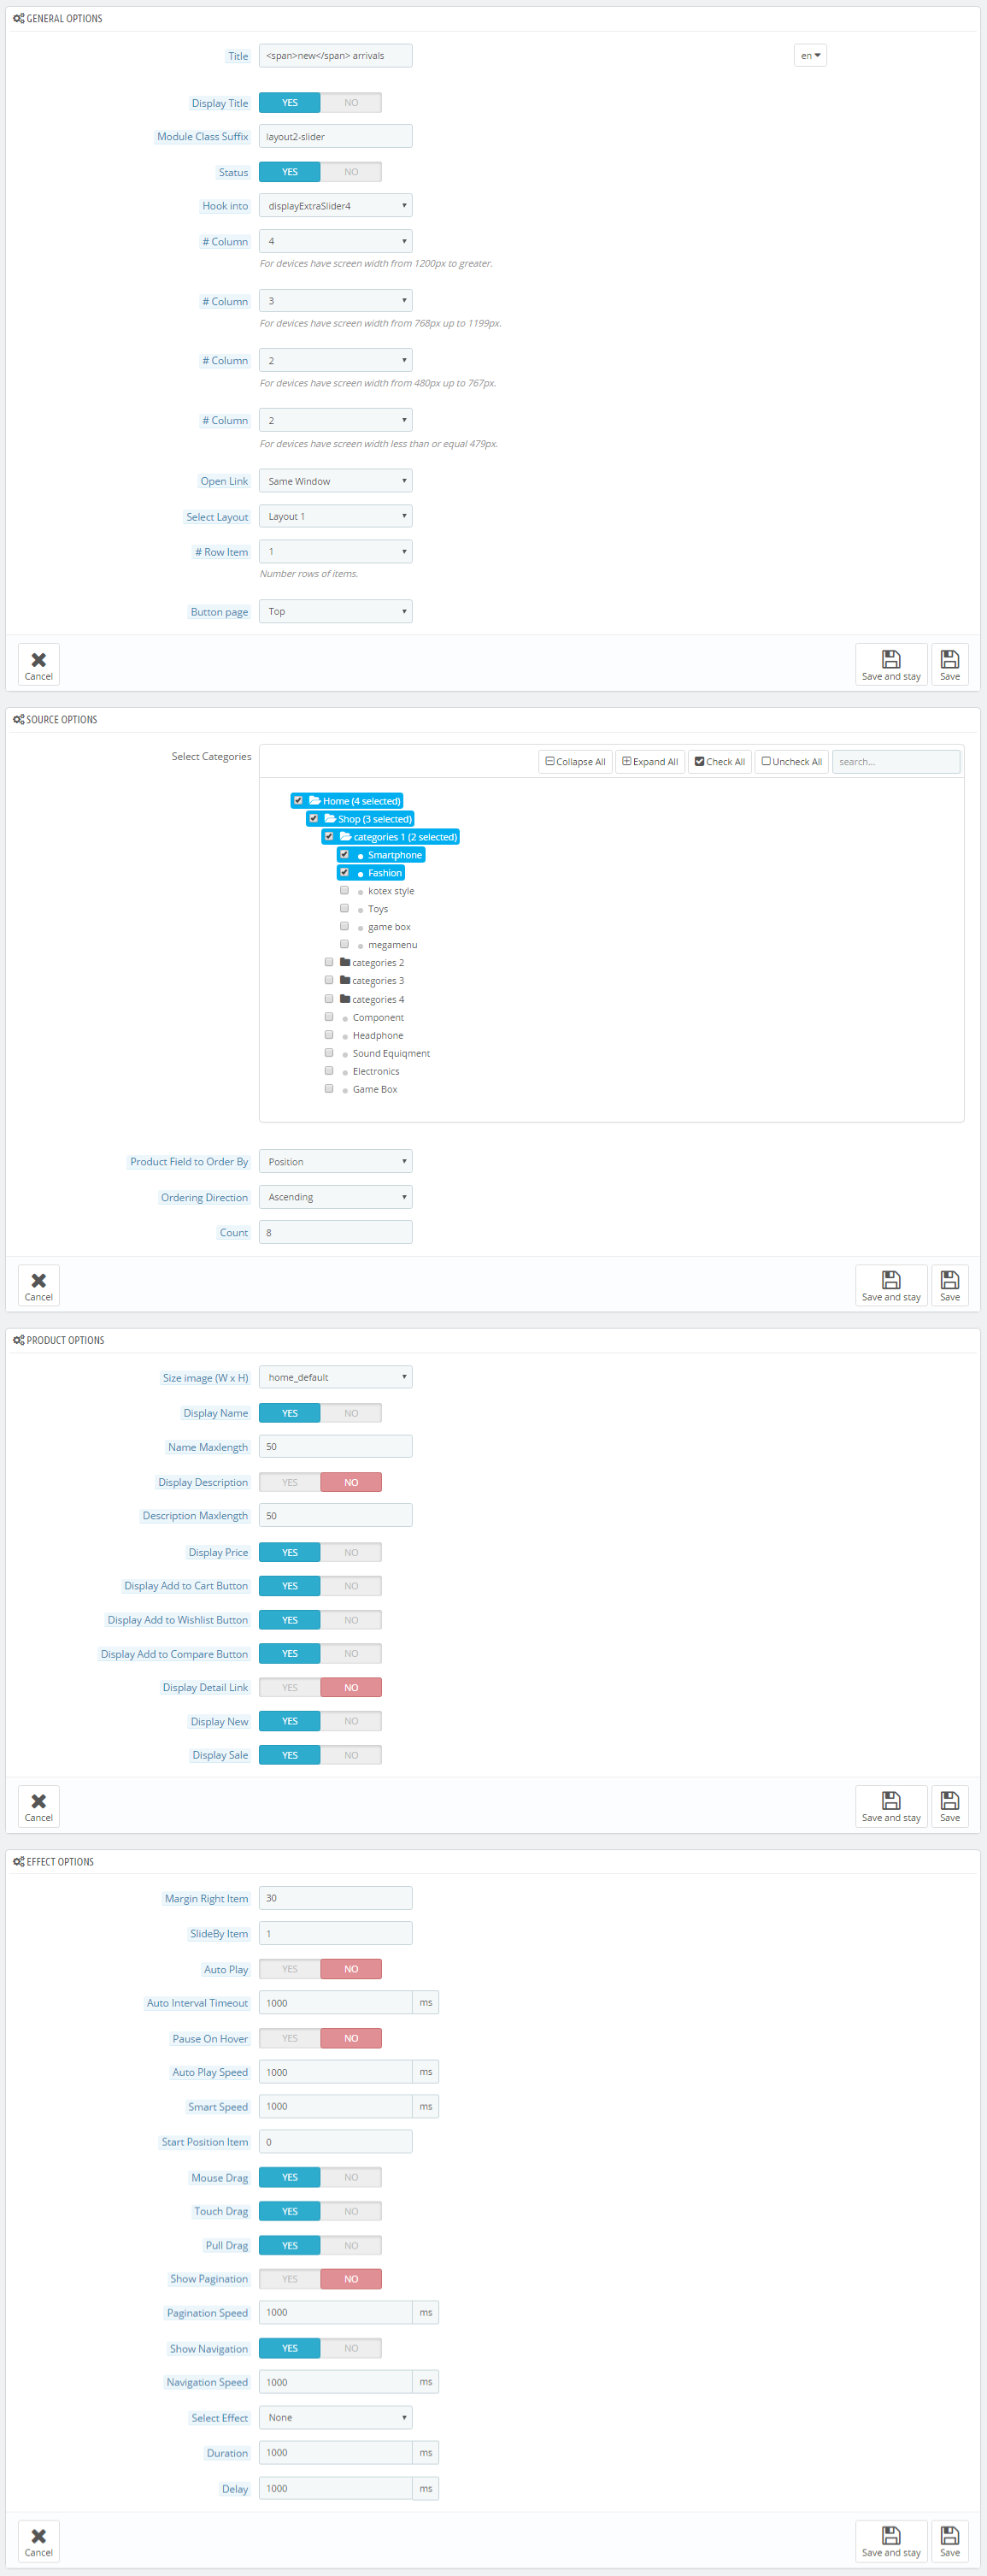
Backend Settings:
Step 1: In the Pretashop Admin Panel, navigate to Modules and Services >> Modules and Services >> look for “SP Extra Slider” module.
![]()
Step 2: In the “SP Extra Slider” configuration page, click ![]() button in the right corner to “ADD NEW MODULE”.
button in the right corner to “ADD NEW MODULE”.
Step 3: You could configure this module like the following image.
![]()
display CustomHTML21
SP Custom HTML – Banner left 2 layout3
Frontend Appearance:
![]()
Backend Settings:
Step 1: In the Pretashop Admin Panel, navigate to Modules and Services >> Modules and Services >> look for “SP Custom HTML” module >> click “Configure” button to configure.
![]()
Step 2: In the “SP Custom HTML” configuration page, click ![]() button in the right corner to “ADD NEW MODULE”.
button in the right corner to “ADD NEW MODULE”.
Step 3: You could configure this module like the following image.
![]()
Copy and paste the following code into the content:
<div class="banner-left"><a href="#"><img src="../themes/sp_topshop/img/cms/banner09.jpg" alt="" /></a></div>
displaySuperCategory8
SP Super Category – Furniture
Frontend Appearance:
![]()
Backend Settings:
Step 1: In the Pretashop Admin Panel, navigate to Modules and Services >> Modules and Services >> look for “SP Super Category” module.
![]()
Step 2: In the “SP Super Category” configuration page, click ![]() button in the right corner to “ADD NEW MODULE”.
button in the right corner to “ADD NEW MODULE”.
Step 3: You could configure this module like the following image.
![]()
displayManufacturer
SP Manufacture Slider – Manufacturers
Frontend Appearance:
![]()
Backend Settings:
Step 1: In the Pretashop Admin Panel, navigate to Modules and Services >> Modules and Services >> look for “SP Manufacture Slider” module.
![]()
Step 2: In the “SP Deal” configuration page, click ![]() button in the right corner to “ADD NEW MODULE”.
button in the right corner to “ADD NEW MODULE”.
Step 3: You could configure this module like the following image.
![]()
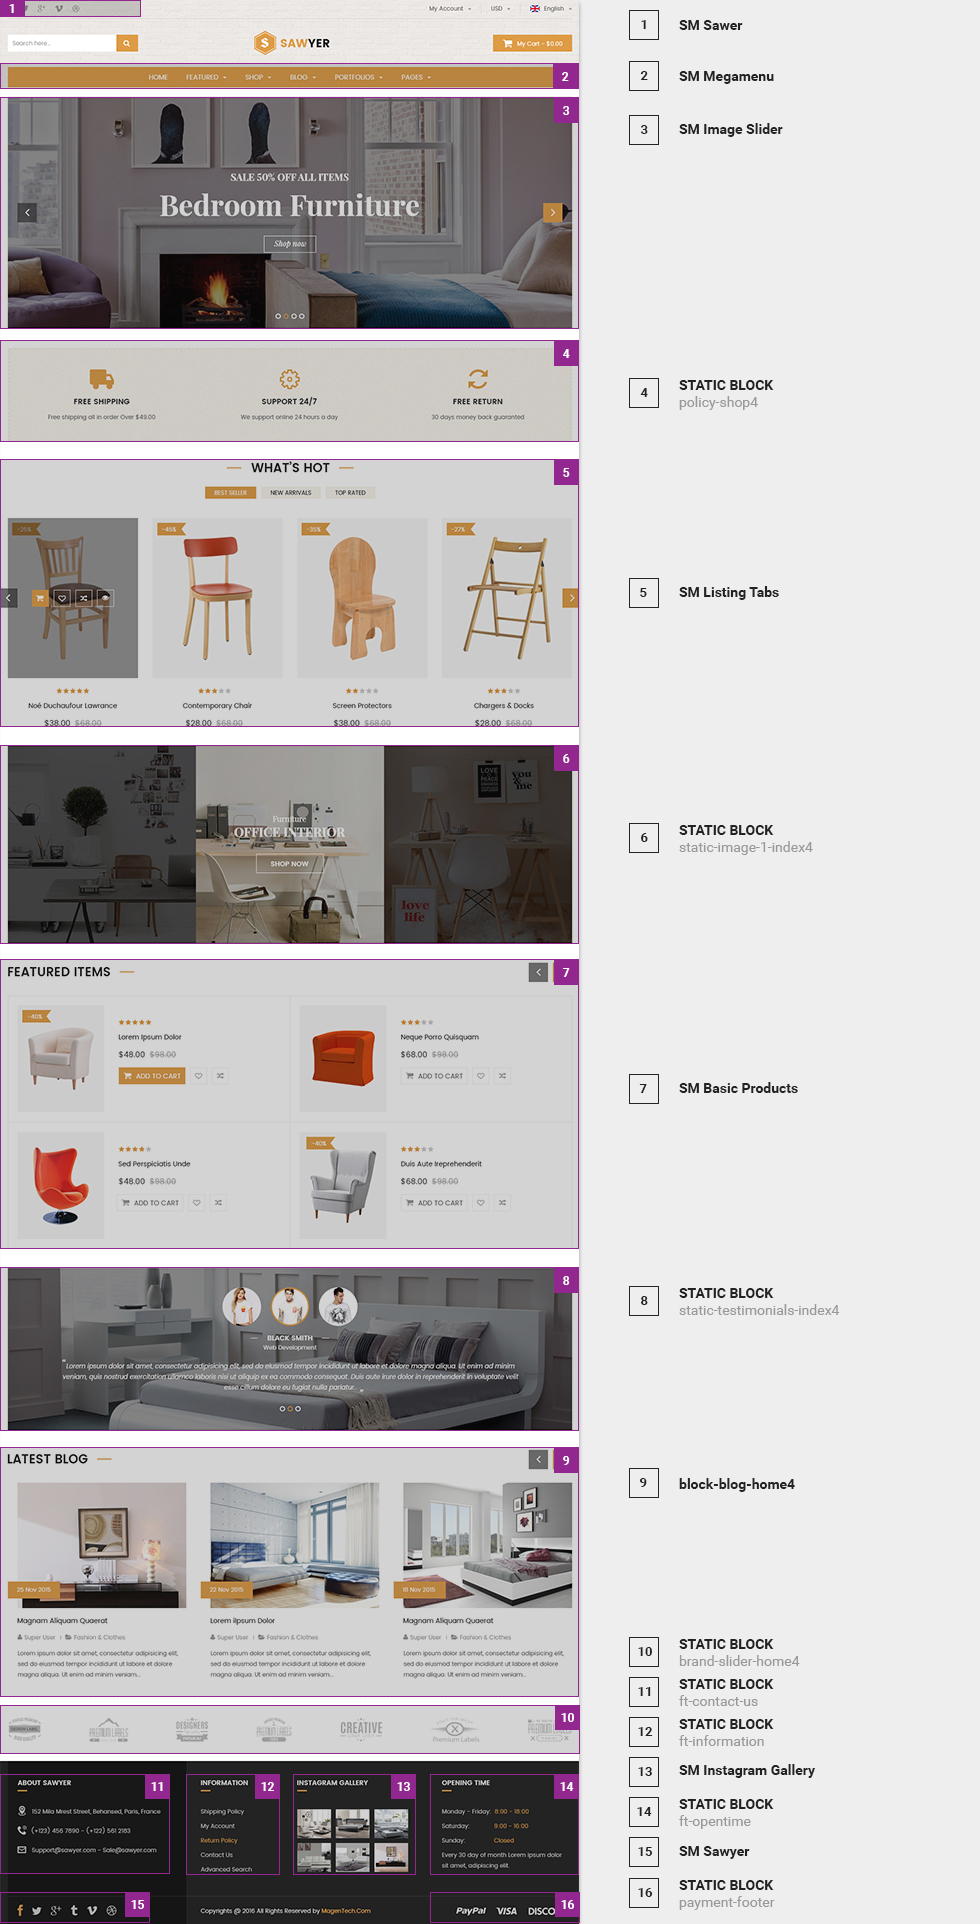
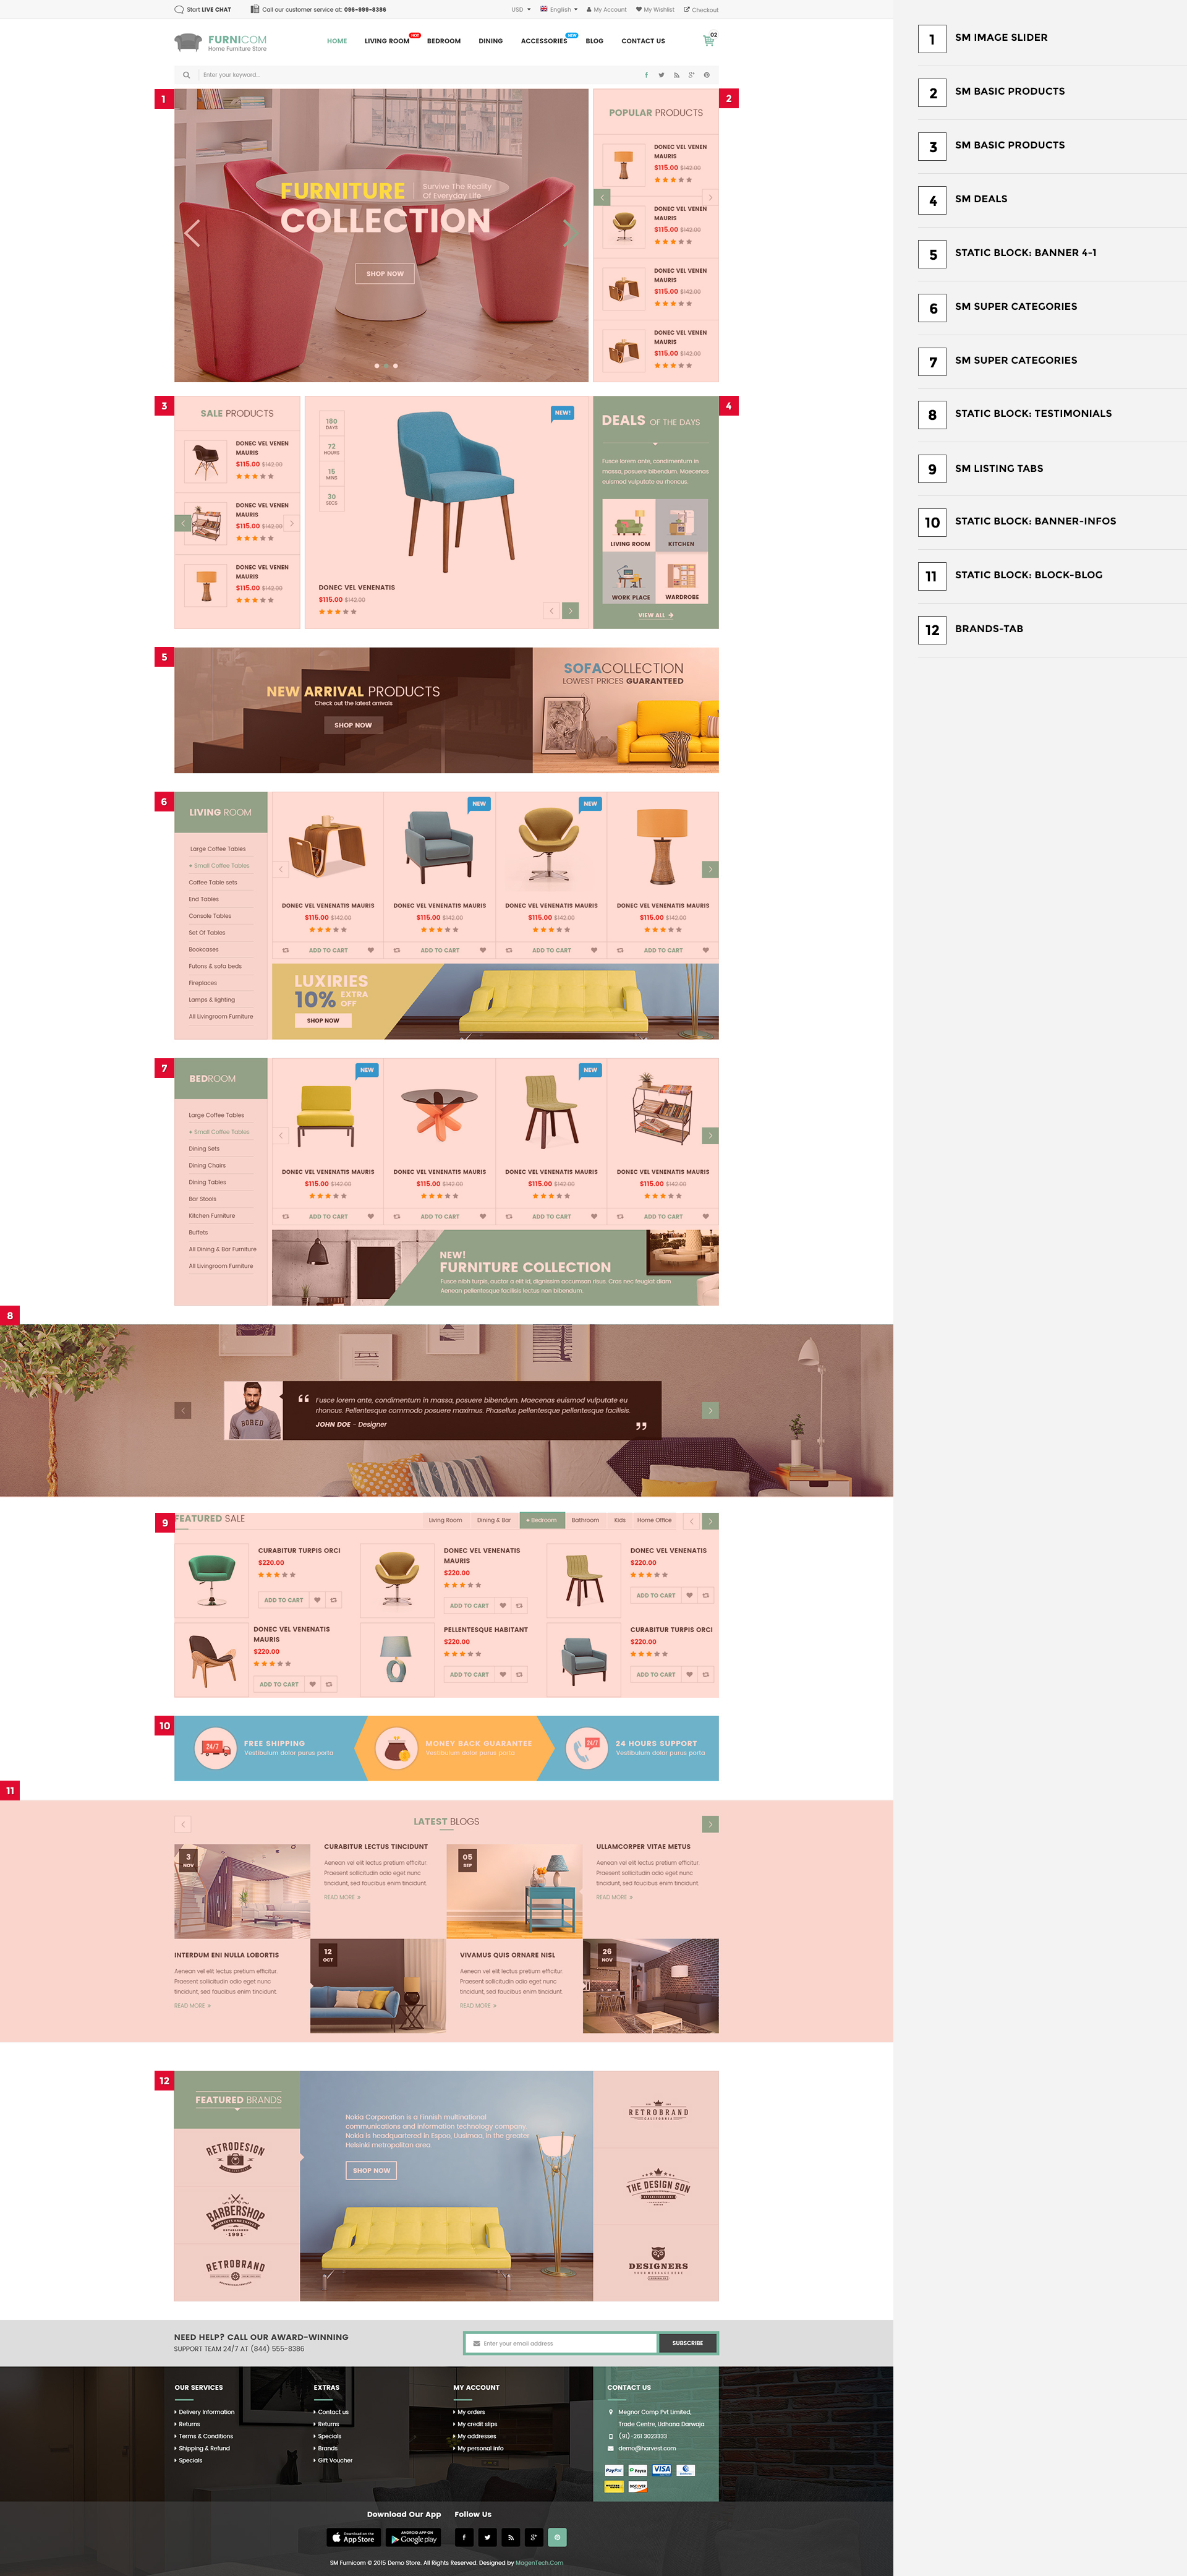
6.4 SP Topshop Layout 4
![home-layout4]()
display CustomHTML23
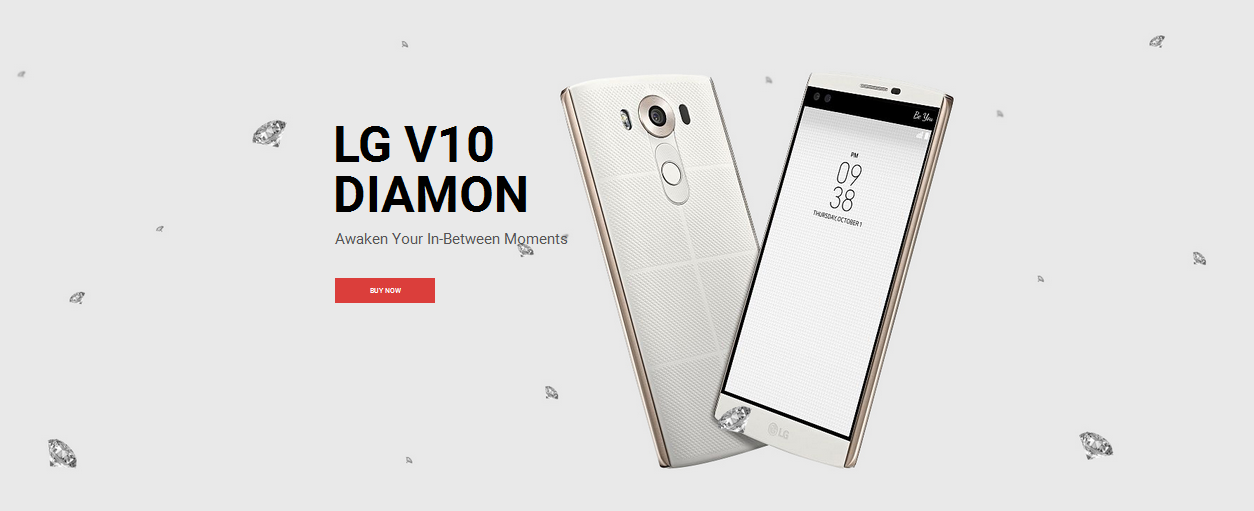
SP Custom HTML – Banner Top layout4
Frontend Appearance:
![]()
Backend Settings:
Step 1: In the Pretashop Admin Panel, navigate to Modules and Services >> Modules and Services >> look for “SP Custom HTML” module >> click “Configure” button to configure.
![]()
Step 2: In the “SP Custom HTML” configuration page, click ![]() button in the right corner to “ADD NEW MODULE”.
button in the right corner to “ADD NEW MODULE”.
Step 3: You could configure this module like the following image.
![]()
Copy and paste the following code into the content:
<div class="banner_adv"><a href="#"><img class="mfvwivdixpanpwoszxls" src="http://www.your-website.yourdomain/themes/sp_topshop/img/cms/adv2.jpg" alt="" /></a></div>
displaySlideShow4
Sp slider for your homepage
Frontend Appearance:
![]()
Backend Settings:
Step 1: In the Pretashop Admin Panel, navigate to Modules and Services >> Modules and Services >> look for “SP Home Slider” module >> click “Configure” button to configure.
![]()
Step 2: In the “SP Slider For Your Homepage” configuration page, click ![]() button in the right corner to “ADD NEW MODULE”.
button in the right corner to “ADD NEW MODULE”.
Step 3: You could configure this module like the following image.
![]()
Step 4: In the last part named Slides List of this configuration page, click ![]() button in the right corner to add new slide and edit slide’s information as follows:
button in the right corner to add new slide and edit slide’s information as follows:
display CustomHTML24
SP Custom HTML – Fashion3 layout4
Frontend Appearance:
![]()
Backend Settings:
Step 1: In the Pretashop Admin Panel, navigate to Modules and Services >> Modules and Services >> look for “SP Custom HTML” module >> click “Configure” button to configure.
![]()
Step 2: In the “SP Custom HTML” configuration page, click ![]() button in the right corner to “ADD NEW MODULE”.
button in the right corner to “ADD NEW MODULE”.
Step 3: You could configure this module like the following image.
![]()
Copy and paste the following code into the content:
<div class="trending3"><a href="#"><img src="../themes/sp_topshop/img/cms/banner10.jpg" alt="" /></a></div>
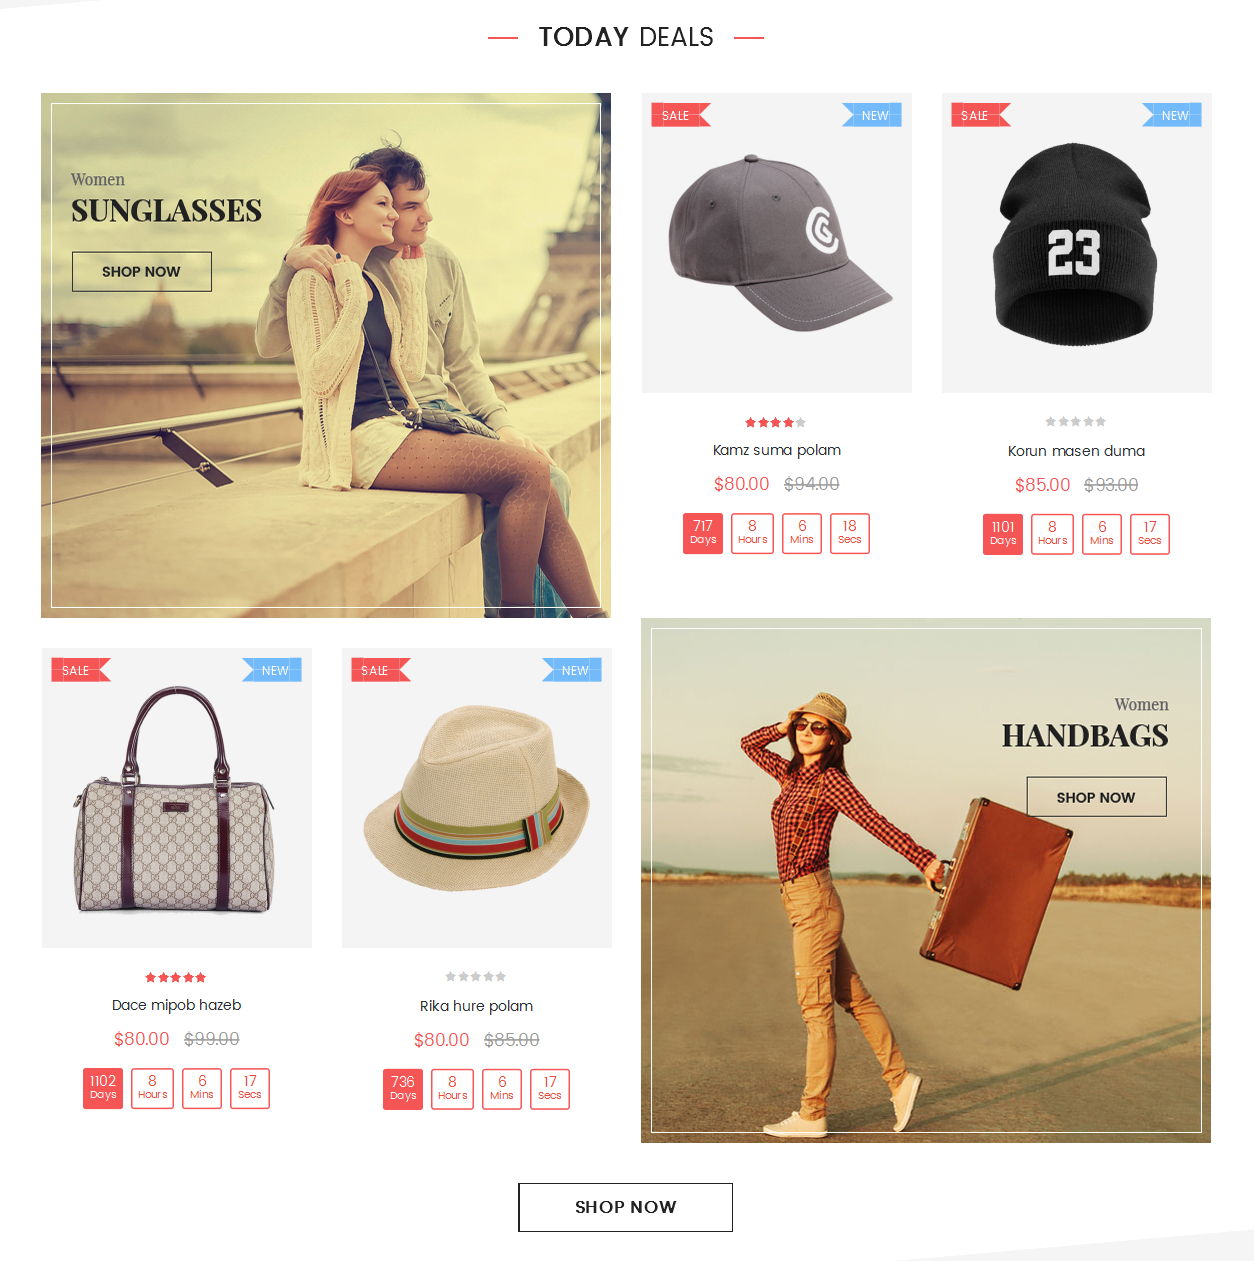
displayCountdownProduct
SP Countdown Products Slider – Hot deals
Frontend Appearance:
![]()
Backend Settings:
Step 1: In the Pretashop Admin Panel, navigate to Modules and Services >> Modules and Services >> look for “SP Countdown Products Slider” module.
![]()
Step 2: In the “SP Extra Slider” configuration page, click ![]() button in the right corner to “ADD NEW MODULE”.
button in the right corner to “ADD NEW MODULE”.
Step 3: You could configure this module like the following image.
![]()
display CustomHTML25
SP Custom HTML – Adv Women
Frontend Appearance:
![]()
Backend Settings:
Step 1: In the Pretashop Admin Panel, navigate to Modules and Services >> Modules and Services >> look for “SP Custom HTML” module >> click “Configure” button to configure.
![]()
Step 2: In the “SP Custom HTML” configuration page, click ![]() button in the right corner to “ADD NEW MODULE”.
button in the right corner to “ADD NEW MODULE”.
Step 3: You could configure this module like the following image.
![]()
Copy and paste the following code into the content:
<div class="adv_content"><a href="#"><img src="../themes/sp_topshop/img/cms/cate05.jpg" alt="" /></a></div>
displaySuperCategory9
SP Super Category – Women
Frontend Appearance:
![]()
Backend Settings:
Step 1: In the Pretashop Admin Panel, navigate to Modules and Services >> Modules and Services >> look for “SP Super Category” module.
![]()
Step 2: In the “SP Super Category” configuration page, click ![]() button in the right corner to “ADD NEW MODULE”.
button in the right corner to “ADD NEW MODULE”.
Step 3: You could configure this module like the following image.
![]()
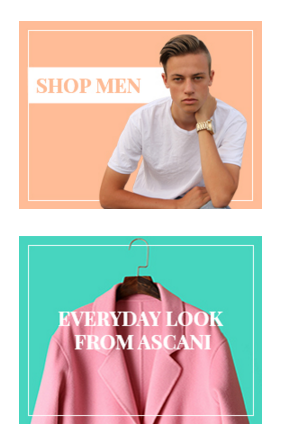
displaySuperCategory10
SP Super Category – Men
Frontend Appearance:
![]()
Backend Settings:
Step 1: In the Pretashop Admin Panel, navigate to Modules and Services >> Modules and Services >> look for “SP Super Category” module.
![]()
Step 2: In the “SP Super Category” configuration page, click ![]() button in the right corner to “ADD NEW MODULE”.
button in the right corner to “ADD NEW MODULE”.
Step 3: You could configure this module like the following image.
![]()
display CustomHTML26
SP Custom HTML – Adv Men
Frontend Appearance:
![]()
Backend Settings:
Step 1: In the Pretashop Admin Panel, navigate to Modules and Services >> Modules and Services >> look for “SP Custom HTML” module >> click “Configure” button to configure.
![]()
Step 2: In the “SP Custom HTML” configuration page, click ![]() button in the right corner to “ADD NEW MODULE”.
button in the right corner to “ADD NEW MODULE”.
Step 3: You could configure this module like the following image.
![]()
Copy and paste the following code into the content:
<div class="adv_content"><a href="#"><img src="../themes/sp_topshop/img/cms/cate06.jpg" alt="" /></a></div>
display CustomHTML27
SP Custom HTML – Shoe & Accessories
Frontend Appearance:
![]()
Backend Settings:
Step 1: In the Pretashop Admin Panel, navigate to Modules and Services >> Modules and Services >> look for “SP Custom HTML” module >> click “Configure” button to configure.
![]()
Step 2: In the “SP Custom HTML” configuration page, click ![]() button in the right corner to “ADD NEW MODULE”.
button in the right corner to “ADD NEW MODULE”.
Step 3: You could configure this module like the following image.
![]()
Copy and paste the following code into the content:
<div class="adv_content"><a href="#"><img src="../themes/sp_topshop/img/cms/cate07.jpg" alt="" /></a></div>
displaySuperCategory11
SP Super Category – Shoe & Accessories
Frontend Appearance:
![]()
Backend Settings:
Step 1: In the Pretashop Admin Panel, navigate to Modules and Services >> Modules and Services >> look for “SP Super Category” module.
![]()
Step 2: In the “SP Super Category” configuration page, click ![]() button in the right corner to “ADD NEW MODULE”.
button in the right corner to “ADD NEW MODULE”.
Step 3: You could configure this module like the following image.
![]()
display CustomHTML28
SP Custom HTML – banner bottom layout4
Frontend Appearance:
![]()
Backend Settings:
Step 1: In the Pretashop Admin Panel, navigate to Modules and Services >> Modules and Services >> look for “SP Custom HTML” module >> click “Configure” button to configure.
![]()
Step 2: In the “SP Custom HTML” configuration page, click ![]() button in the right corner to “ADD NEW MODULE”.
button in the right corner to “ADD NEW MODULE”.
Step 3: You could configure this module like the following image.
![]()
Copy and paste the following code into the content:
<div class="bannerbottom">
<div class="col-sm-6"><a href="#"><img src="../themes/sp_topshop/img/cms/banner11.jpg" alt="" /></a></div>
<div class="col-sm-6"><a href="#"><img src="../themes/sp_topshop/img/cms/banner12.jpg" alt="" /></a></div>
</div>
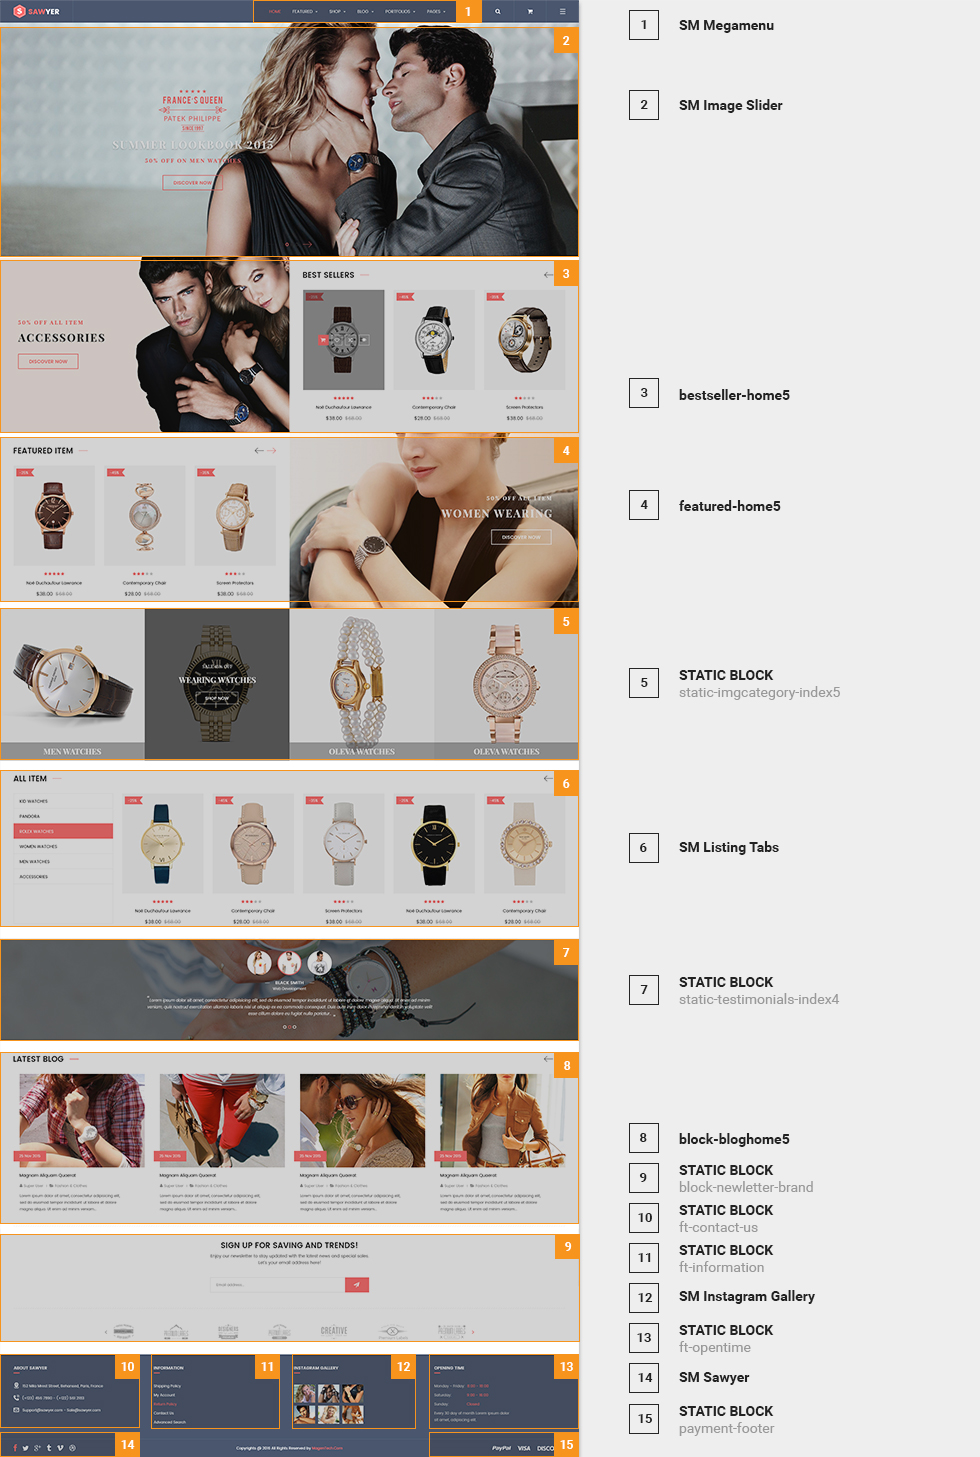
6.5 SP Topshop Layout 5
![home-layout5]()
displaySlideShow5
Sp slider for your homepage
Frontend Appearance:
![]()
Backend Settings:
Step 1: In the Pretashop Admin Panel, navigate to Modules and Services >> Modules and Services >> look for “SP Home Slider” module >> click “Configure” button to configure.
![]()
Step 2: In the “SP Slider For Your Homepage” configuration page, click ![]() button in the right corner to “ADD NEW MODULE”.
button in the right corner to “ADD NEW MODULE”.
Step 3: You could configure this module like the following image.
![]()
Step 4: In the last part named Slides List of this configuration page, click ![]() button in the right corner to add new slide and edit slide’s information as follows:
button in the right corner to add new slide and edit slide’s information as follows:
- Sample 13: Please click Here to view
- Sample 14: Please click Here to view
- Sample 15: Please click Here to view
display CustomHTML29
SP Custom HTML – banner slider layout5
Frontend Appearance:
![]()
Backend Settings:
Step 1: In the Pretashop Admin Panel, navigate to Modules and Services >> Modules and Services >> look for “SP Custom HTML” module >> click “Configure” button to configure.
![]()
Step 2: In the “SP Custom HTML” configuration page, click ![]() button in the right corner to “ADD NEW MODULE”.
button in the right corner to “ADD NEW MODULE”.
Step 3: You could configure this module like the following image.
![]()
Copy and paste the following code into the content:
<div class="banerslider"><a href="#"><img src="../themes/sp_topshop/img/cms/banner13.jpg" alt="" /></a></div>
display CustomHTML30
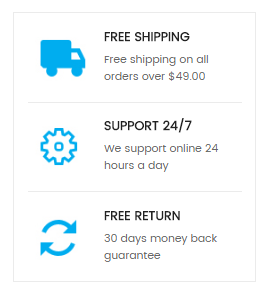
SP Custom HTML – Custom service layout5
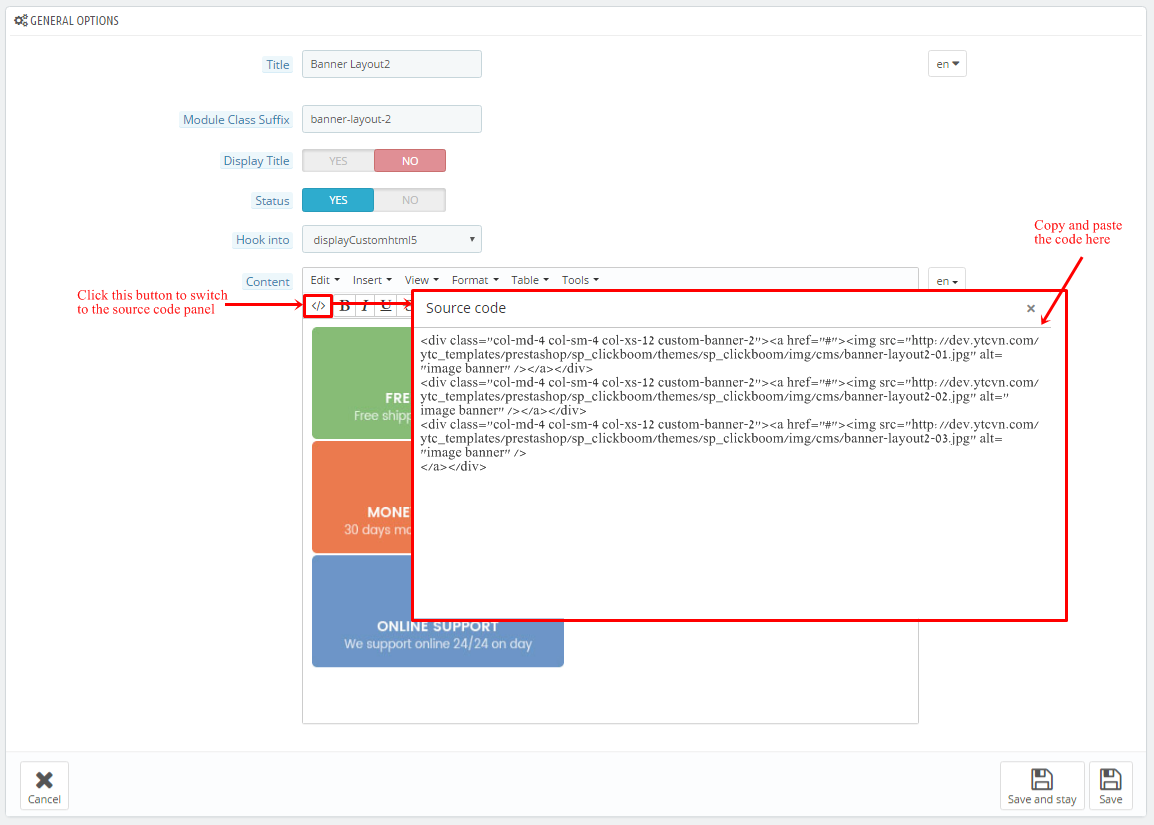
Frontend Appearance:
![]()
Backend Settings:
Step 1: In the Pretashop Admin Panel, navigate to Modules and Services >> Modules and Services >> look for “SP Custom HTML” module >> click “Configure” button to configure.
![]()
Step 2: In the “SP Custom HTML” configuration page, click ![]() button in the right corner to “ADD NEW MODULE”.
button in the right corner to “ADD NEW MODULE”.
Step 3: You could configure this module like the following image.
![]()
Copy and paste the following code into the content:
<div class="static-service-1-index5">
<div class="row">
<div class="col-lg-4 col-md-4 col-sm-4 col-xs-4 item-service">
<div class="icon1"></div>
<div class="info">
<p class="title">Free Shipping</p>
<p class="desc">On orders over $99.99</p>
</div>
</div>
<div class="col-lg-4 col-md-4 col-sm-4 col-xs-4  item-service">
<div class="icon2"></div>
<div class="info">
<p class="title">Money Back 100%</p>
<p class="desc">Within 30 Days after delivery</p>
</div>
</div>
<div class="col-lg-4 col-md-4 col-sm-4 col-xs-4  item-service">
<div class="icon3"></div>
<div class="info">
<p class="title">Support 24/7</p>
<p class="desc">Support 100%</p>
</div>
</div>
</div>
</div>
display CustomHTML32
SP Custom HTML – banner layout5 (1)
Frontend Appearance:
![]()
Backend Settings:
Step 1: In the Pretashop Admin Panel, navigate to Modules and Services >> Modules and Services >> look for “SP Custom HTML” module >> click “Configure” button to configure.
![]()
Step 2: In the “SP Custom HTML” configuration page, click ![]() button in the right corner to “ADD NEW MODULE”.
button in the right corner to “ADD NEW MODULE”.
Step 3: You could configure this module like the following image.
![]()
Copy and paste the following code into the content:
<p><a href="#"><img src="../themes/sp_topshop/img/cms/banner15.jpg" alt="" /></a></p>
display CustomHTML33
SP Custom HTML – banner layout5 (2)
Frontend Appearance:
![]()
Backend Settings:
Step 1: In the Pretashop Admin Panel, navigate to Modules and Services >> Modules and Services >> look for “SP Custom HTML” module >> click “Configure” button to configure.
![]()
Step 2: In the “SP Custom HTML” configuration page, click ![]() button in the right corner to “ADD NEW MODULE”.
button in the right corner to “ADD NEW MODULE”.
Step 3: You could configure this module like the following image.
![]()
Copy and paste the following code into the content:
<p><a href="#"><img src="../themes/sp_topshop/img/cms/banner16.jpg" alt="" /></a></p>
display CustomHTML31
SP Custom HTML – banner layout5
Frontend Appearance:
![]()
Backend Settings:
Step 1: In the Pretashop Admin Panel, navigate to Modules and Services >> Modules and Services >> look for “SP Custom HTML” module >> click “Configure” button to configure.
![]()
Step 2: In the “SP Custom HTML” configuration page, click ![]() button in the right corner to “ADD NEW MODULE”.
button in the right corner to “ADD NEW MODULE”.
Step 3: You could configure this module like the following image.
![]()
Copy and paste the following code into the content:
<p><a href="#"><img src="../themes/sp_topshop/img/cms/banner14.jpg" alt="" /></a></p>
displaySuperCategory12
SP Super Category – Women
Frontend Appearance:
![]()
Backend Settings:
Step 1: In the Pretashop Admin Panel, navigate to Modules and Services >> Modules and Services >> look for “SP Super Category” module.
![]()
Step 2: In the “SP Super Category” configuration page, click ![]() button in the right corner to “ADD NEW MODULE”.
button in the right corner to “ADD NEW MODULE”.
Step 3: You could configure this module like the following image.
![]()
displaySuperCategory13
SP Super Category – Men
Frontend Appearance:
![]()
Backend Settings:
Step 1: In the Pretashop Admin Panel, navigate to Modules and Services >> Modules and Services >> look for “SP Super Category” module.
![]()
Step 2: In the “SP Super Category” configuration page, click ![]() button in the right corner to “ADD NEW MODULE”.
button in the right corner to “ADD NEW MODULE”.
Step 3: You could configure this module like the following image.
![]()
displaySuperCategory14
SP Super Category – Shoe & Accessories
Frontend Appearance:
![]()
Backend Settings:
Step 1: In the Pretashop Admin Panel, navigate to Modules and Services >> Modules and Services >> look for “SP Super Category” module.
![]()
Step 2: In the “SP Super Category” configuration page, click ![]() button in the right corner to “ADD NEW MODULE”.
button in the right corner to “ADD NEW MODULE”.
Step 3: You could configure this module like the following image.
![]()
6.6 SP Topshop Layout 6
![home-default]()
displaySearch
SP Search Block
Frontend Appearance:
![]()
Backend Settings:
Step 1: In the Pretashop Admin Panel, navigate to Modules and Services >> Modules and Services >> look for “SP Search Pro” module >> click “Configure” button to configure.
![]()
Step 2: In the “SP Search Pro” configuration page, click ![]() button in the right corner to “ADD NEW MODULE”.
button in the right corner to “ADD NEW MODULE”.
Step 3: You could configure this module like the following image.
![]()
displayCart
SP Cart Block
Frontend Appearance:
![]()
Backend Settings:
Step 1: In the Pretashop Admin Panel, navigate to Modules and Services >> Modules and Services >> look for “SP Cart Block” module >> click “Configure” button to configure.
![]()
Step 2: In the “SP Cart Block” configuration page, click ![]() button in the right corner to “ADD NEW MODULE”.
button in the right corner to “ADD NEW MODULE”.
Step 3: You could configure this module like the following image.
![]()
displayUserinfo
SP User Info Block
Frontend Appearance:
![]()
Backend Settings:
In the Pretashop Admin Panel, navigate to Modules and Services >> Modules and Services >> look for “SP User Info Block” module >> click “Enable” button to enable this module.
![]()
displayTopNav
1. SP Block Currencies
Frontend Appearance:
![]()
Backend Settings:
In the Pretashop Admin Panel, navigate to Modules and Services >> Modules and Services >> look for “SP Currency Block” >> click “Enable” button to enable this module.
![]()
2. SP Block Languages
Frontend Appearance:
![]()
Backend Settings:
Step 1: To add language as you want. For example: To add “Arabic” language, in your Admin Panel >> navigate to LOCALIZATION >> Languages >> click ![]() button in the right corner to “ADD NEW”.
button in the right corner to “ADD NEW”.
![]()
Step 2: Fill information into the required field (*) as below:
![]()
Step 3: Click “Save” button and view shop to see the changes.
Note: When you add any language as you want, for example: Arabic language as above. At the frontend , some images will display “?” image as following:
![]() .
.
To resolve this error, please make the steps following:
1. In your administator, please find to position of this module, for example: Position – displayHtml35: banner slider layout6; Module: SP Custom HTML.
![]() .
.
2. And click source code to add “../” at before the image url >> Click “OK”.
![]() .
.
3. Click “Save” button and go to the frontend to view the changes.
![]()
displaySlideShow6
Sp slider for your homepage
Frontend Appearance:
![]()
Backend Settings:
Step 1: In the Pretashop Admin Panel, navigate to Modules and Services >> Modules and Services >> look for “SP Home Slider” module >> click “Configure” button to configure.
![]()
Step 2: In the “SP Slider For Your Homepage” configuration page, click ![]() button in the right corner to “ADD NEW MODULE”.
button in the right corner to “ADD NEW MODULE”.
Step 3: You could configure this module like the following image.
![]()
Step 4: In the last part named Slides List of this configuration page, click ![]() button in the right corner to add new slide and edit slide’s information as follows:
button in the right corner to add new slide and edit slide’s information as follows:
- Sample 13: Please click Here to view
- Sample 14: Please click Here to view
display CustomHTML35
SP Custom HTML – banner slider layout6
Frontend Appearance:
![]()
Backend Settings:
Step 1: In the Pretashop Admin Panel, navigate to Modules and Services >> Modules and Services >> look for “SP Custom HTML” module >> click “Configure” button to configure.
![]()
Step 2: In the “SP Custom HTML” configuration page, click ![]() button in the right corner to “ADD NEW MODULE”.
button in the right corner to “ADD NEW MODULE”.
Step 3: You could configure this module like the following image.
![]()
Copy and paste the following code into the content:
<div class="banner_l6"><a href="#" class="img1"><img src="../themes/sp_topshop/img/cms/banner_l6_1.jpg" alt="" /></a> <a href="#" class="img2"><img src="../themes/sp_topshop/img/cms/banner_l6_2.jpg" alt="" /></a></div>
display CustomHTML36
SP Custom HTML – Weve confident
Frontend Appearance:
![]()
Backend Settings:
Step 1: In the Pretashop Admin Panel, navigate to Modules and Services >> Modules and Services >> look for “SP Custom HTML” module >> click “Configure” button to configure.
![]()
Step 2: In the “SP Custom HTML” configuration page, click ![]() button in the right corner to “ADD NEW MODULE”.
button in the right corner to “ADD NEW MODULE”.
Step 3: You could configure this module like the following image.
![]()
Copy and paste the following code into the content:
<div class="custom_confident">
<div class="logo1 col-md-3 col-sm-3"><a href="#"><img src="../themes/sp_topshop/img/cms/logo_valenci_1.png" alt="" /></a></div>
<div class="text_custom col-md-9 col-sm-9">
<p>Weve confident weve provided all the best for you. Stay connect with us. <span>Thank so much!</span></p>
</div>
</div>
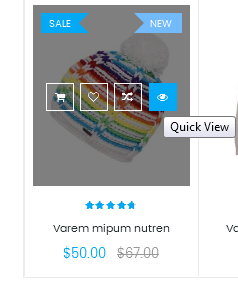
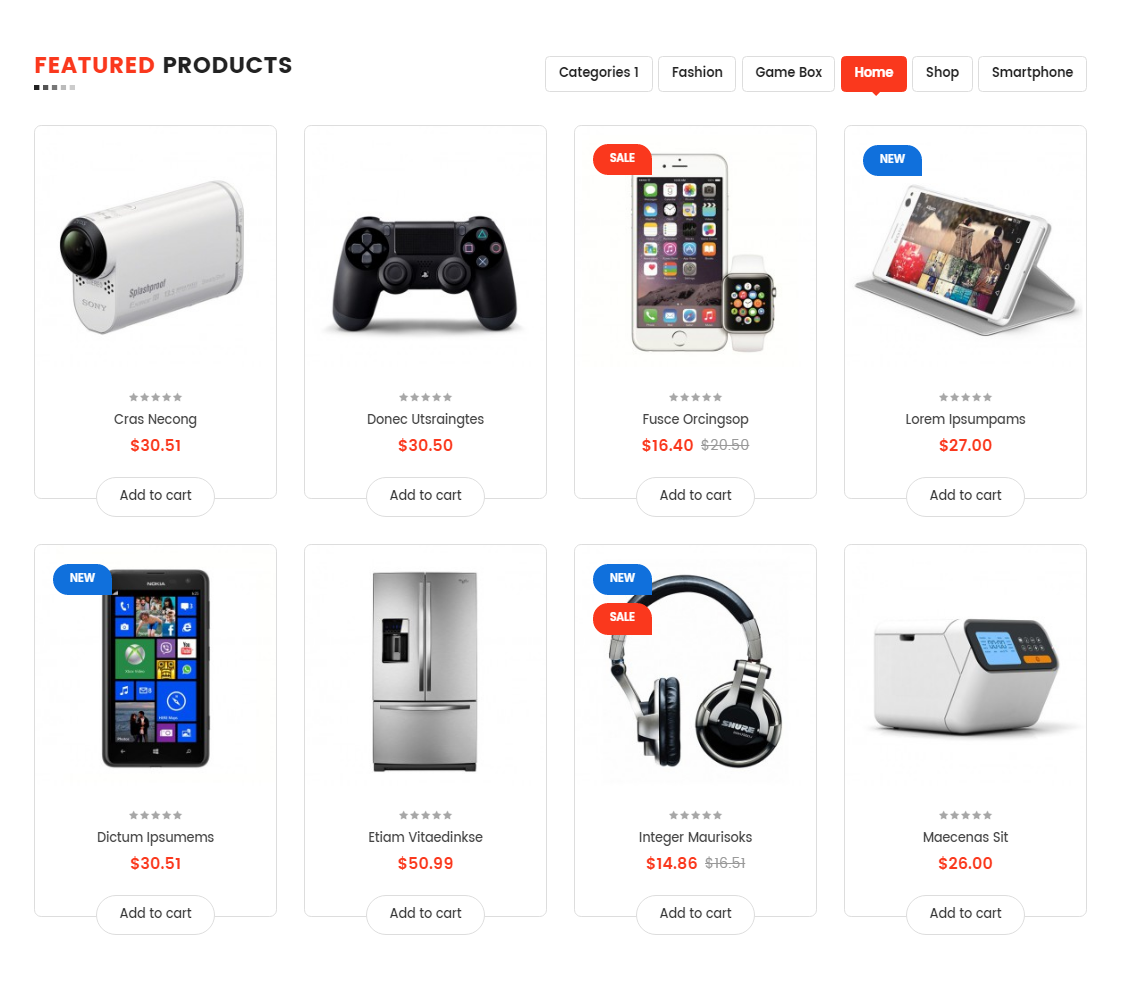
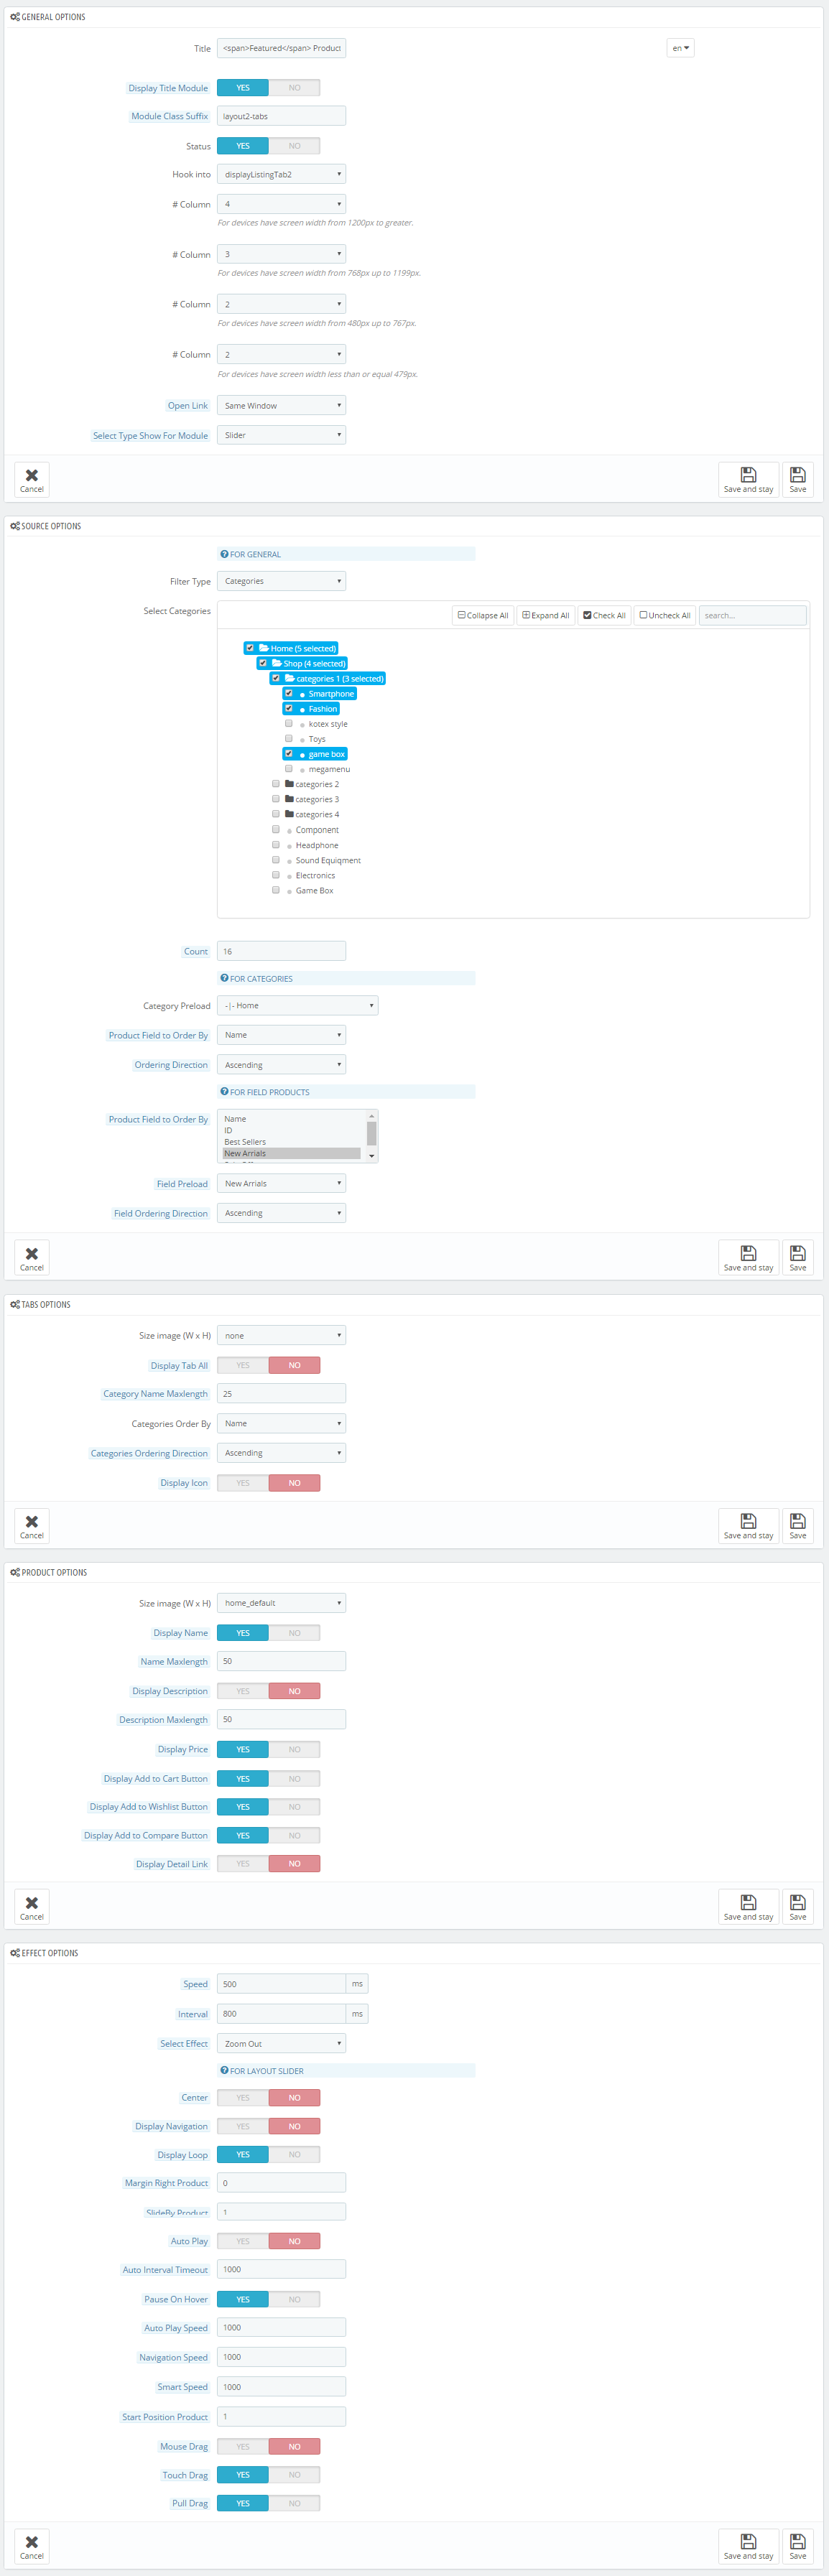
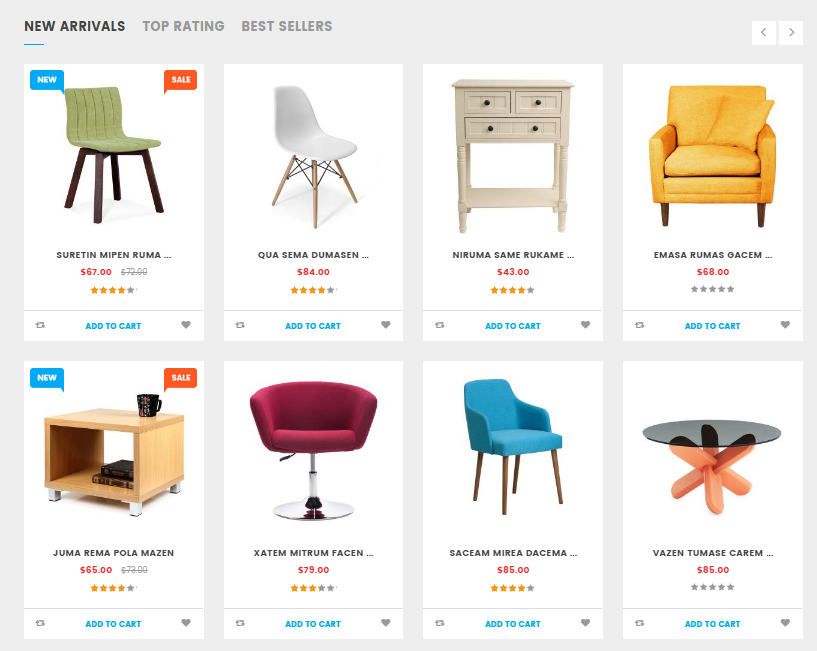
displayListingtab
SP Listing Tabs
Frontend Appearance:
![]()
Backend Settings:
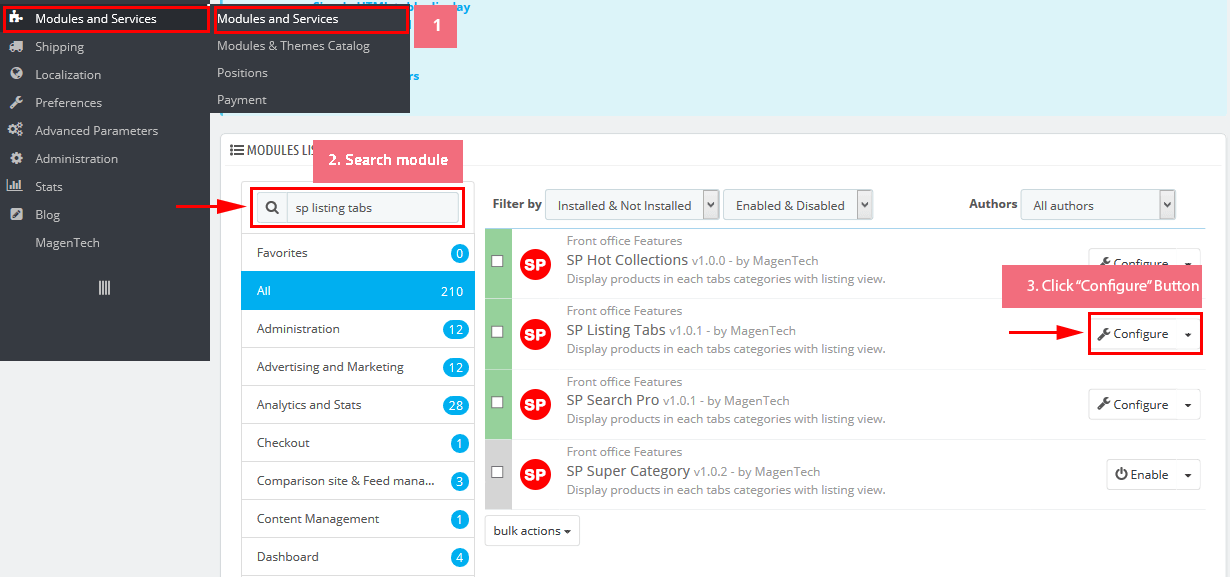
Step 1: In the Pretashop Admin Panel, navigate to Modules and Services >> Modules and Services >> look for “SP Listing Tabs” module.
![]()
Step 2: In the “SP Listing Tabs” configuration page, click ![]() button in the right corner to “ADD NEW MODULE”.
button in the right corner to “ADD NEW MODULE”.
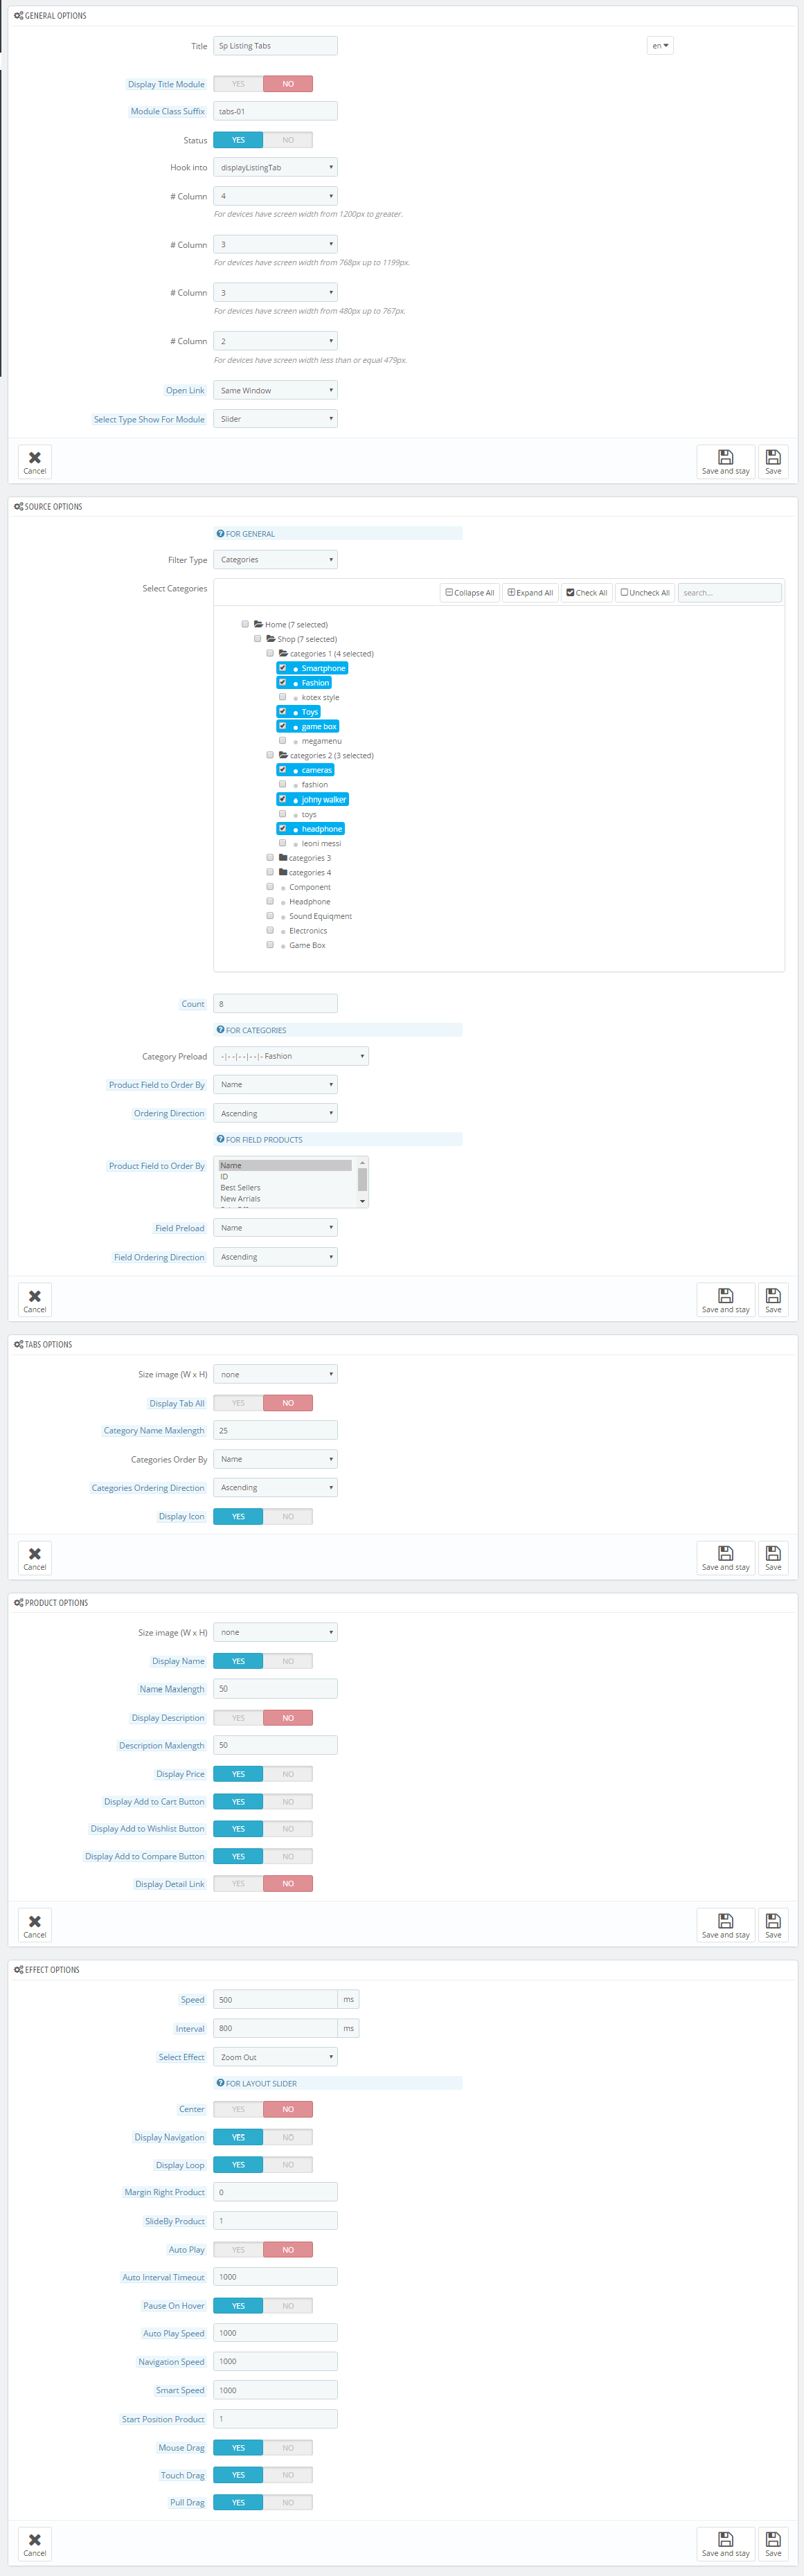
Step 3: You could configure this module like the following image.
![]()
display CustomHTML37
SP Custom HTML – Banner Left layout6
Frontend Appearance:
![]()
Backend Settings:
Step 1: In the Pretashop Admin Panel, navigate to Modules and Services >> Modules and Services >> look for “SP Custom HTML” module >> click “Configure” button to configure.
![]()
Step 2: In the “SP Custom HTML” configuration page, click ![]() button in the right corner to “ADD NEW MODULE”.
button in the right corner to “ADD NEW MODULE”.
Step 3: You could configure this module like the following image.
![]()
Copy and paste the following code into the content:
<div class="bgr_img"><a href="#"><img src="../themes/sp_topshop/img/cms/cate09.jpg" alt="" /></a></div>
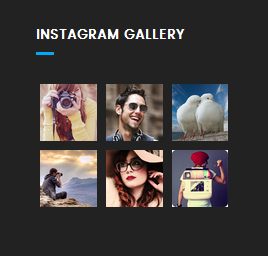
displayInstagram
SP Instagram Gallery
Frontend Appearance:
![]()
Backend Settings:
Step 1: In the Pretashop Admin Panel, navigate to Modules and Services >> Modules and Services >> look for “SP Instagram Gallery” module.
![]()
Step 2: In the “SP Instagram Gallery” configuration page, click ![]() button in the right corner to “ADD NEW MODULE”.
button in the right corner to “ADD NEW MODULE”.
Step 3: You could configure this module like the following image.
![]()
display CustomHTML38
SP Custom HTML – Banner center layout6
Frontend Appearance:
![]()
Backend Settings:
Step 1: In the Pretashop Admin Panel, navigate to Modules and Services >> Modules and Services >> look for “SP Custom HTML” module >> click “Configure” button to configure.
![]()
Step 2: In the “SP Custom HTML” configuration page, click ![]() button in the right corner to “ADD NEW MODULE”.
button in the right corner to “ADD NEW MODULE”.
Step 3: You could configure this module like the following image.
![]()
Copy and paste the following code into the content:
<div class="hotline_l6">
<div class="box box1">
<div class="images"><a href="#"><img src="../themes/sp_topshop/img/cms/box1.jpg" alt="" /></a></div>
<div class="content"><span class="icon">icon</span>
<h5>We support</h5>
<p>Online store 24/7</p>
</div>
</div>
<div class="box box2">
<div class="images"><a href="#"><img src="../themes/sp_topshop/img/cms/box2.jpg" alt="" /></a></div>
<div class="content"><span class="icon2">icon</span>
<h5>Free shipping</h5>
<p>Delivery world wide</p>
</div>
</div>
<div class="box box3">
<div class="images"><a href="#"><img src="../themes/sp_topshop/img/cms/box3.jpg" alt="" /></a></div>
<div class="content"><span class="icon3">icon</span>
<h5>Hotline</h5>
<p>(+084) 666 78901</p>
</div>
</div>
<div class="box box4 last">
<div class="images"><a href="#"><img src="../themes/sp_topshop/img/cms/box5.jpg" alt="" /></a></div>
<div class="content"><span class="icon4">icon</span>
<h5>Money back</h5>
<p>While not exactly line</p>
</div>
</div>
</div>
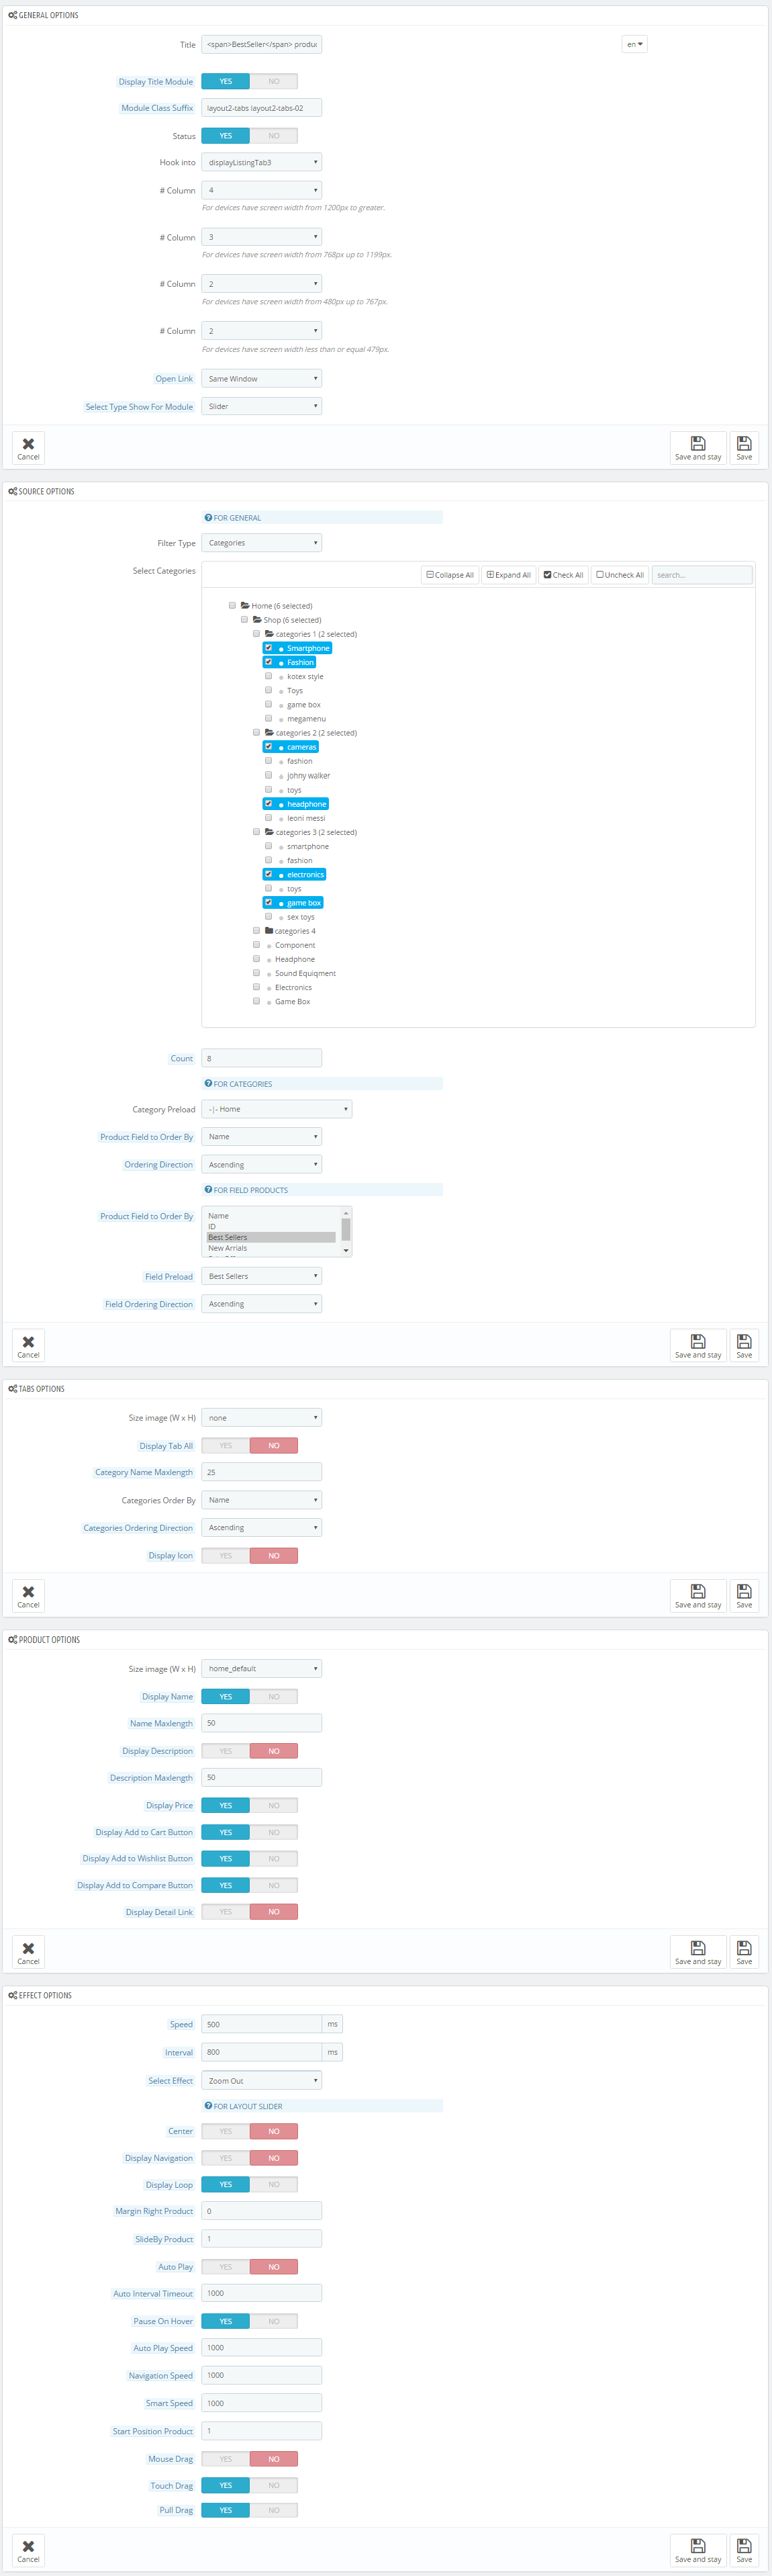
displayListingtab2
SP Listing Tabs
Frontend Appearance:
![]()
Backend Settings:
Step 1: In the Pretashop Admin Panel, navigate to Modules and Services >> Modules and Services >> look for “SP Listing Tabs” module.
![]()
Step 2: In the “SP Listing Tabs” configuration page, click ![]() button in the right corner to “ADD NEW MODULE”.
button in the right corner to “ADD NEW MODULE”.
Step 3: You could configure this module like the following image.
![]()
display CustomHTML39
SP Custom HTML – Banner bottom layout6
Frontend Appearance:
![]()
Backend Settings:
Step 1: In the Pretashop Admin Panel, navigate to Modules and Services >> Modules and Services >> look for “SP Custom HTML” module >> click “Configure” button to configure.
![]()
Step 2: In the “SP Custom HTML” configuration page, click ![]() button in the right corner to “ADD NEW MODULE”.
button in the right corner to “ADD NEW MODULE”.
Step 3: You could configure this module like the following image.
![]()
Copy and paste the following code into the content:
<div class="img1 col-sm-3 col-md-3 col-lg-3"<<a href="#"<<img src="../themes/sp_topshop/img/cms/banner_l6_3.jpg" alt="" /<</a<</div<
<div class="img2 col-sm-3 col-md-3 col-lg-3"<<a href="#"<<img src="../themes/sp_topshop/img/cms/banner_l6_4.jpg" alt="" /<</a<</div<
<div class="img3 col-sm-6 col-md-6 col-lg-6"<<a href="#"<<img src="../themes/sp_topshop/img/cms/banner_l6_5.jpg" alt="" /<</a<</div<
SP Extra Slider – Hot Sale
Frontend Appearance:
![]()
Backend Settings:
Step 1: In the Pretashop Admin Panel, navigate to Modules and Services >> Modules and Services >> look for “SP Extra Slider” module.
![]()
Step 2: In the “SP Extra Slider” configuration page, click ![]() button in the right corner to “ADD NEW MODULE”.
button in the right corner to “ADD NEW MODULE”.
Step 3: You could configure this module like the following image.
![]()
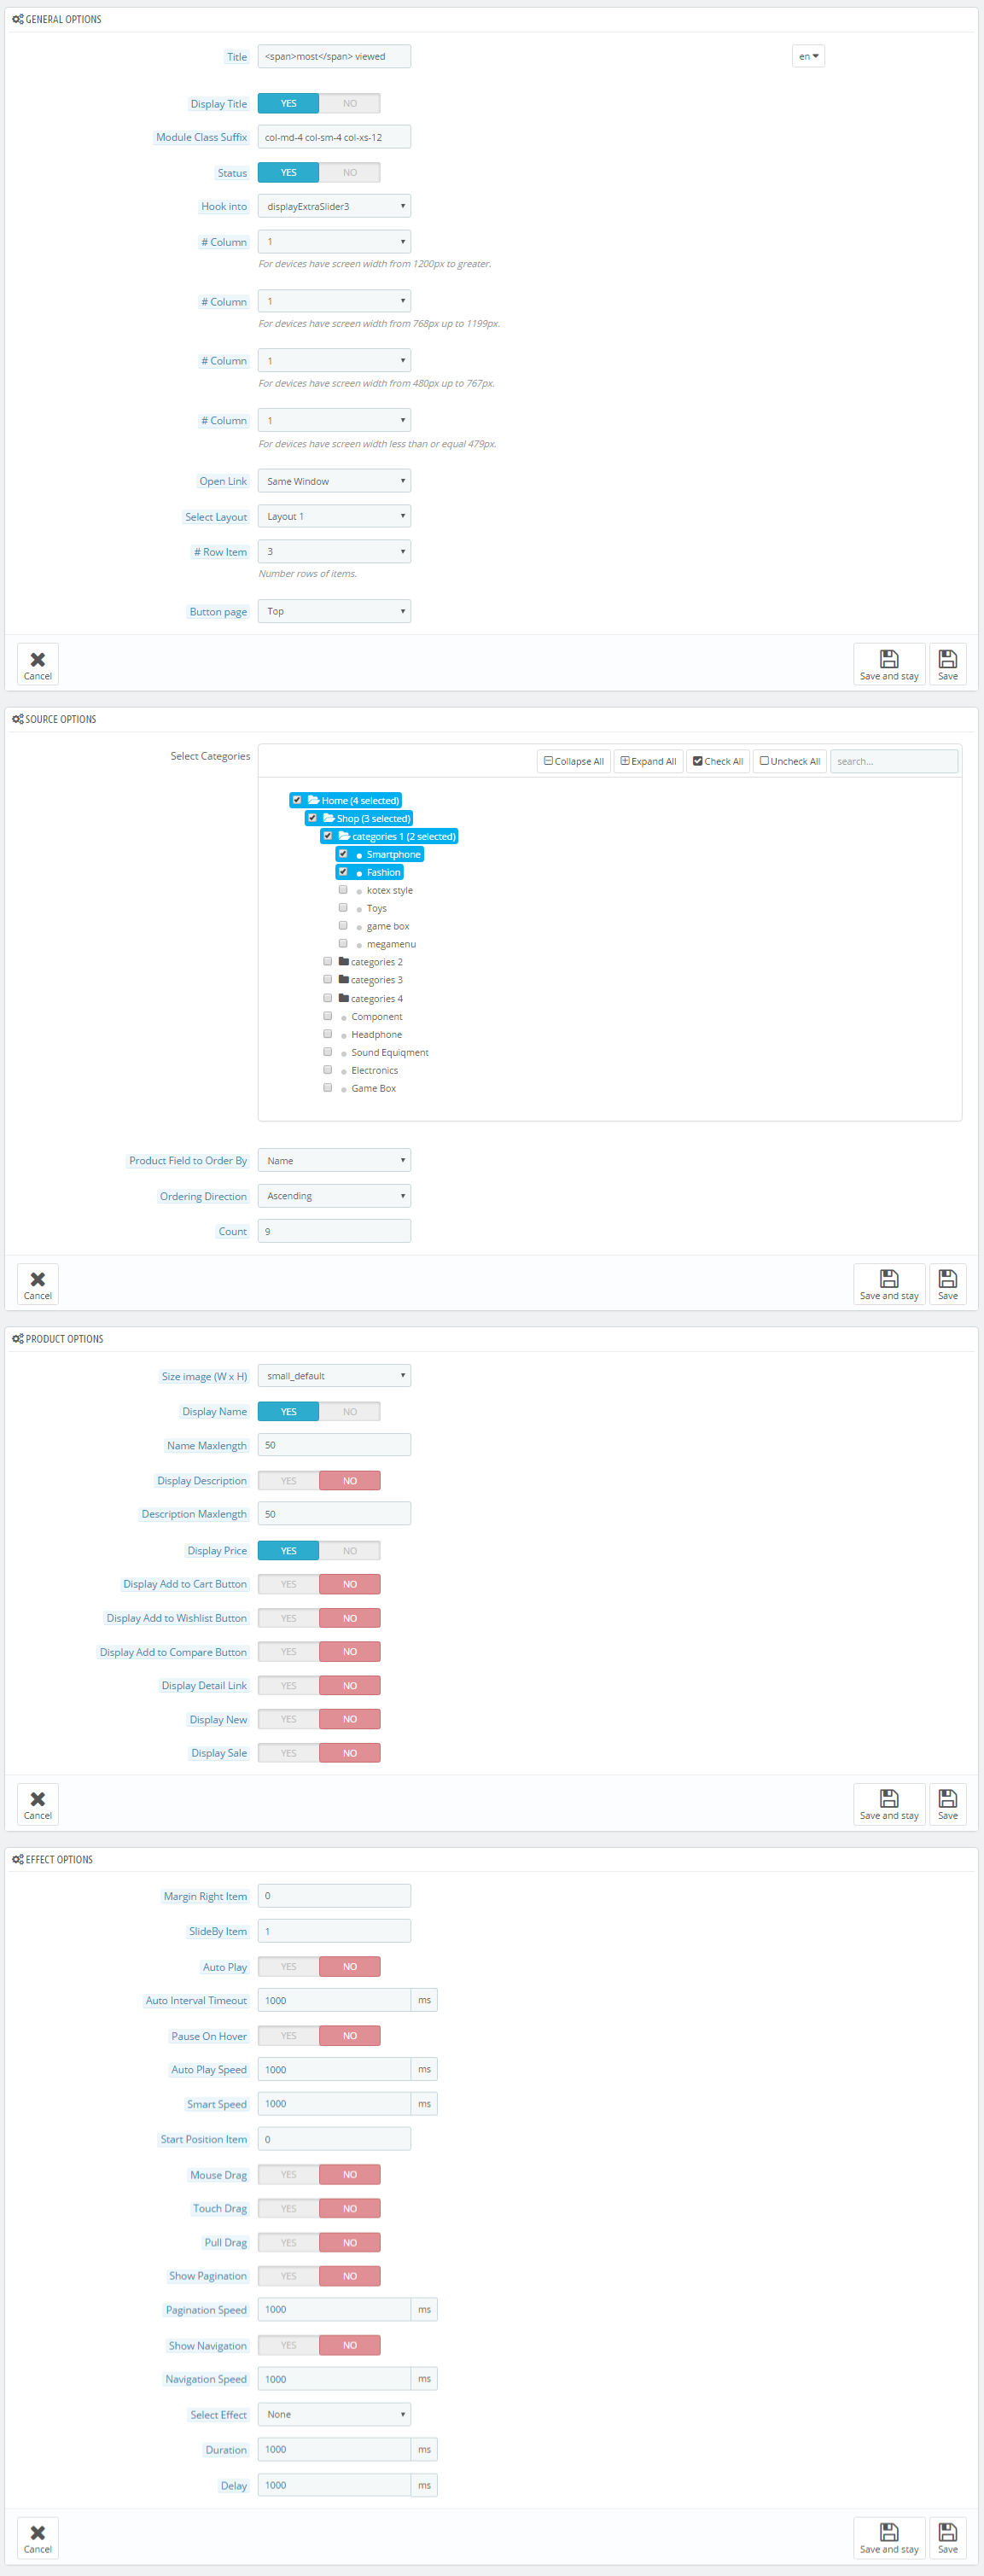
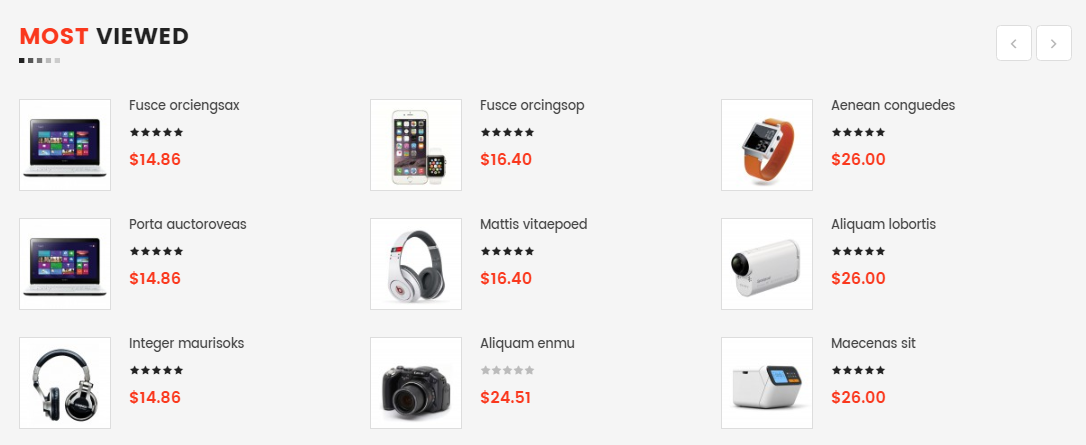
SP Extra Slider – Recent
Frontend Appearance:
![]()
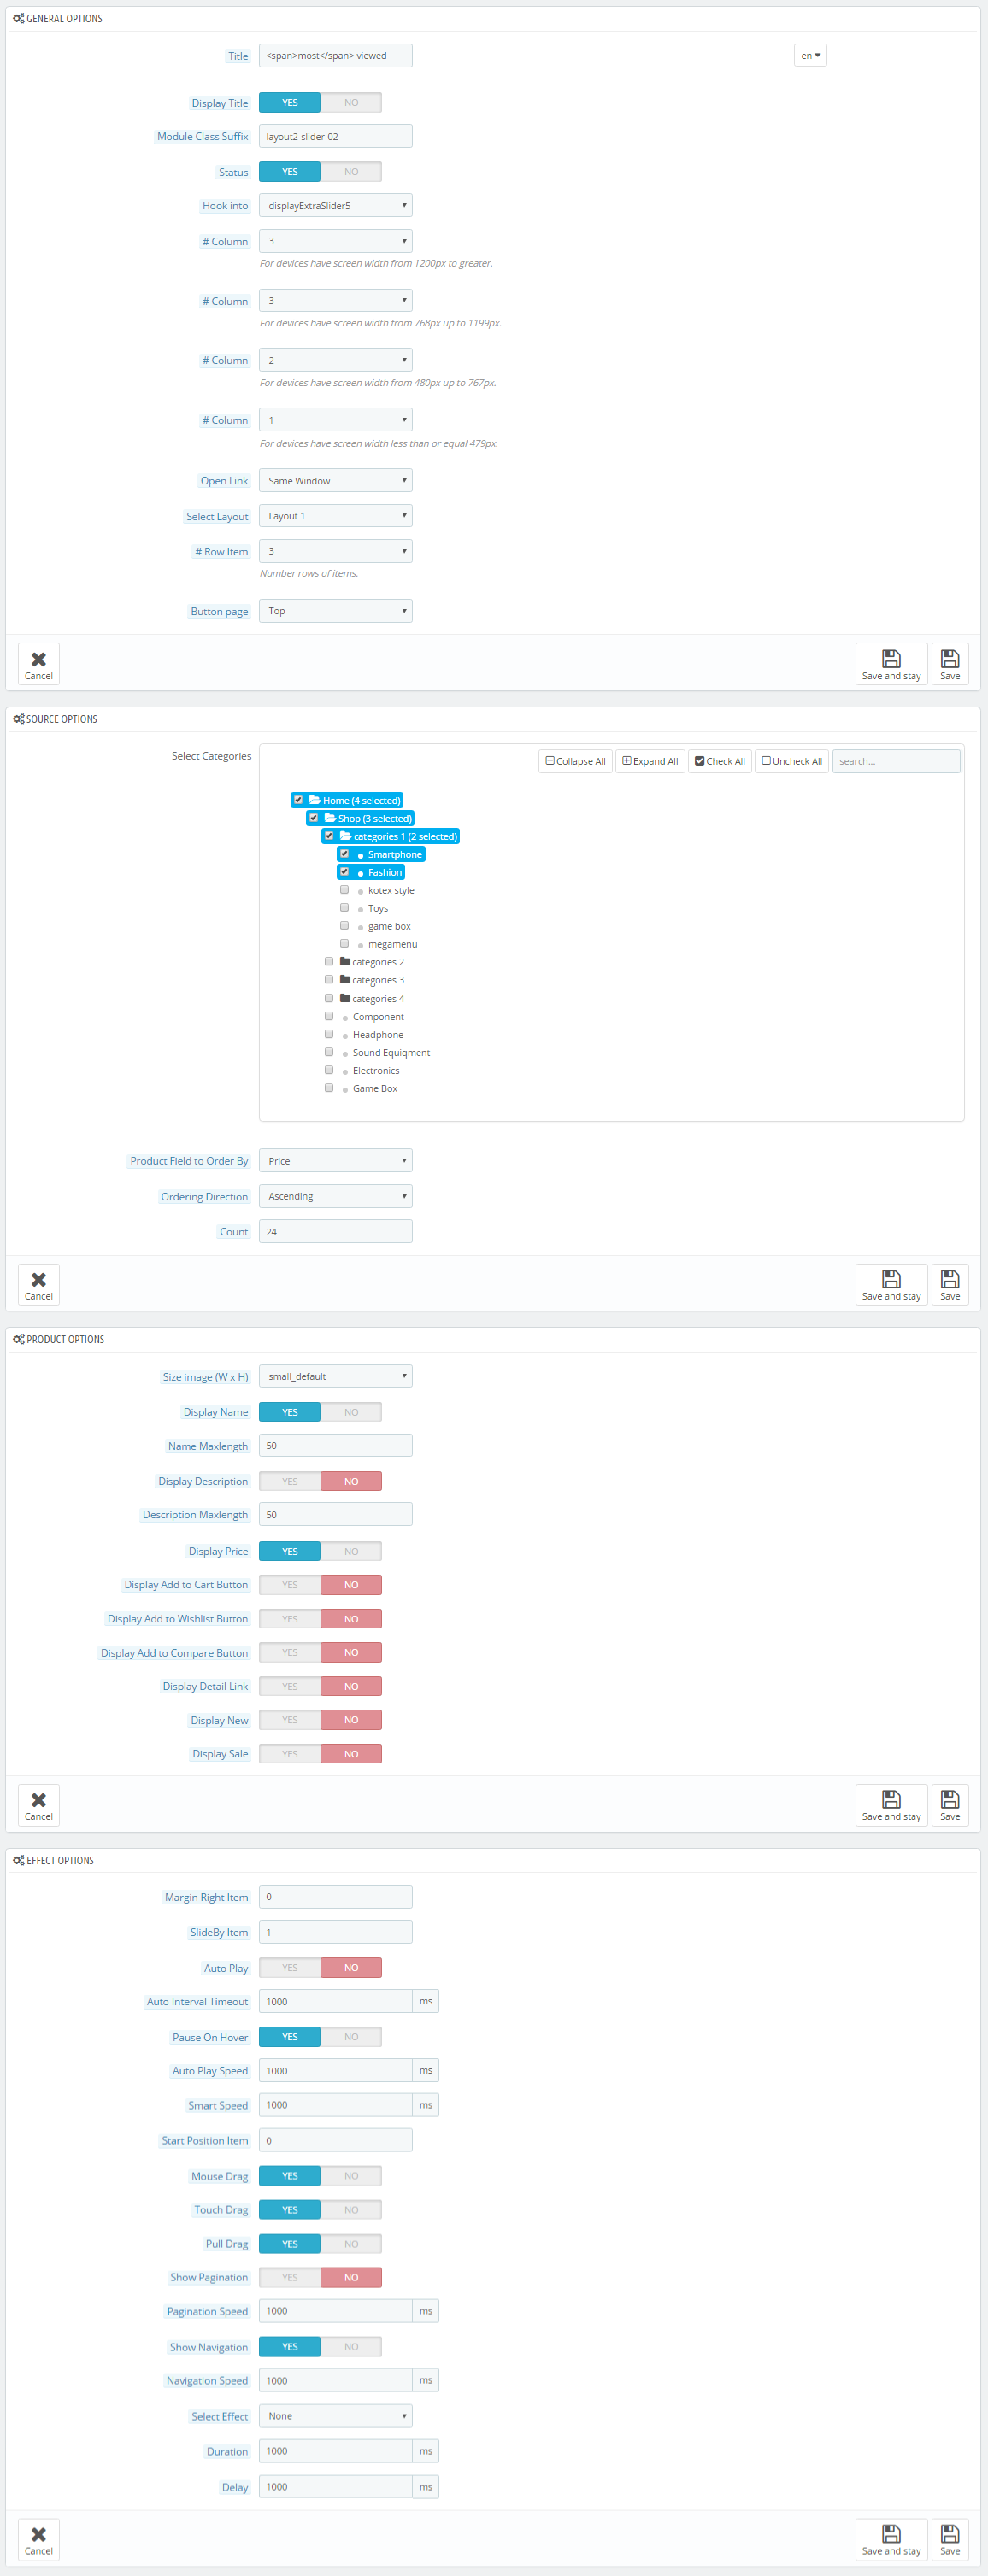
Backend Settings:
Step 1: In the Pretashop Admin Panel, navigate to Modules and Services >> Modules and Services >> look for “SP Extra Slider” module.
![]()
Step 2: In the “SP Extra Slider” configuration page, click ![]() button in the right corner to “ADD NEW MODULE”.
button in the right corner to “ADD NEW MODULE”.
Step 3: You could configure this module like the following image.
![]()
displayDeal3
SP Deal – hot deals
Frontend Appearance:
![]()
Backend Settings:
Step 1: In the Pretashop Admin Panel, navigate to Modules and Services >> Modules and Services >> look for “SP Deal” module.
![]()
Step 2: In the “SP Deal” configuration page, click ![]() button in the right corner to “ADD NEW MODULE”.
button in the right corner to “ADD NEW MODULE”.
Step 3: You could configure this module like the following image.
![]()
displayHomeNews4
SP SmartBlog Home Lastest
Frontend Appearance:
![]()
Backend Settings:
Step 1: In the Pretashop Admin Panel, navigate to Modules and Services >> Modules and Services >> look for “SmartBlog Home Lastest” module.
![]()
Step 2: You could configure this module like the following image.
![]()
displayManufacturer3
SP Manufacture Slider – Our Brands layout6
Frontend Appearance:
![]()
Backend Settings:
Step 1: In the Pretashop Admin Panel, navigate to Modules and Services >> Modules and Services >> look for “SP Manufacture Slider” module.
![]()
Step 2: In the “SP Deal” configuration page, click ![]() button in the right corner to “ADD NEW MODULE”.
button in the right corner to “ADD NEW MODULE”.
Step 3: You could configure this module like the following image.
![]()
display CustomHTML40
SP Custom HTML – Logo bottom l6
Frontend Appearance:
![]()
Backend Settings:
Step 1: In the Pretashop Admin Panel, navigate to Modules and Services >> Modules and Services >> look for “SP Custom HTML” module >> click “Configure” button to configure.
![]()
Step 2: In the “SP Custom HTML” configuration page, click ![]() button in the right corner to “ADD NEW MODULE”.
button in the right corner to “ADD NEW MODULE”.
Step 3: You could configure this module like the following image.
![]()
Copy and paste the following code into the content:
<p><a href="#"><img src="http://yourstore.com/themes/sp_topshop/img/logovalenci_footer.png" alt="" /></a></p>
Contact Information Block
Frontend Appearance:
![]()
Backend Settings:
Step 1: In the Pretashop Admin Panel, navigate to Modules and Services >> Modules and Services >> look for “Contact Information Block” module.
![]()
Step 2: You could configure this module like the following image.
![]()
display CustomHTML41
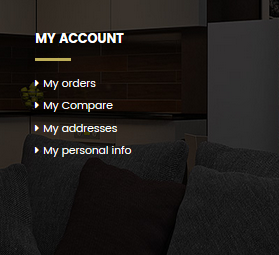
SP Custom HTML – MY ACCOUNT
Frontend Appearance:
![]()
Backend Settings:
Step 1: In the Pretashop Admin Panel, navigate to Modules and Services >> Modules and Services >> look for “SP Custom HTML” module >> click “Configure” button to configure.
![]()
Step 2: In the “SP Custom HTML” configuration page, click ![]() button in the right corner to “ADD NEW MODULE”.
button in the right corner to “ADD NEW MODULE”.
Step 3: You could configure this module like the following image.
![]()
Copy and paste the following code into the content:
<ul>
<li><a href="http://yourstore.com/en/my-account">My Account</a></li>
<li><a href="#">Order History</a></li>
<li><a href="http://yourstore.com/en/module/blockwishlist/mywishlist">Wish List</a></li>
<li><a href="#">Newsletter</a></li>
<li><a href="#">Specials</a></li>
</ul>
display CustomHTML42
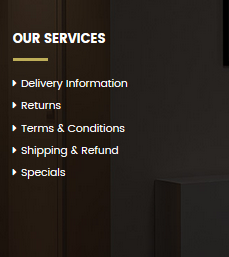
SP Custom HTML – OUR SERVICES
Frontend Appearance:
![]()
Backend Settings:
Step 1: In the Pretashop Admin Panel, navigate to Modules and Services >> Modules and Services >> look for “SP Custom HTML” module >> click “Configure” button to configure.
![]()
Step 2: In the “SP Custom HTML” configuration page, click ![]() button in the right corner to “ADD NEW MODULE”.
button in the right corner to “ADD NEW MODULE”.
Step 3: You could configure this module like the following image.
![]()
Copy and paste the following code into the content:
<ul>
<li><a href="http://yourstore.com/en/contact-us">Contact Us</a></li>
<li><a href="#">Discount</a></li>
<li><a href="#">Sitemap</a></li>
<li><a href="http://yourstore.com/en/content/4-about-us">About Us</a></li>
<li><a href="#">Custom Service</a></li>
</ul>
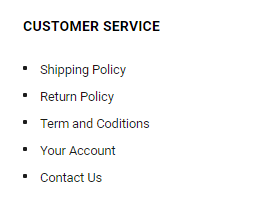
display CustomHTML43
SP Custom HTML – SUPPORT
Frontend Appearance:
![]()
Backend Settings:
Step 1: In the Pretashop Admin Panel, navigate to Modules and Services >> Modules and Services >> look for “SP Custom HTML” module >> click “Configure” button to configure.
![]()
Step 2: In the “SP Custom HTML” configuration page, click ![]() button in the right corner to “ADD NEW MODULE”.
button in the right corner to “ADD NEW MODULE”.
Step 3: You could configure this module like the following image.
![]()
Copy and paste the following code into the content:
<ul>
<li><a href="http://yourstore.com/en/content/4-about-us">About us</a></li>
<li><a href="#">Deliveru information</a></li>
<li><a href="#">Privacy policy</a></li>
<li><a href="#">Terms & conditions</a></li>
</ul>
SP Theme Configuration
Frontend Appearance:
![]()
Backend Settings: Go Here to see the backend settings.
displayNewsletter
SP Newsletter Block
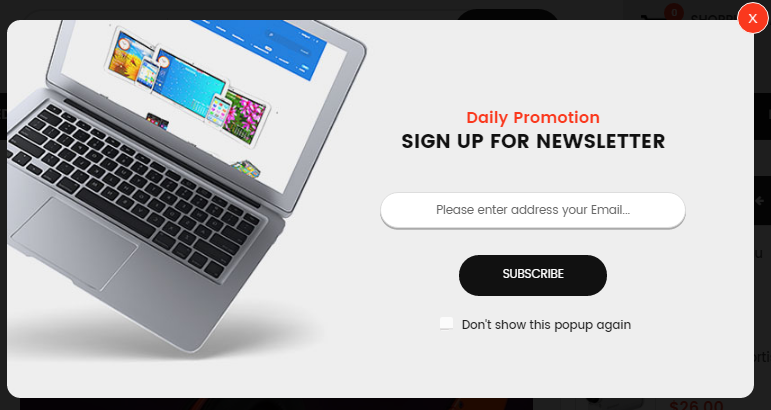
Frontend Appearance:
![]()
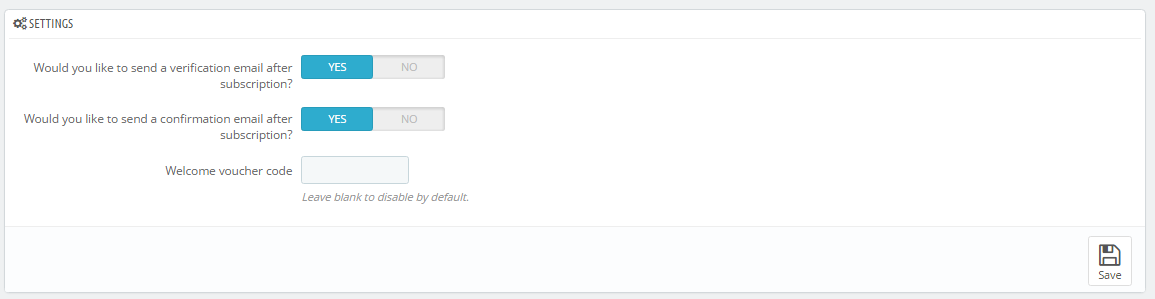
Backend Settings:
Step 1: In the Pretashop Admin Panel, navigate to Modules and Services >> Modules and Services >> look for “SP Newsletter Block” module.
![]()
Step 2: You could configure its settings like the following image.
![]()
To edit the text in this module, please follow these steps:
In your Website’s Directory, go to themes\sp_topshop\modules\spblocknewsletter folder. To change the text in this module, in this folder, you could open the file named blocknewsletter3.tpl by your editor program.
You could find and change the text you want to edit, such as: Subscribe to receive inspiration, ideas and news in your inbox.
![]()


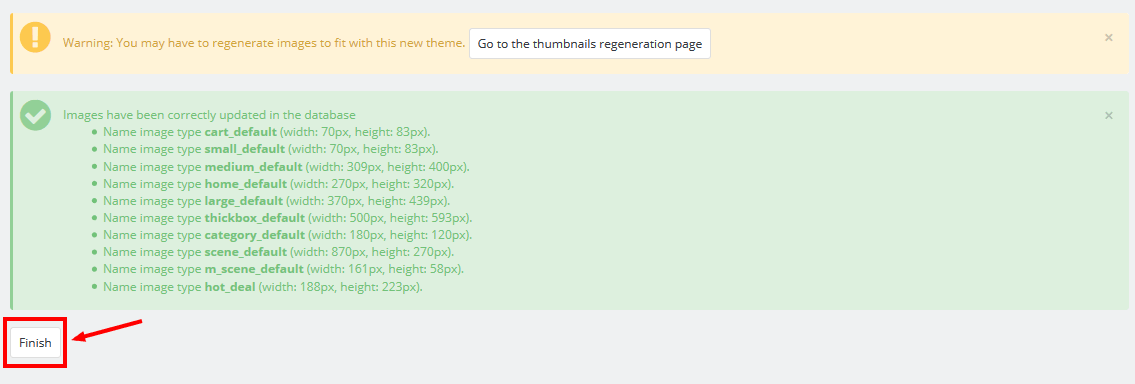
 When you are done, click the ‘Next’ button.


 button in the right corner to “ADD NEW MODULE”.


 .
. .
. .
.


 button in the right corner to add new slide and edit slide’s information as follows:


 When you are done, click the ‘Next’ button.


 button in the right corner to “ADD NEW MODULE”.


 .
. .
. .
.


 button in the right corner to “ADD NEW MODULE”.


 button in the right corner to add new slide and edit slide’s information as follows:


 button in the right corner to “ADD NEW MODULE”.


 .
. .
. .
.


 When you are done, click the ‘Next’ button.


 button in the right corner to “ADD NEW”.

 .
. .
. .
.


 button in the right corner to add new slide and edit slide’s information as follows:


 When you are done, click the ‘Next’ button.


 button in the right corner to “ADD NEW MODULE”.
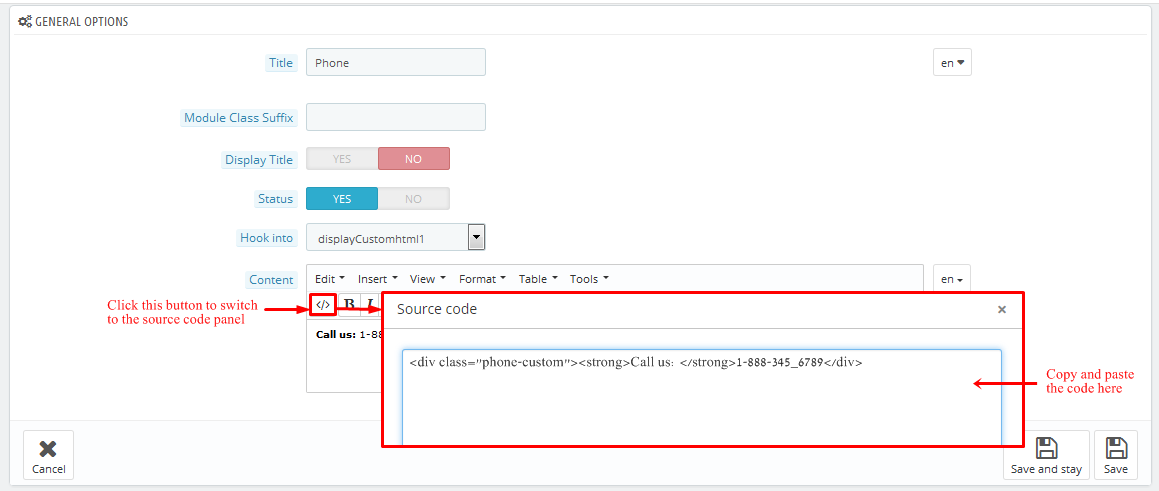


 .
. .
. .
.


 When you are done, click the ‘Next’ button.


 button in the right corner to “ADD NEW MODULE”.


 button in the right corner to “ADD NEW MODULE”.


