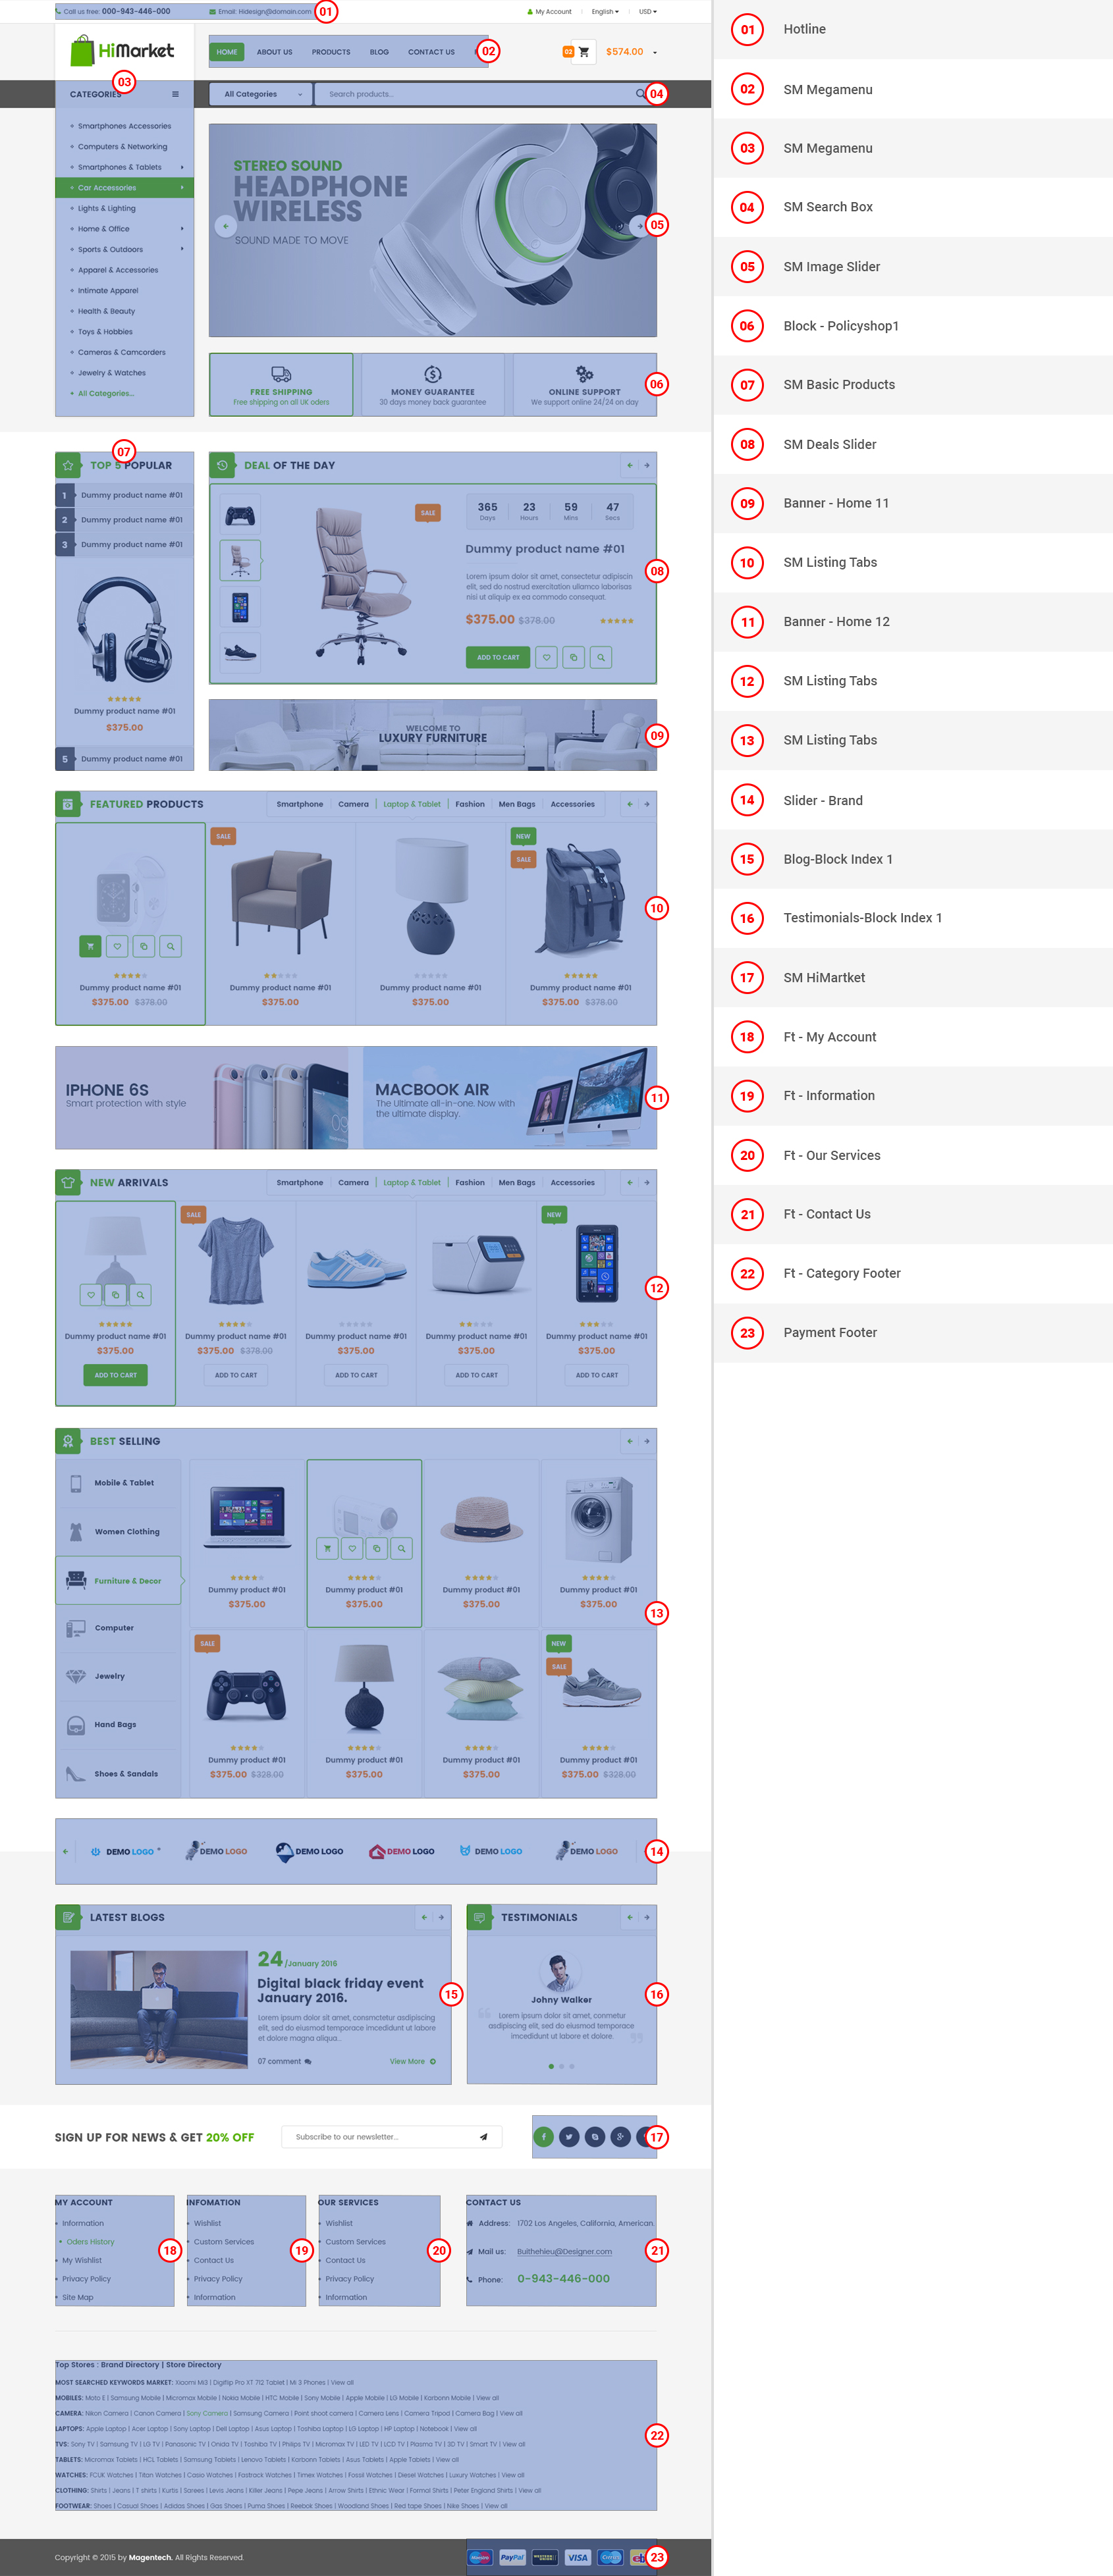
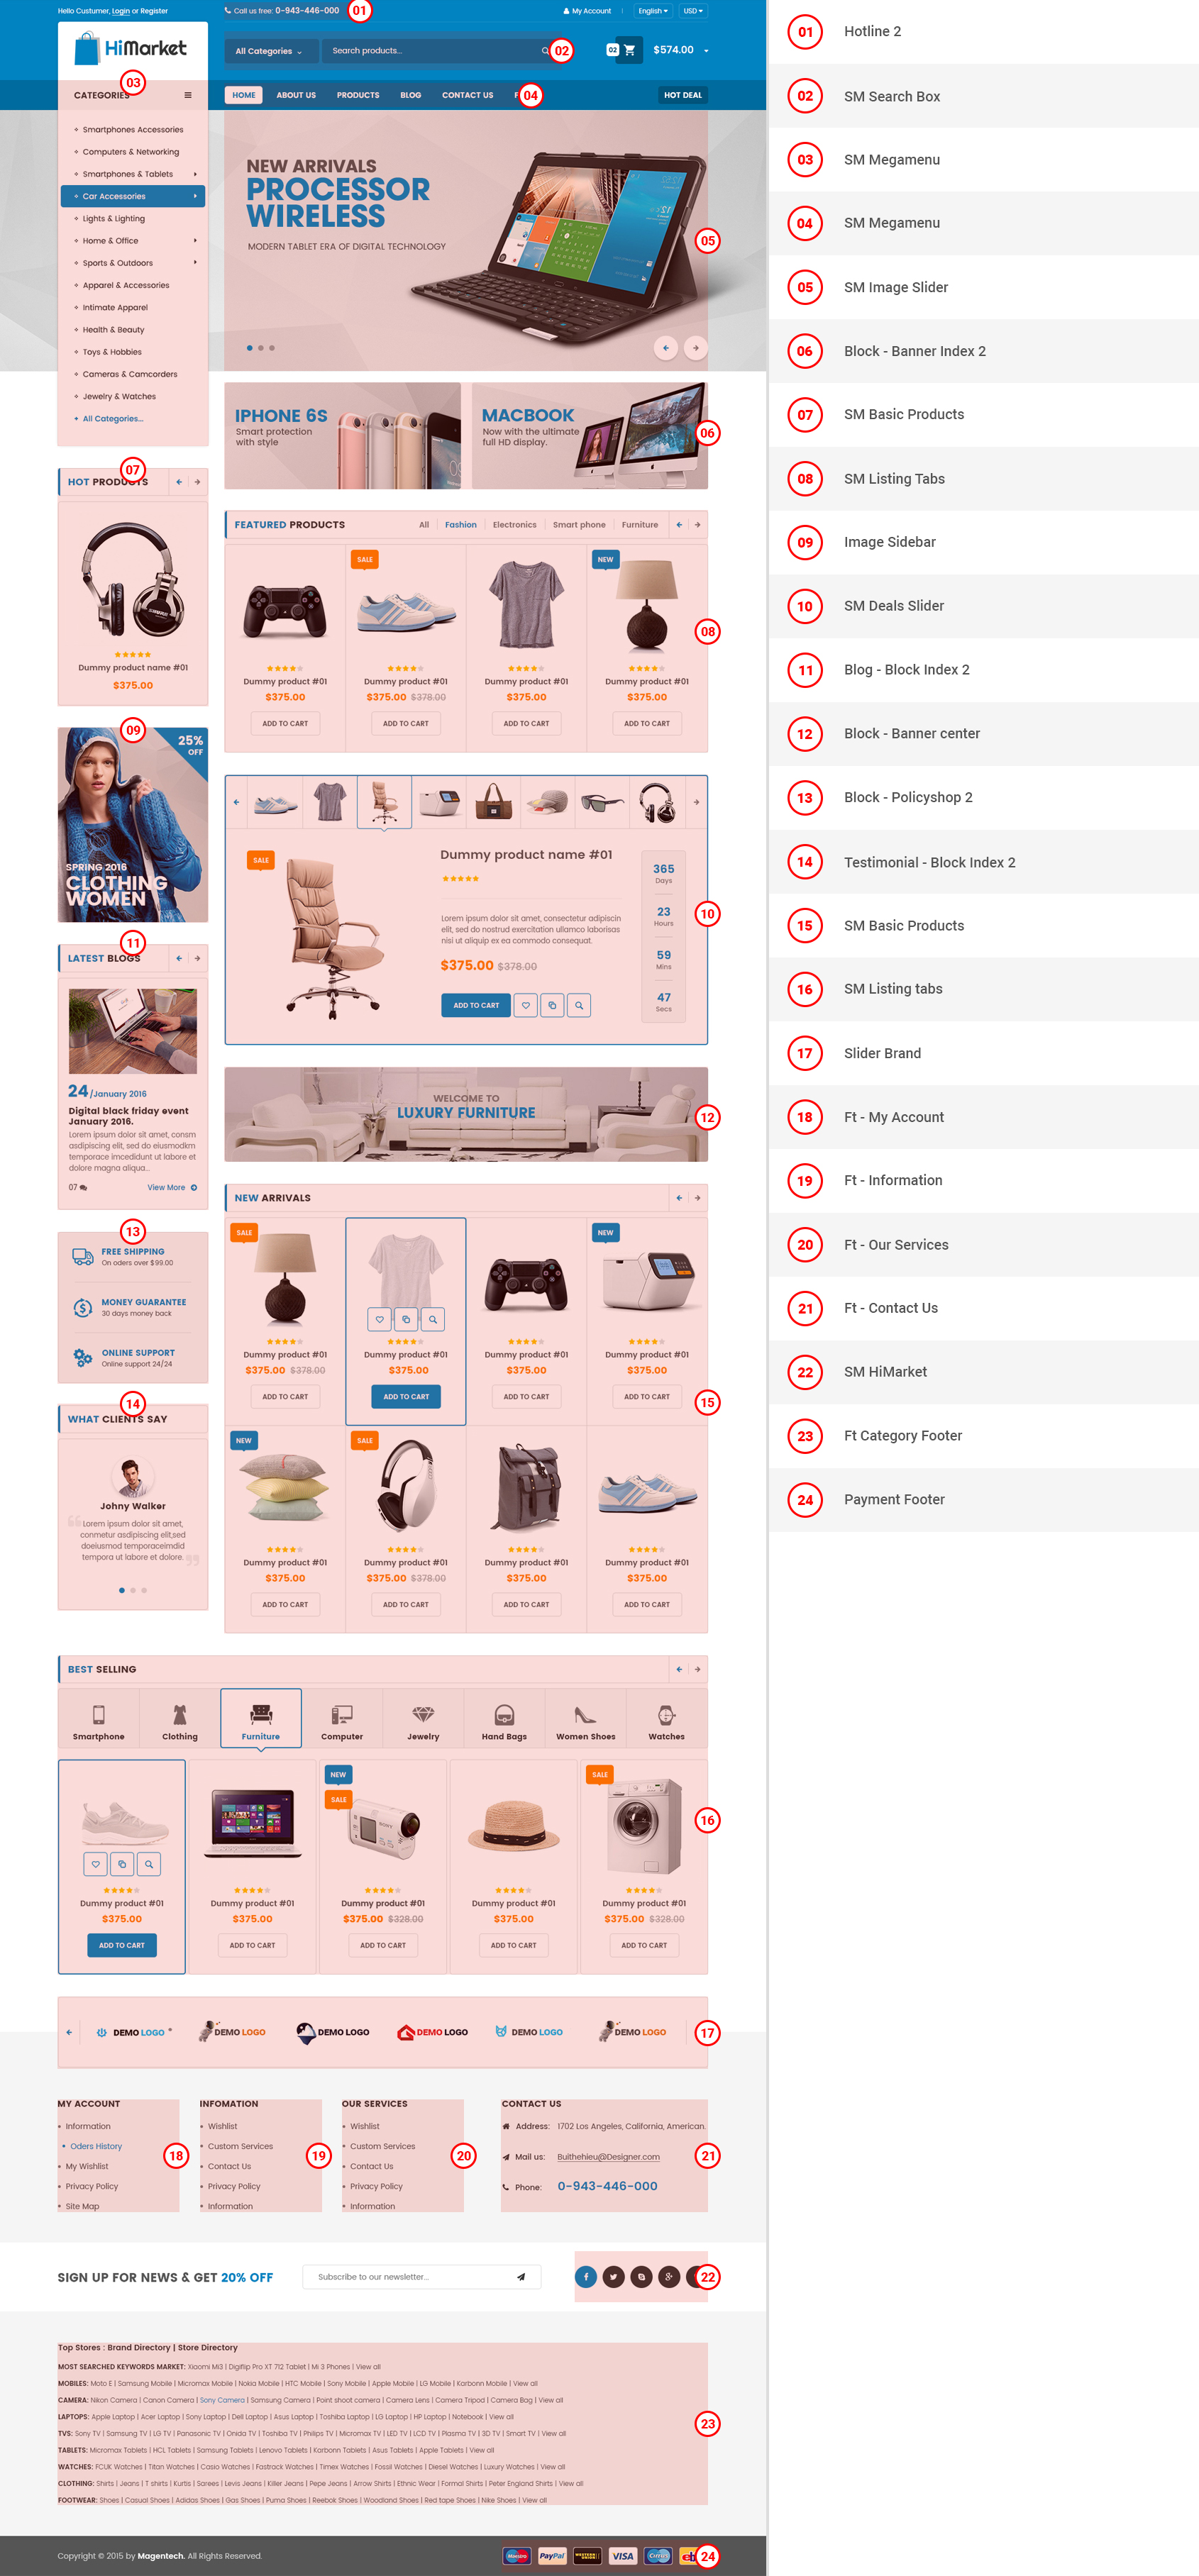
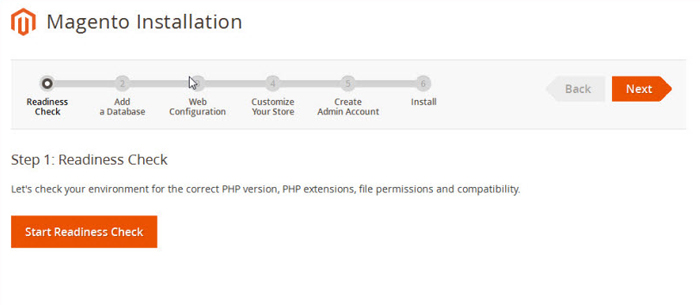
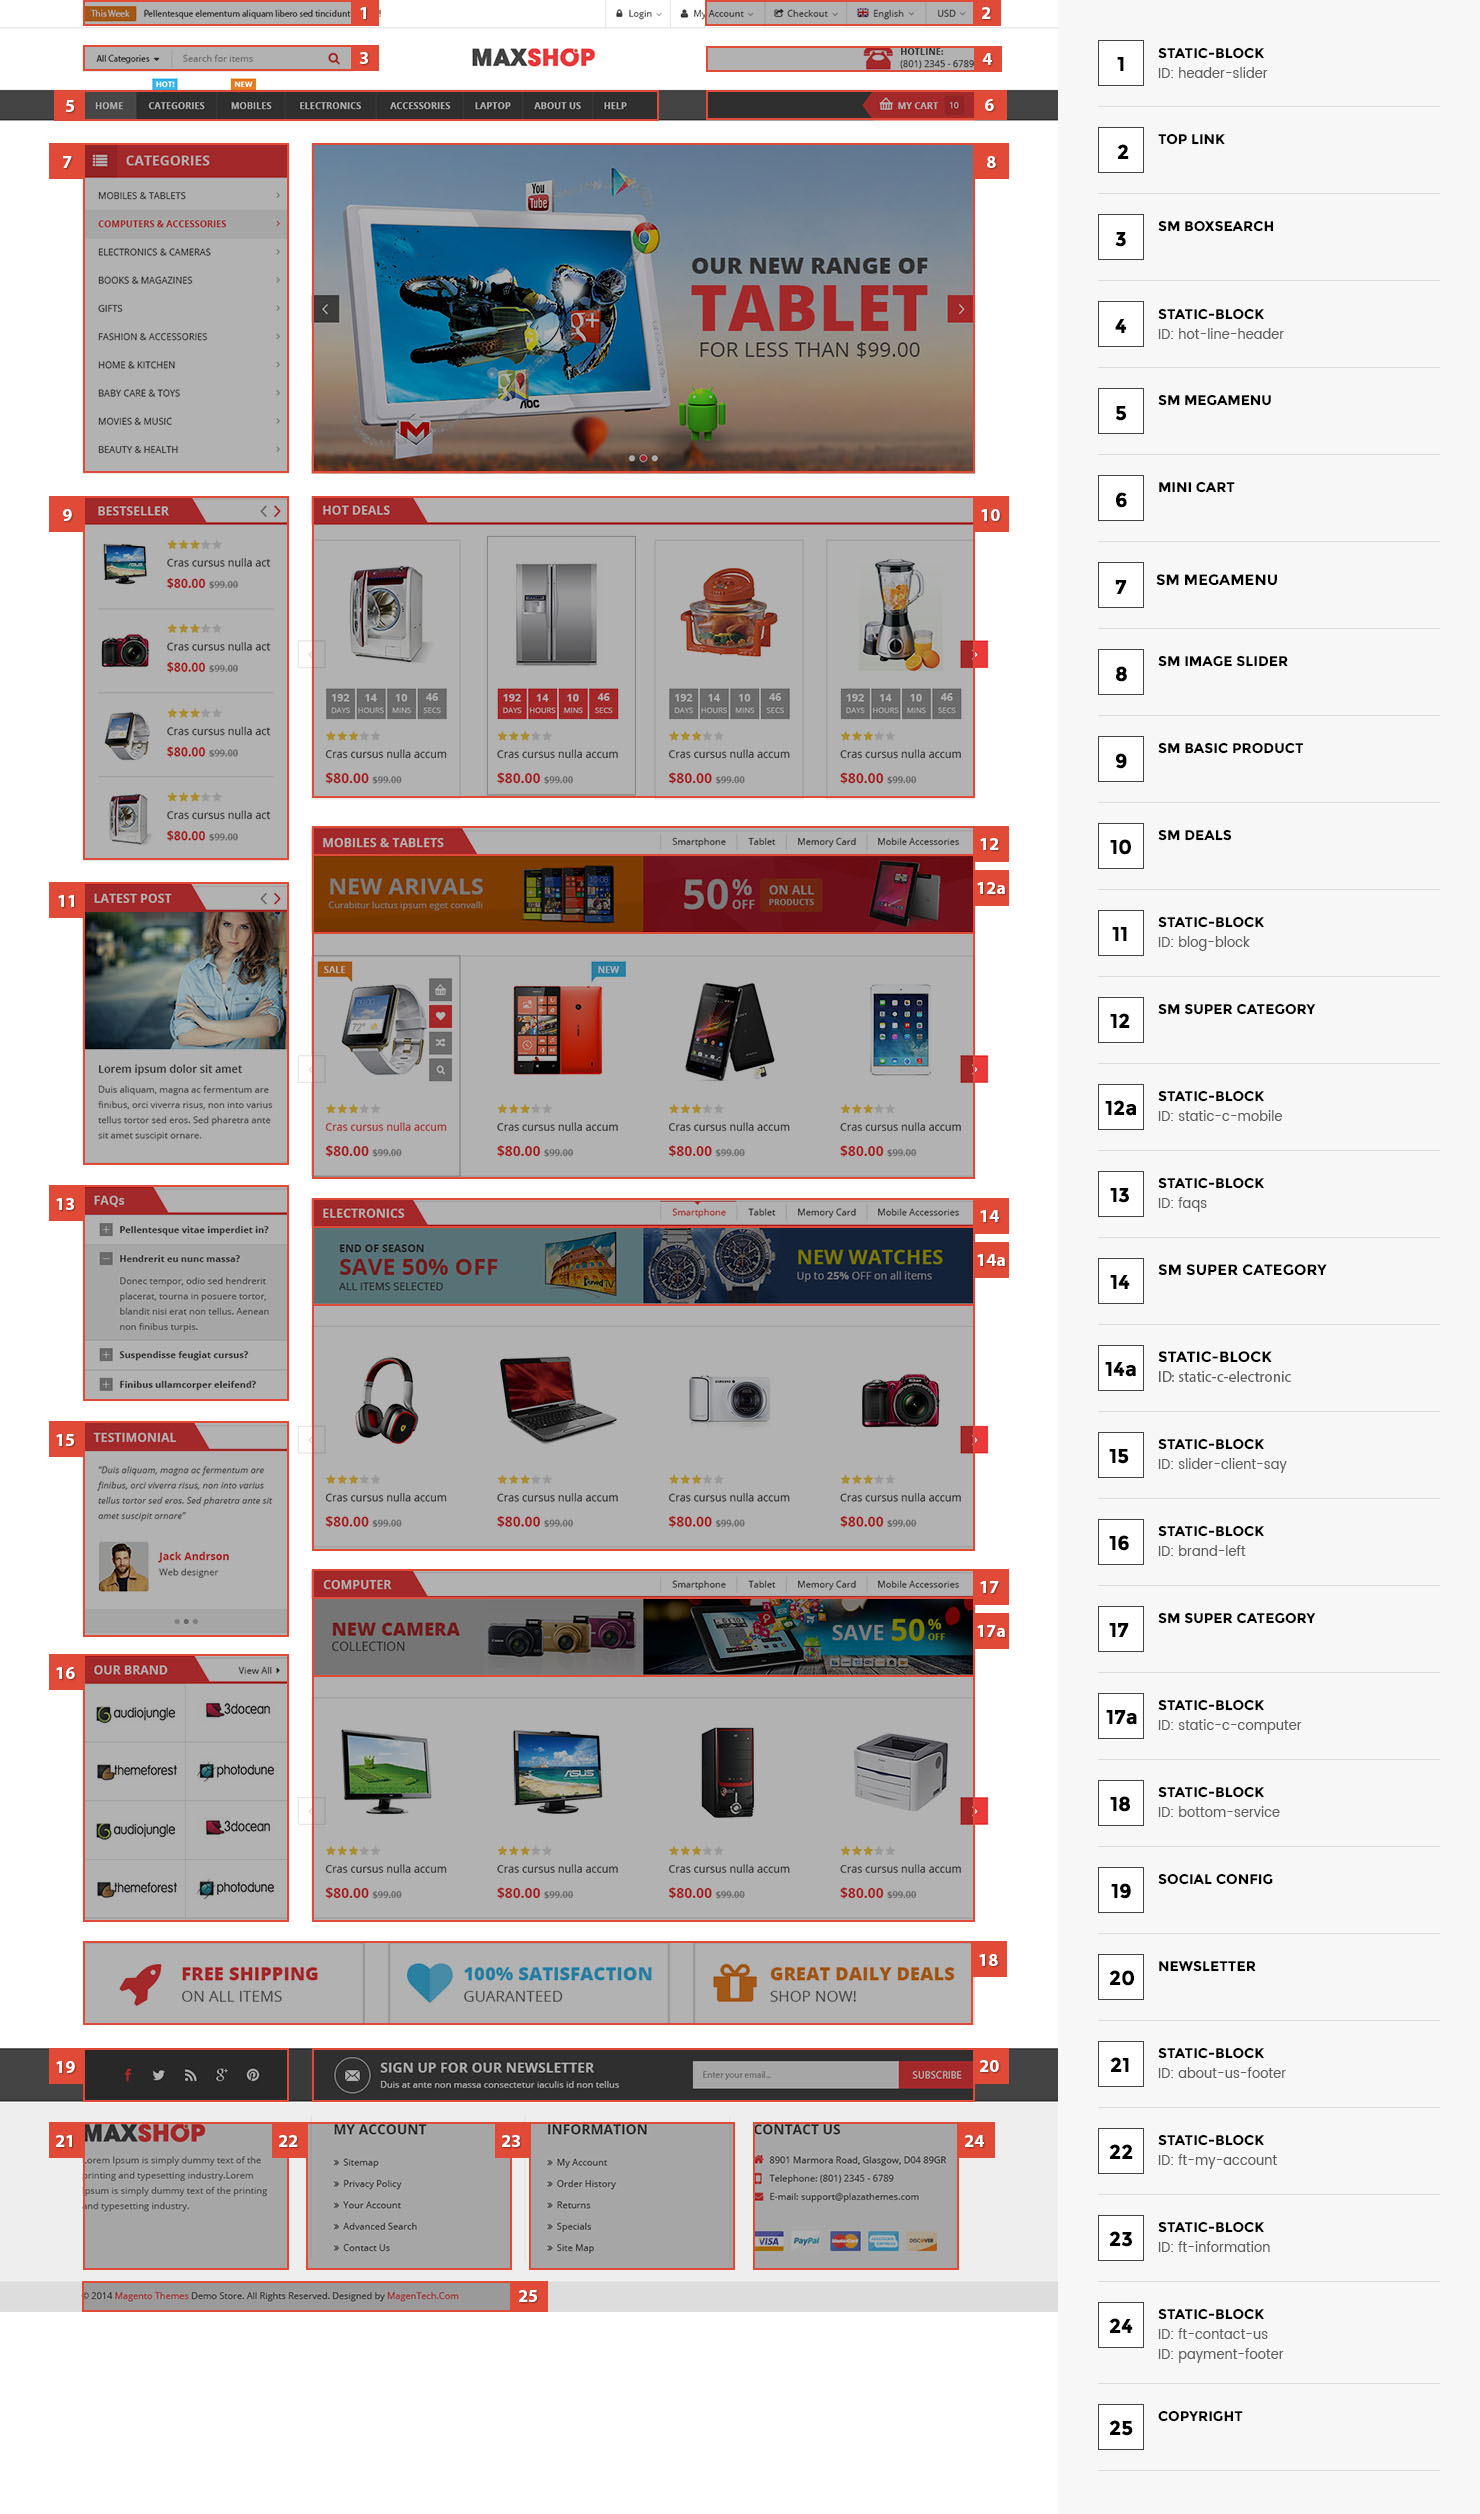
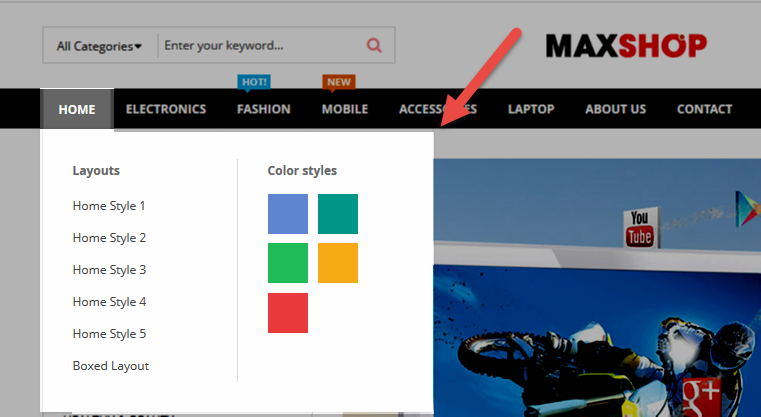
6.1 SP Agood Layout 1
![home-default]()
displayTopNav
1. SP Block Currencies
Frontend Appearance:
![]()
Backend Settings:
In the Pretashop Admin Panel, navigate to Modules and Services >> Modules and Services >> look for “SP Currency Block” >> click “Enable” button to enable this module.
![]()
2. SP Block Languages
Frontend Appearance:
![]()
Backend Settings:
Step 1: To add language as you want. For example: To add “Arabic” language, in your Admin Panel >> navigate to LOCALIZATION >> Languages >> click ![]() button in the right corner to “ADD NEW”.
button in the right corner to “ADD NEW”.
![]()
Step 2: Fill information into the required field (*) as below:
![]()
displayUserinfo
SP User Info Block
Frontend Appearance:
![]()
Backend Settings:
In the Pretashop Admin Panel, navigate to Modules and Services >> Modules and Services >> look for “SP User Info Block” module >> click “Enable” button to enable this module.
![]()
displayCustomHtml1
SP Custom HTML – Custom Support
Frontend Appearance:
![]()
Backend Setting:
Step 1: In the Pretashop Admin Panel, navigate to Modules and Services >> Modules and Services >> look for “SP Custom HTML” module >> click “Configure” button to configure.
![]()
Step 2: In the “SP Custom HTML” configuration page, click ![]() button in the right corner to “ADD NEW MODULE”.
button in the right corner to “ADD NEW MODULE”.
Step 3: You could configure this module like the following image.
![]()
Copy and paste the following code into the content:
<div class="support-info">
<ul>
<li class="live-chat"><a href="#">Start <strong>live chat</strong></a></li>
<li class="phone-support"><span>Call our customer service at:</span><strong> 096-999-8386</strong></li>
</ul>
</div>
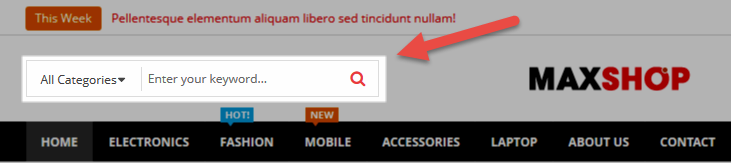
displaySearch
SP Search Block
Frontend Appearance:
![]()
Backend Settings:
Step 1: In the Pretashop Admin Panel, navigate to Modules and Services >> Modules and Services >> look for “SP Search Pro” module >> click “Configure” button to configure.
![]()
Step 2: In the “SP Search Pro” configuration page, click ![]() button in the right corner to “ADD NEW MODULE”.
button in the right corner to “ADD NEW MODULE”.
Step 3: You could configure this module like the following image.
![]()
displayCart
SP Cart Block
Frontend Appearance:
![]()
Backend Settings:
Step 1: In the Pretashop Admin Panel, navigate to Modules and Services >> Modules and Services >> look for “SP Cart Block” module >> click “Configure” button to configure.
![]()
Step 2: In the “SP Cart Block” configuration page, click ![]() button in the right corner to “ADD NEW MODULE”.
button in the right corner to “ADD NEW MODULE”.
Step 3: You could configure this module like the following image.
![]()
displayTag2
SP Tags Block
Frontend Appearance:
![]()
Backend Settings:
Step 1: In the Pretashop Admin Panel, navigate to Modules and Services >> Modules and Services >> look for “SP Tags Block” module >> click “Configure” button to configure.
![]()
Step 2: In the “SP Tags Block” configuration page, click ![]() button in the right corner to “ADD NEW MODULE”.
button in the right corner to “ADD NEW MODULE”.
Step 3: You could configure this module like the following image.
![]()
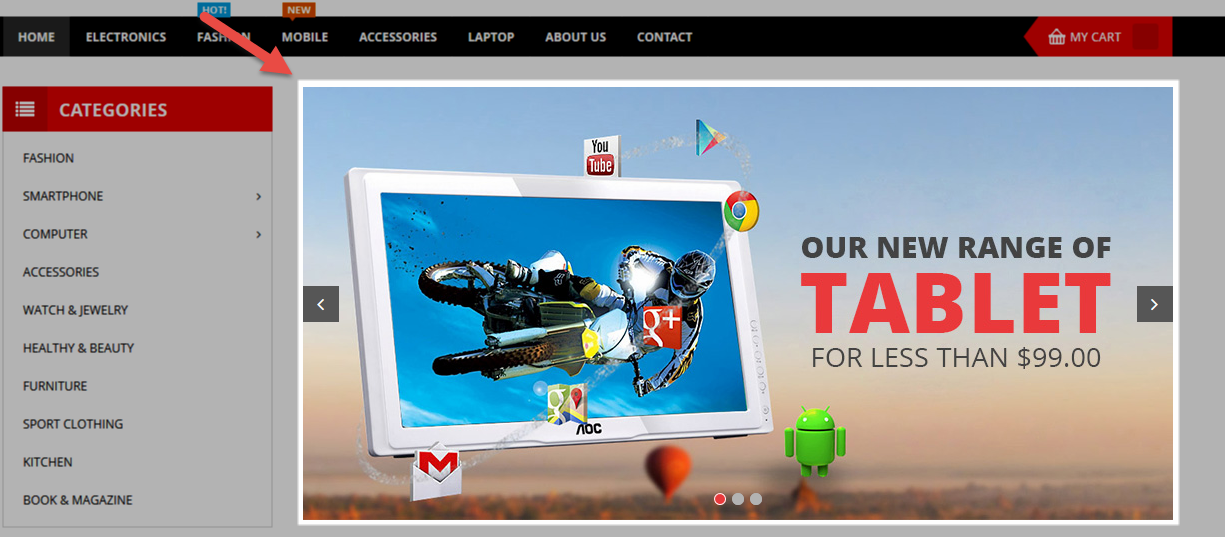
displaySlideShow1
Sp slider for your homepage
Frontend Appearance:
![]()
Backend Settings:
Step 1: In the Pretashop Admin Panel, navigate to Modules and Services >> Modules and Services >> look for “SP Home Slider” module >> click “Configure” button to configure.
![]()
Step 2: In the “SP Slider For Your Homepage” configuration page, click ![]() button in the right corner to “ADD NEW MODULE”.
button in the right corner to “ADD NEW MODULE”.
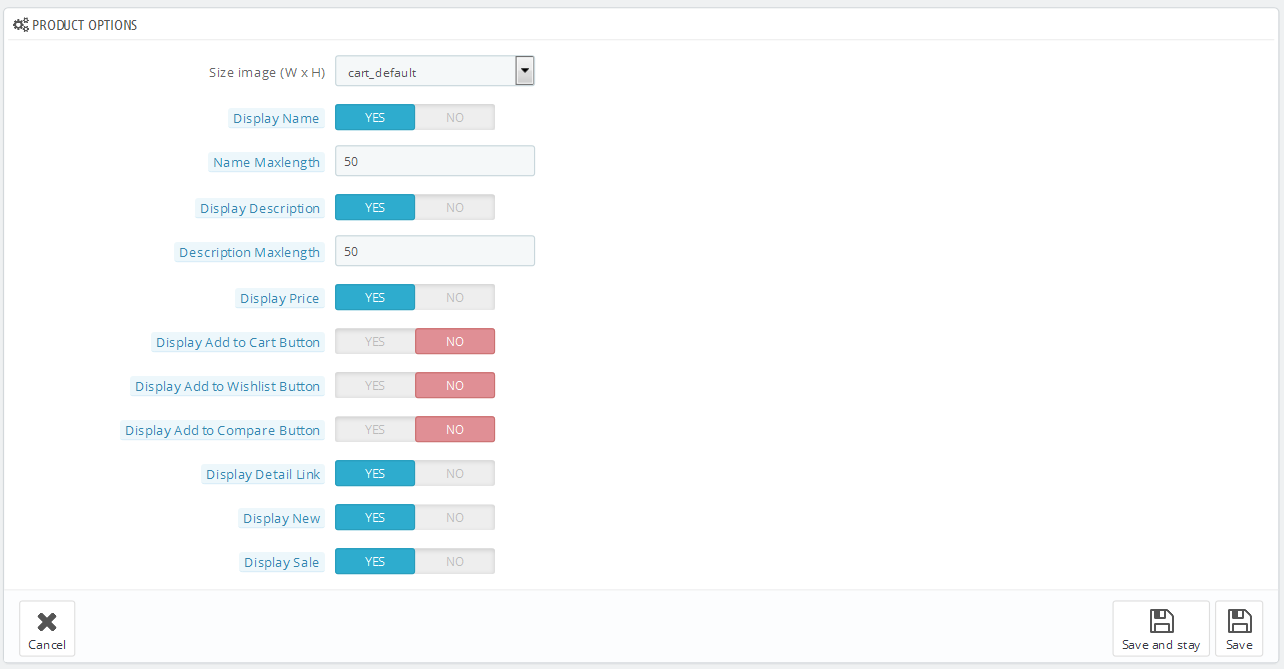
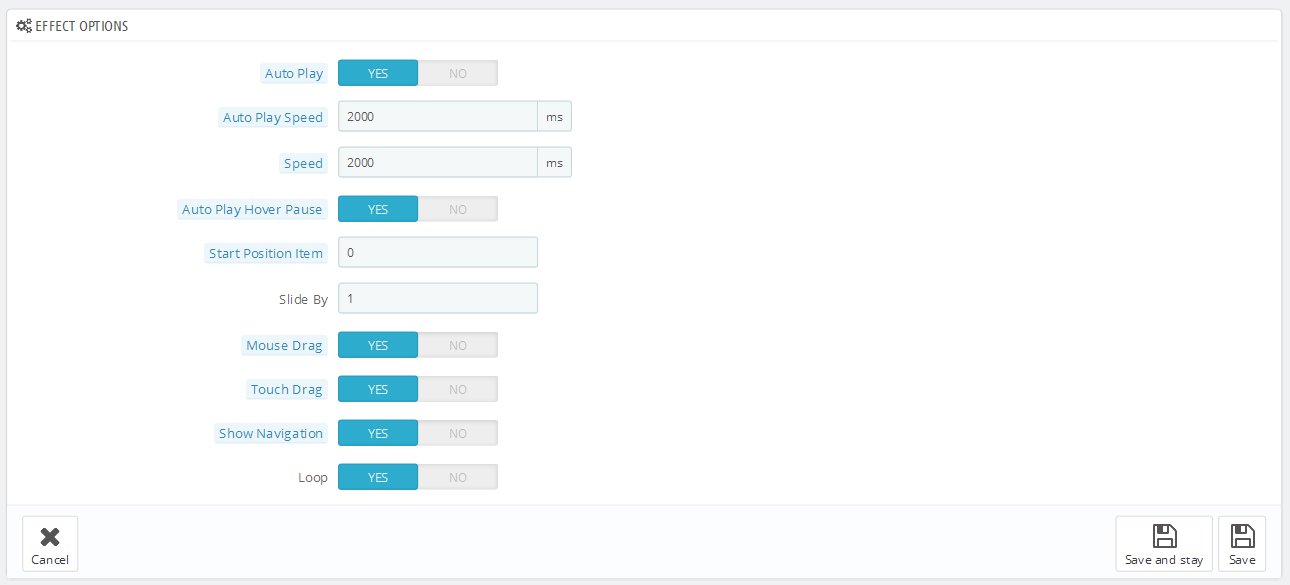
Step 3: You could configure this module like the following image.
![]()
Step 4: In the last part named Slides List of this configuration page, click ![]() button in the right corner to add new slide and edit slide’s information as follows:
button in the right corner to add new slide and edit slide’s information as follows:
- Sample 1: Please click Here to view
- Sample 2: Please click Here to view
- Sample 3: Please click Here to view
display Customhtml5
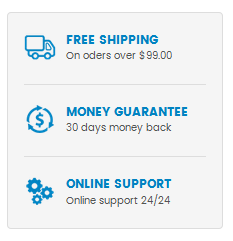
SP Custom HTML – Free Shipping
Frontend Appearance:
![]()
Backend Settings:
Step 1: In the Pretashop Admin Panel, navigate to Modules and Services >> Modules and Services >> look for “SP Custom HTML” module >> click “Configure” button to configure.
![]()
Step 2: In the “SP Custom HTML” configuration page, click ![]() button in the right corner to “ADD NEW MODULE”.
button in the right corner to “ADD NEW MODULE”.
Step 3: You could configure this module like the following image.
![]()
Copy and paste the following code into the content:
<div class="free-shipping">
<div class="item style-01">
<div class="thumb"><img src="../themes/sp_agood/img/cms/free-ship.png" alt="images" /></div>
<div class="content">
<h4 class="title"><a href="#">free shipping</a></h4>
<p>Delivery world wide</p>
</div>
</div>
<div class="item style-02">
<div class="thumb"><img src="../themes/sp_agood/img/cms/money.png" alt="images" /></div>
<div class="content">
<h4 class="title"><a href="#">money back</a></h4>
<p>While not exactly line</p>
</div>
</div>
<div class="item style-03">
<div class="thumb"><img src="../themes/sp_agood/img/cms/support.png" alt="images" /></div>
<div class="content">
<h4 class="title"><a href="#">we support</a></h4>
<p>Online store 24/7</p>
</div>
</div>
<div class="item style-04">
<div class="thumb"><img src="../themes/sp_agood/img/cms/hotline.png" alt="images" /></div>
<div class="content">
<h4 class="title"><a href="#">hot line</a></h4>
<strong>+ 098.111.666</strong></div>
</div>
</div>
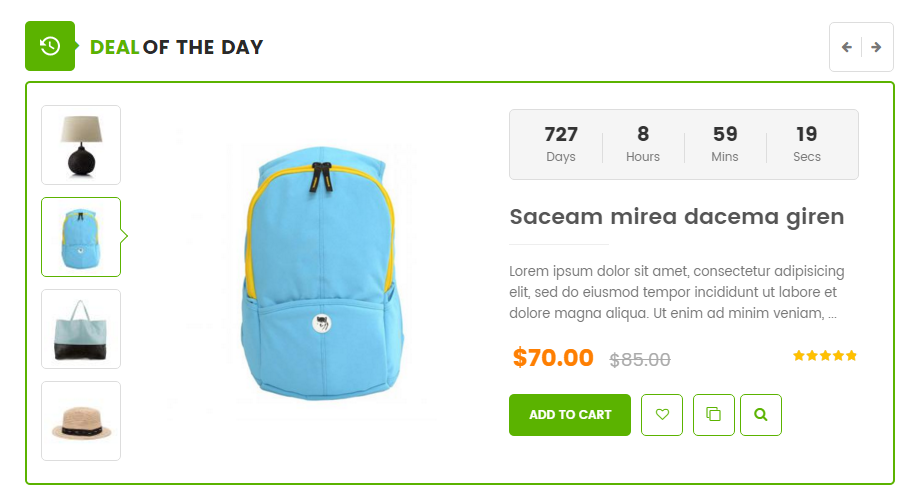
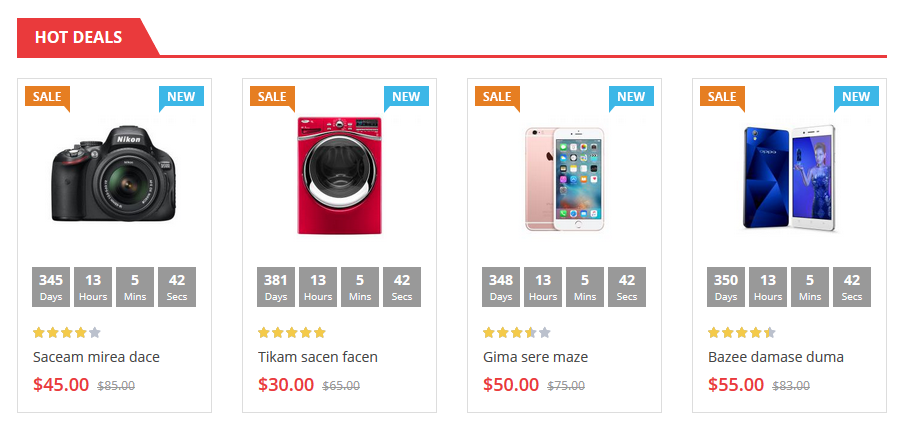
displayCountdownproduct
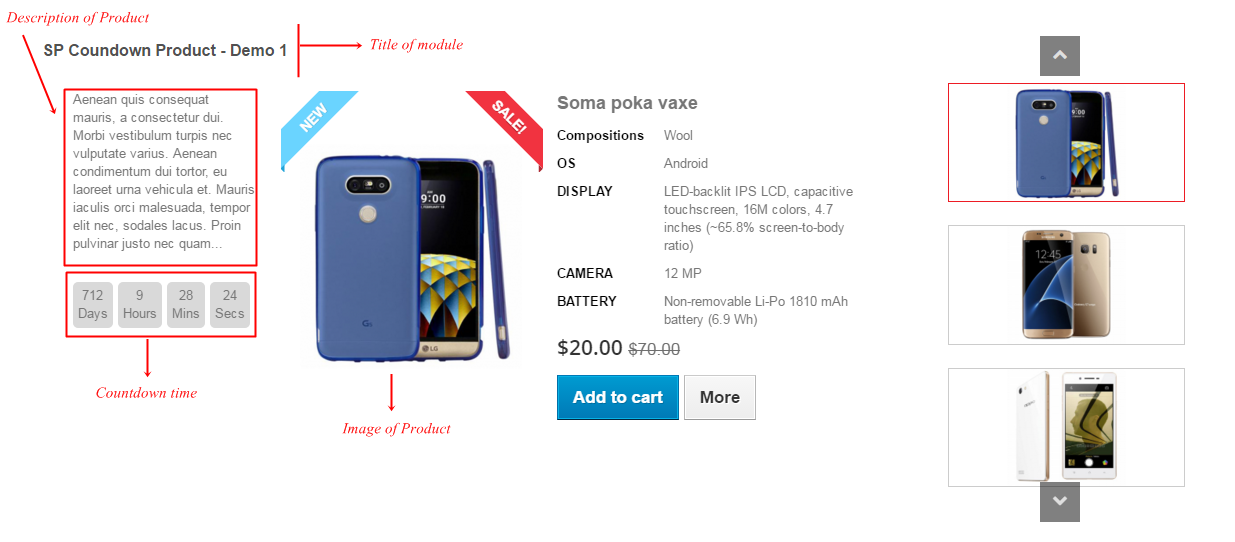
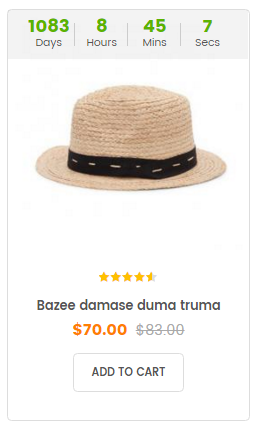
SP Countdown product slider – Deals of the day!
Frontend Appearance:
![]()
Backend Settings:
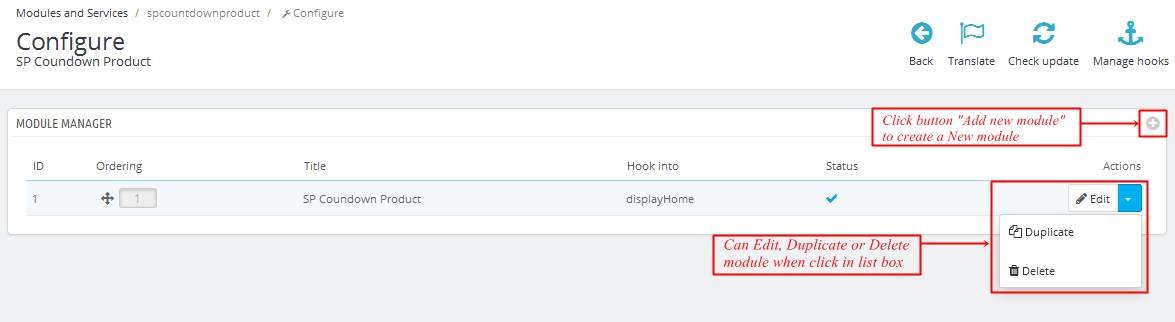
Step 1: In the Pretashop Admin Panel, navigate to Modules and Services >> Modules and Services >> look for “SP Countdown product slider” module.
![]()
Step 2: In the “SP Countdown product slider” configuration page, click ![]() button in the right corner to “ADD NEW MODULE”.
button in the right corner to “ADD NEW MODULE”.
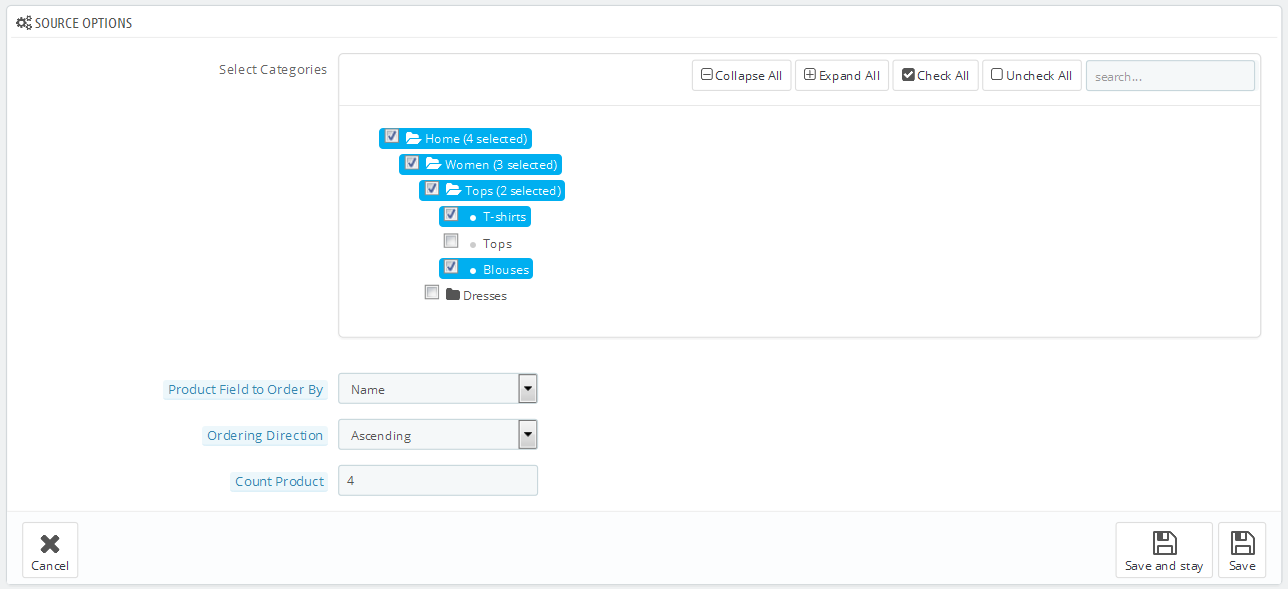
Step 3: You could configure this module like the following image.
![]()
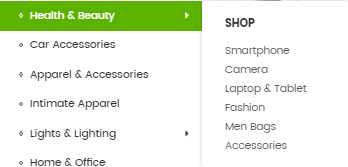
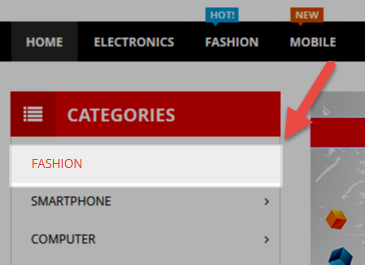
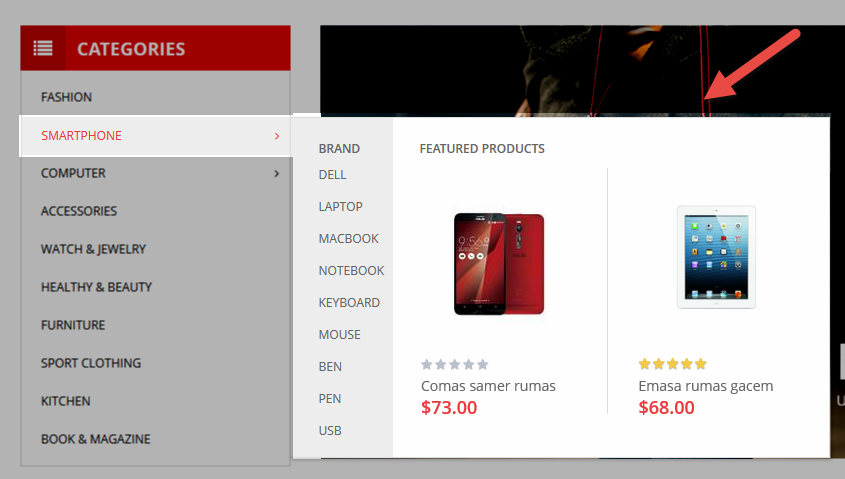
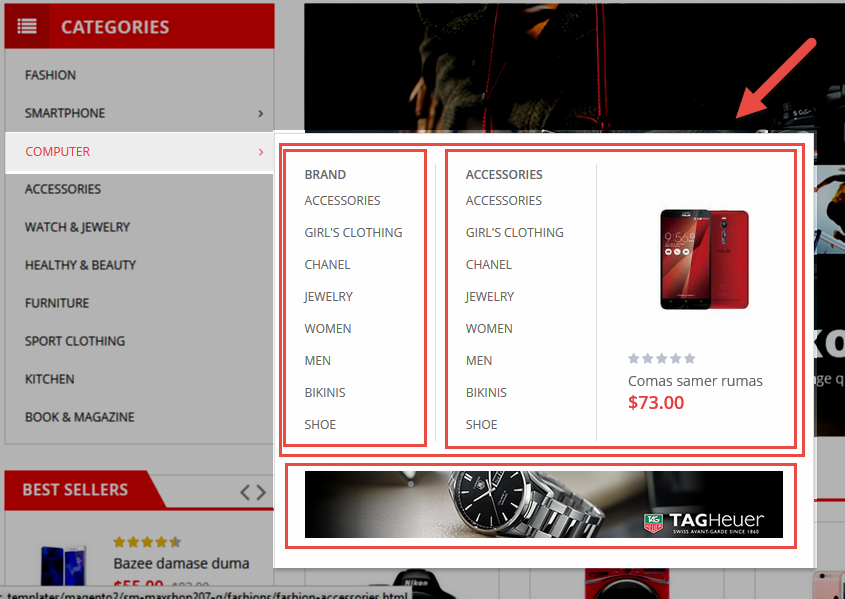
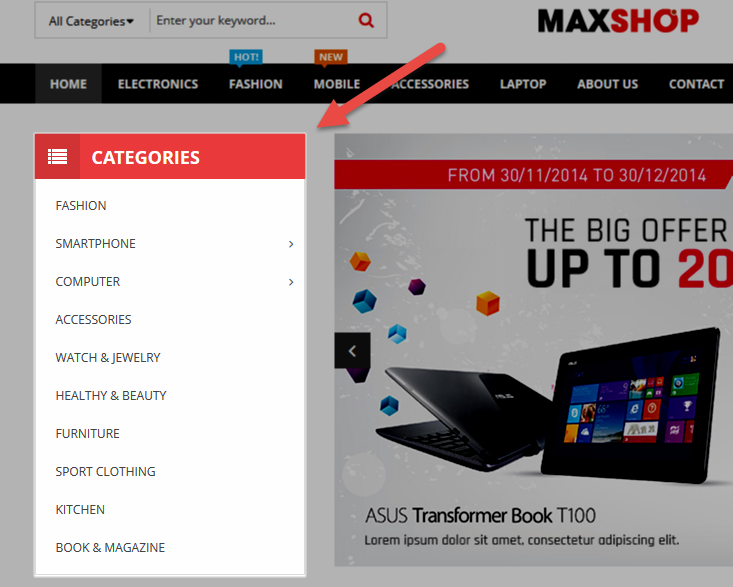
displayCategories
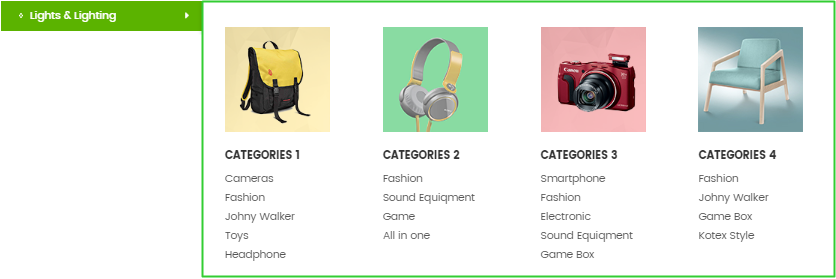
SP Categories – collection!
Frontend Appearance:
![]()
Backend Settings:
Step 1: In the Pretashop Admin Panel, navigate to Modules and Services >> Modules and Services >> look for “SP Categories” module.
![]()
Step 2: In the “SP Categories” configuration page, click ![]() button in the right corner to “ADD NEW MODULE”.
button in the right corner to “ADD NEW MODULE”.
Step 3: You could configure this module like the following image.
![]()
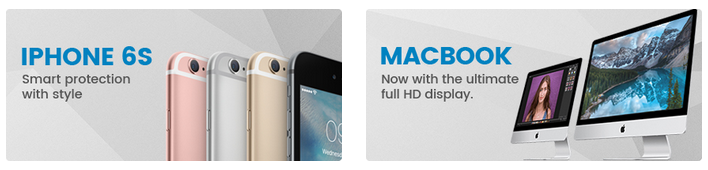
display Customhtml4
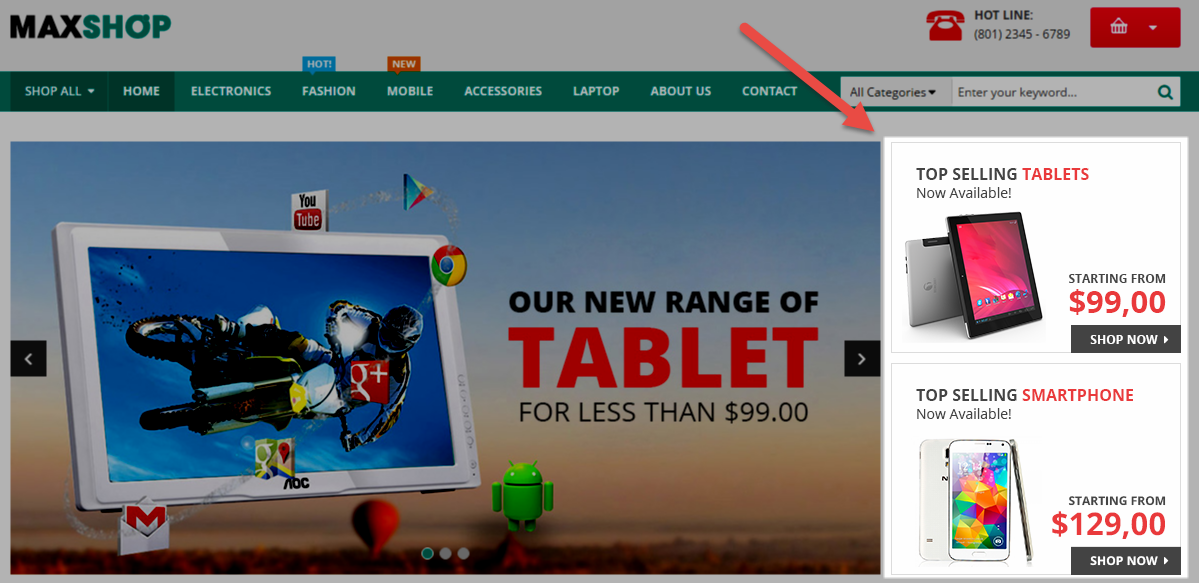
SP Custom HTML – Banner Top
Frontend Appearance:
![]()
Backend Settings:
Step 1: In the Pretashop Admin Panel, navigate to Modules and Services >> Modules and Services >> look for “SP Custom HTML” module >> click “Configure” button to configure.
![]()
Step 2: In the “SP Custom HTML” configuration page, click ![]() button in the right corner to “ADD NEW MODULE”.
button in the right corner to “ADD NEW MODULE”.
Step 3: You could configure this module like the following image.
![]()
Copy and paste the following code into the content:
<div class="col-md-6 col-sm-6 col-xs-6 images"><a href="#"><img src="../themes/sp_agood/img/cms/banner01.jpg" alt="images" /></a></div>
<div class="col-md-6 col-sm-6 col-xs-6 images"><a href="#"><img src="../themes/sp_agood/img/cms/banner02.jpg" alt="images" /></a></div>
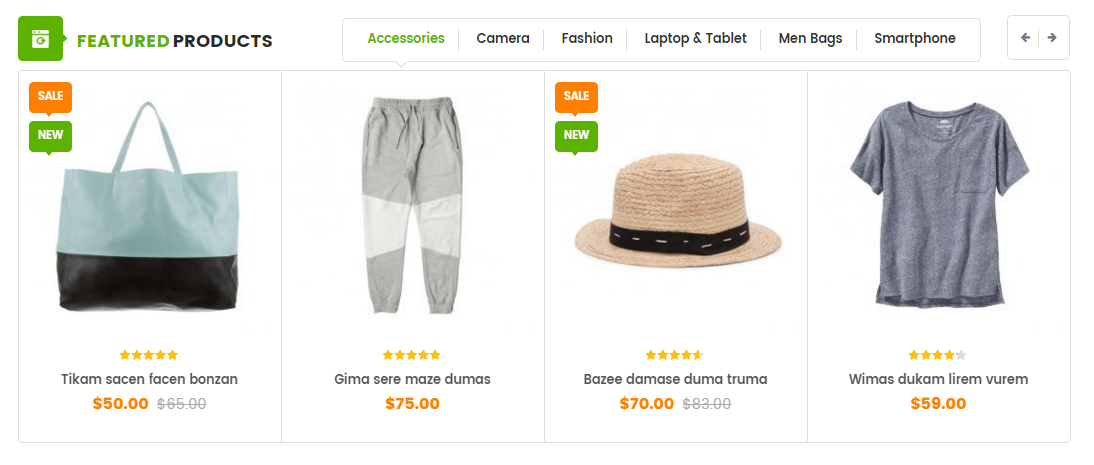
SP Listing Tabs – Top Selling
Frontend Appearance:
![]()
Backend Settings:
Step 1: In the Pretashop Admin Panel, navigate to Modules and Services >> Modules and Services >> look for “SP Listing Tabs” module.
![]()
Step 2: In the “SP Listing Tabs” configuration page, click ![]() button in the right corner to “ADD NEW MODULE”.
button in the right corner to “ADD NEW MODULE”.
Step 3: You could configure this module like the following image.
![]()
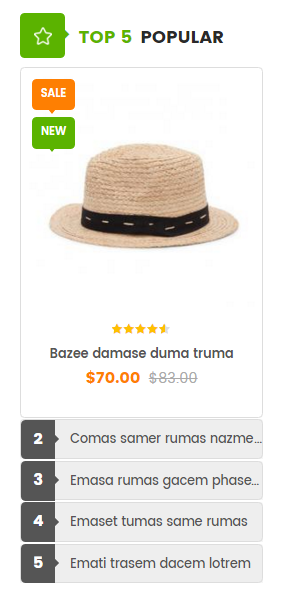
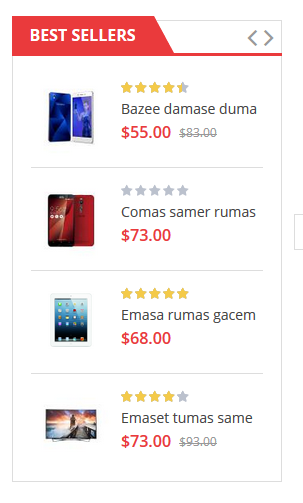
SP Extra Slider – Top 10 Popular
Frontend Appearance:
![]()
Backend Settings:
Step 1: In the Pretashop Admin Panel, navigate to Modules and Services >> Modules and Services >> look for “SP Extra Slider” module.
![]()
Step 2: In the “SP Extra Slider” configuration page, click ![]() button in the right corner to “ADD NEW MODULE”.
button in the right corner to “ADD NEW MODULE”.
Step 3: You could configure this module like the following image.
![]()
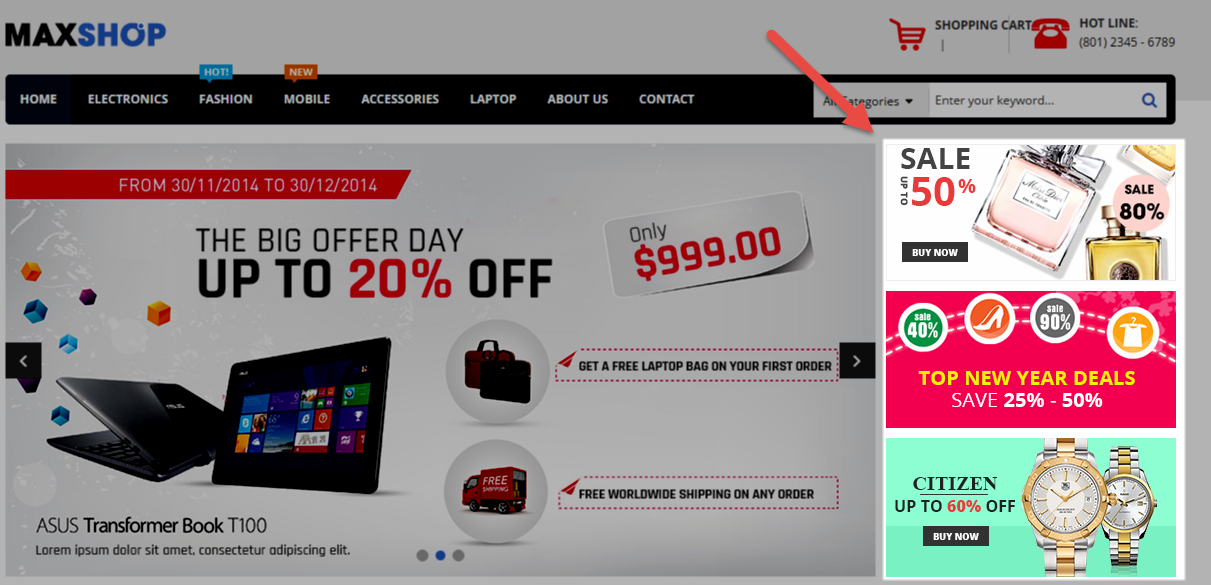
display Customhtml3
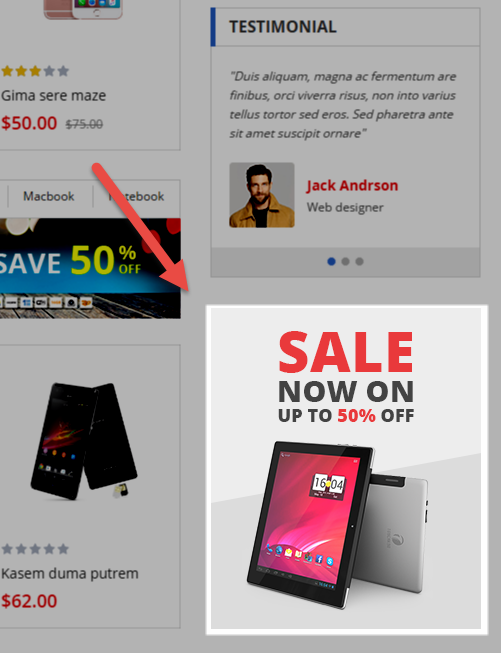
SP Custom HTML – Banner Content Layout 1
Frontend Appearance:
![]()
Backend Settings:
Step 1: In the Pretashop Admin Panel, navigate to Modules and Services >> Modules and Services >> look for “SP Custom HTML” module >> click “Configure” button to configure.
![]()
Step 2: In the “SP Custom HTML” configuration page, click ![]() button in the right corner to “ADD NEW MODULE”.
button in the right corner to “ADD NEW MODULE”.
Step 3: You could configure this module like the following image.
![]()
Copy and paste the following code into the content:
<div class="custom-banner-02">
<div class="row custom-row">
<div class="custom-col-left col-md-6 col-sm-6 col-xs-6">
<div class="images style-01"><a href="#"><img src="../themes/sp_agood/img/cms/banner03.jpg" alt="images" /></a></div>
<div class="images style-02"><a href="#"><img src="../themes/sp_agood/img/cms/banner04.jpg" alt="images" /></a></div>
</div>
<div class="custom-col-right col-md-6 col-sm-6 col-xs-6">
<div class="images style-03"><a href="#"><img src="../themes/sp_agood/img/cms/banner05.jpg" alt="images" /></a></div>
</div>
</div>
</div>
SP Extra Slider – Hot Sale
Frontend Appearance:
![]()
Backend Settings:
Step 1: In the Pretashop Admin Panel, navigate to Modules and Services >> Modules and Services >> look for “SP Extra Slider” module.
![]()
Step 2: In the “SP Extra Slider” configuration page, click ![]() button in the right corner to “ADD NEW MODULE”.
button in the right corner to “ADD NEW MODULE”.
Step 3: You could configure this module like the following image.
![]()
SP Extra Slider – Viewed Products
Frontend Appearance:
![]()
Backend Settings:
Step 1: In the Pretashop Admin Panel, navigate to Modules and Services >> Modules and Services >> look for “SP Extra Slider” module.
![]()
Step 2: In the “SP Extra Slider” configuration page, click ![]() button in the right corner to “ADD NEW MODULE”.
button in the right corner to “ADD NEW MODULE”.
Step 3: You could configure this module like the following image.
![]()
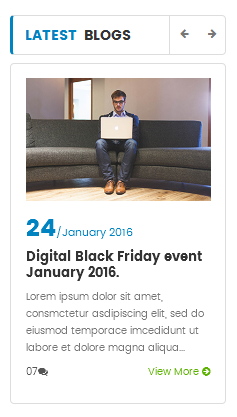
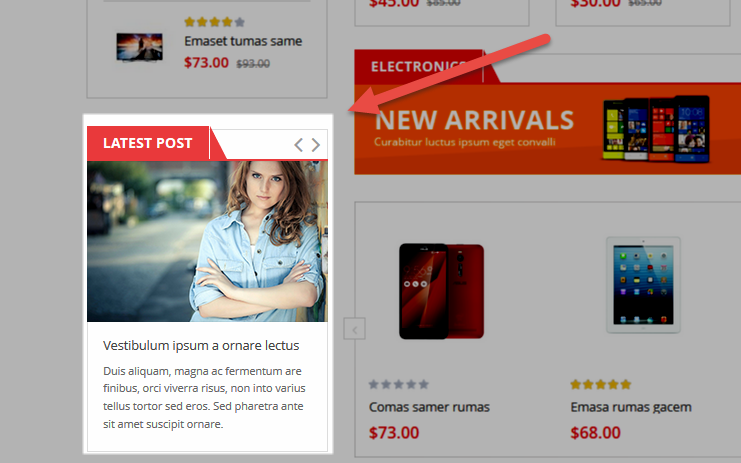
display Home News
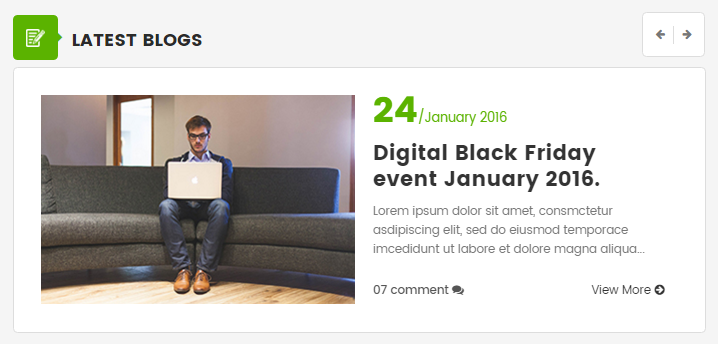
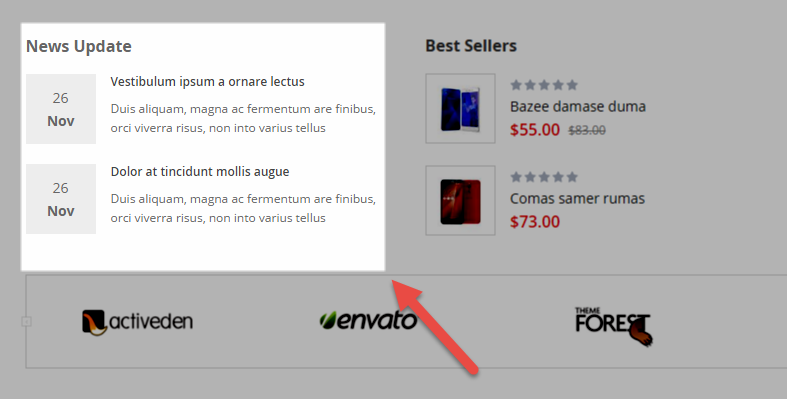
SP SmartBlog Home Lastest
Frontend Appearance:
![]()
Backend Settings:
Step 1: In the Pretashop Admin Panel, navigate to Modules and Services >> Modules and Services >> look for “SmartBlog Home Lastest” module.
![]()
Step 2: You could configure this module like the following image.
![]()
display Customhtml6
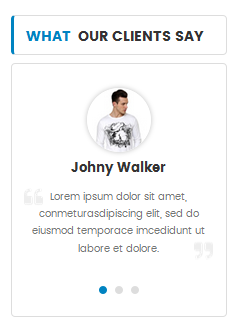
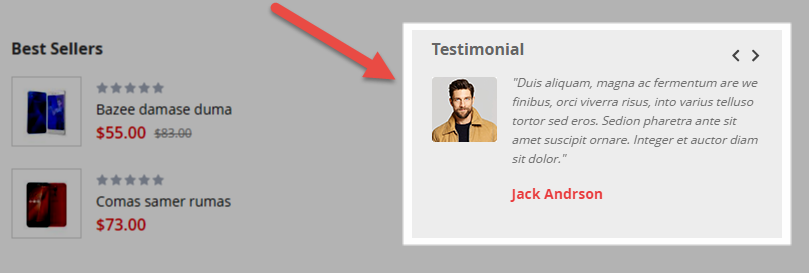
SP Custom HTML – Testimonial
Frontend Appearance:
![]()
Backend Settings:
Step 1: In the Pretashop Admin Panel, navigate to Modules and Services >> Modules and Services >> look for “SP Custom HTML” module >> click “Configure” button to configure.
![]()
Step 2: In the “SP Custom HTML” configuration page, click ![]() button in the right corner to “ADD NEW MODULE”.
button in the right corner to “ADD NEW MODULE”.
Step 3: You could configure this module like the following image.
![]()
Copy and paste the following code into the content:
<div class="bg_testimonia">
<div class="item">
<div class="images"><a href="#"><img src="http://dev.ytcvn.com/ytc_templates/prestashop/sp_agood/themes/sp_agood/img/cms/tes1.jpg" alt="images" /></a></div>
<div class="bg_content">
<div class="author"><a href="#">John doe</a> <span>8 Sep 2018</span></div>
<div class="des">Healthy Vending. the world's leading franchisor of socially responsible. healthy vending machine businesses.</div>
</div>
</div>
</div>
displayManufacture
SP Manufacture Slider – FEATURED BRANDS
Frontend Appearance:
![]()
Backend Settings:
Step 1: In the Pretashop Admin Panel, navigate to Modules and Services >> Modules and Services >> look for “SP Manufacture Slider” module.
![]()
Step 2: In the “SP Deal” configuration page, click ![]() button in the right corner to “ADD NEW MODULE”.
button in the right corner to “ADD NEW MODULE”.
Step 3: You could configure this module like the following image.
![]()
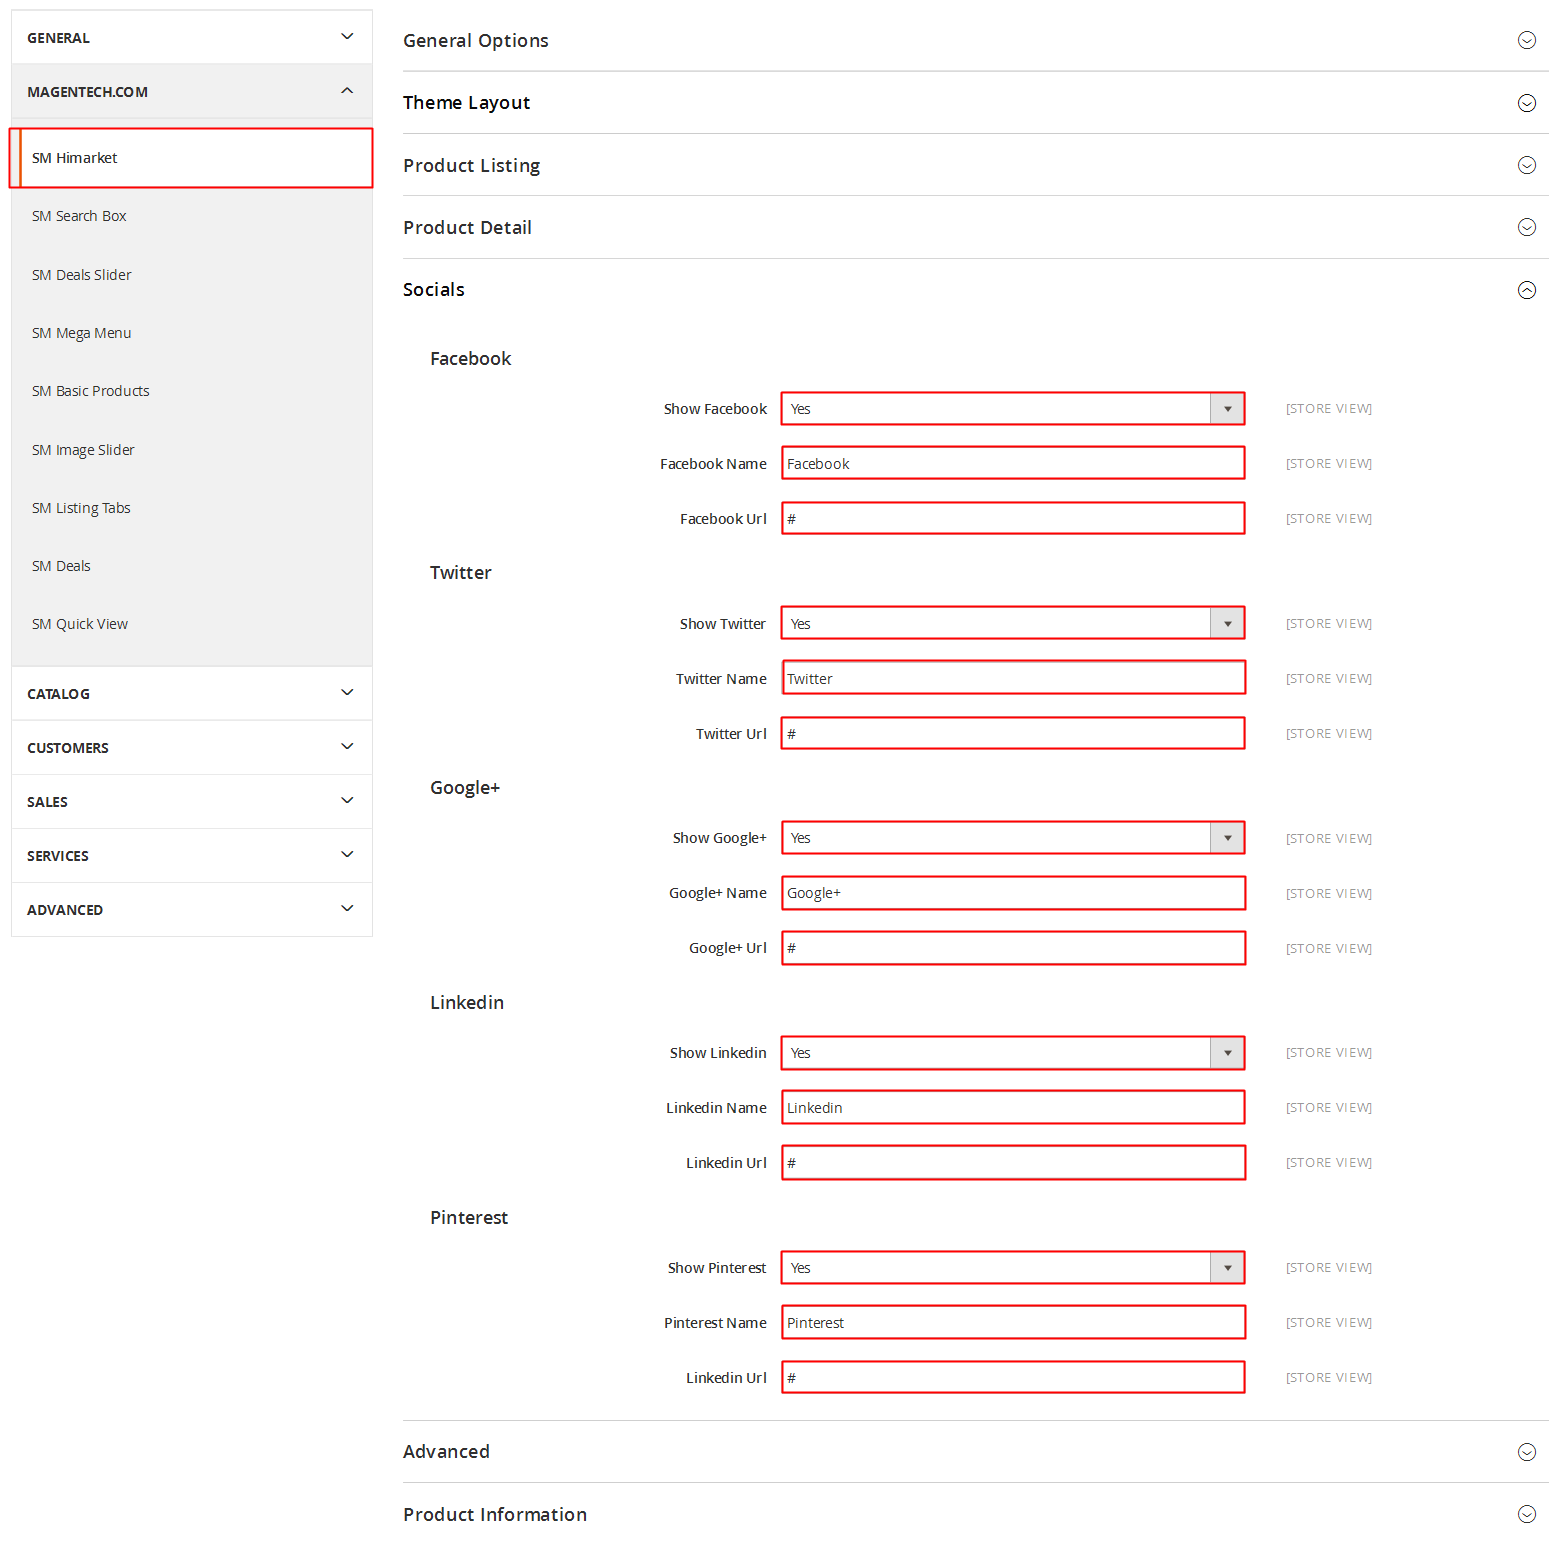
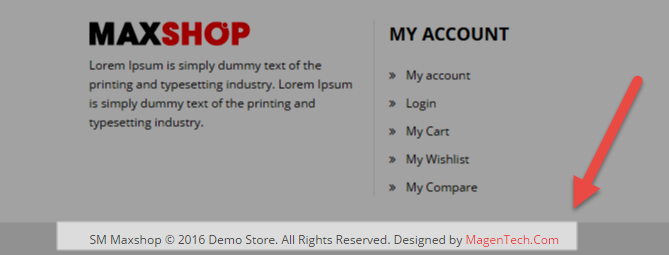
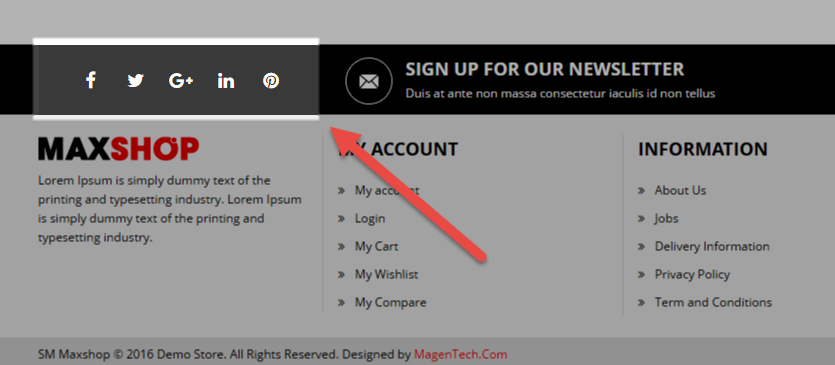
displayFootersocial
SP Theme Configuration
Frontend Appearance:
![]()
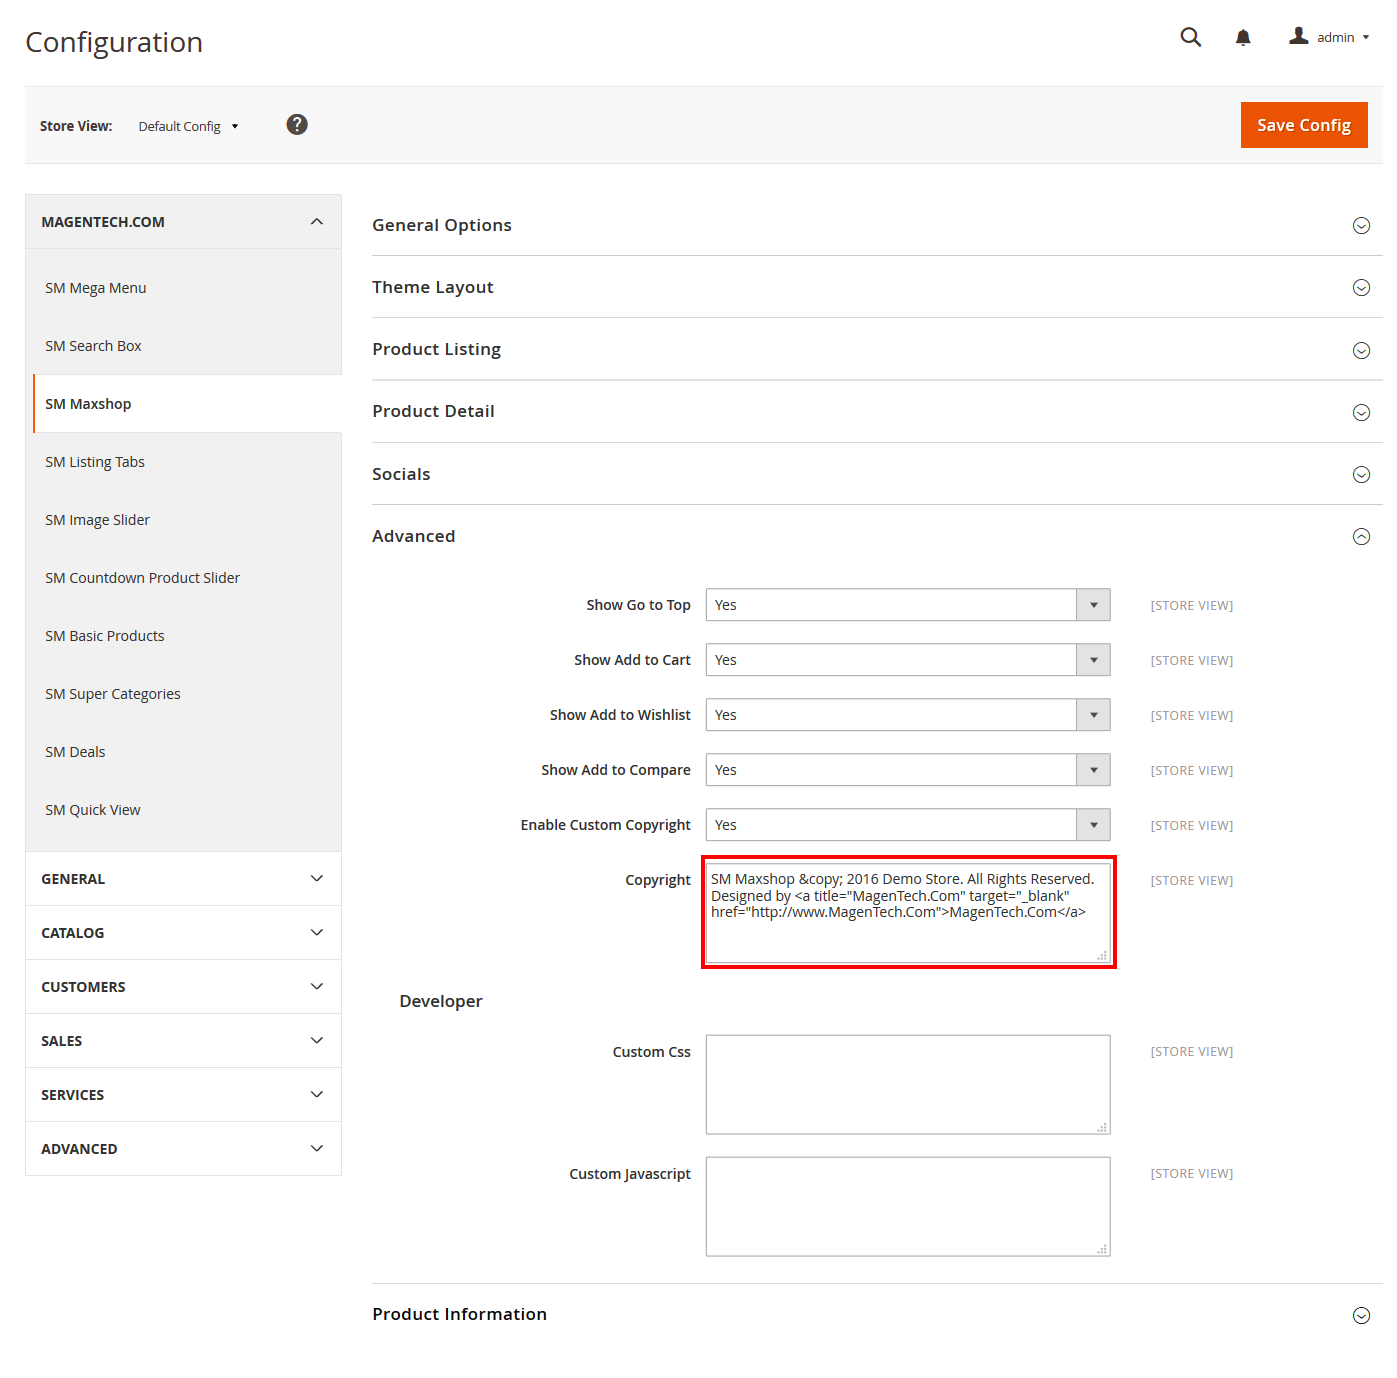
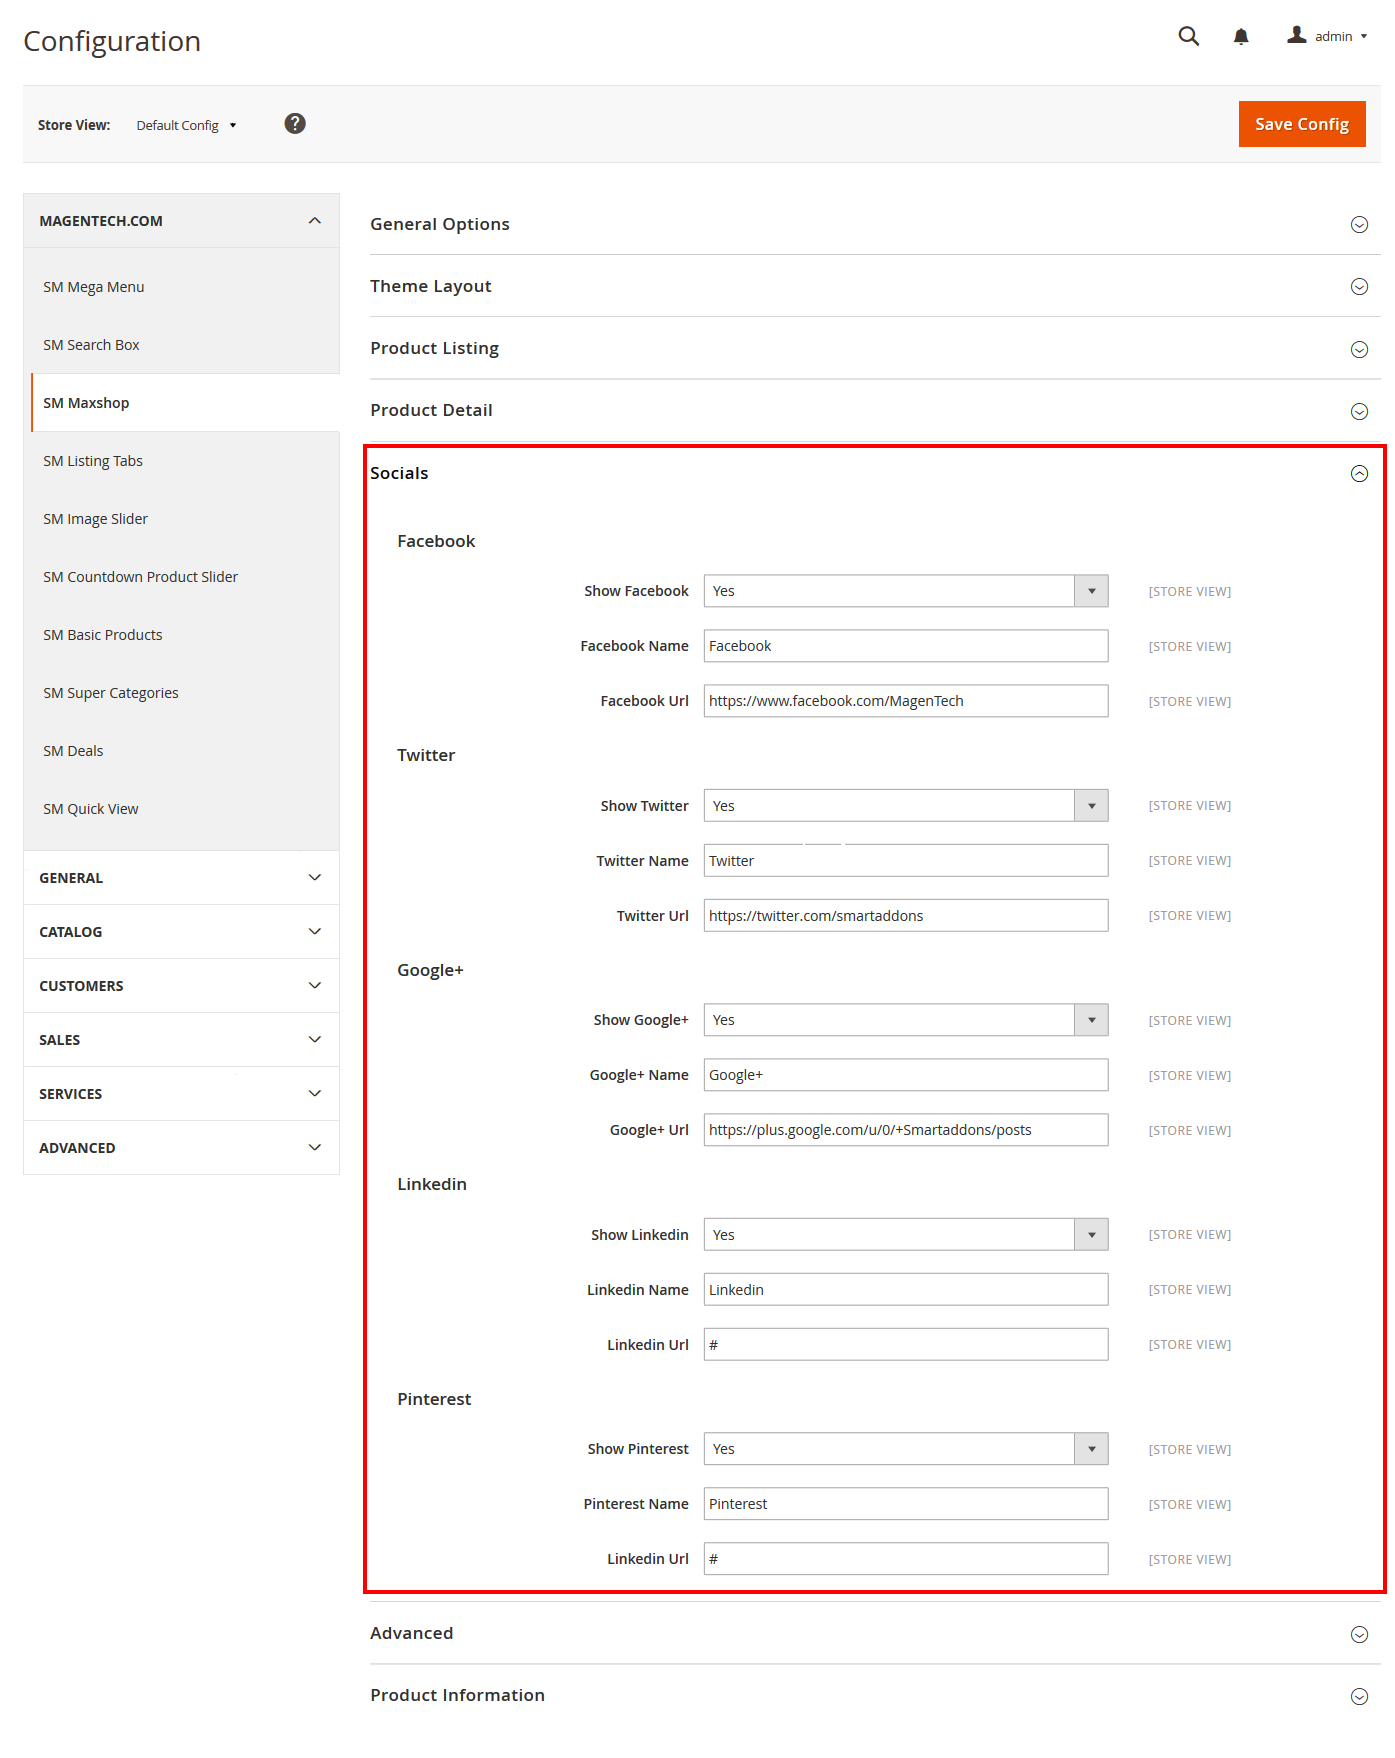
Backend Settings:
Step 1: In the Pretashop Admin Panel, navigate to Modules and Services >> Modules and Services >> look for “SP Theme Configuration” module.
![]()
Step 2: You could configure its settings like the following image.
![]()
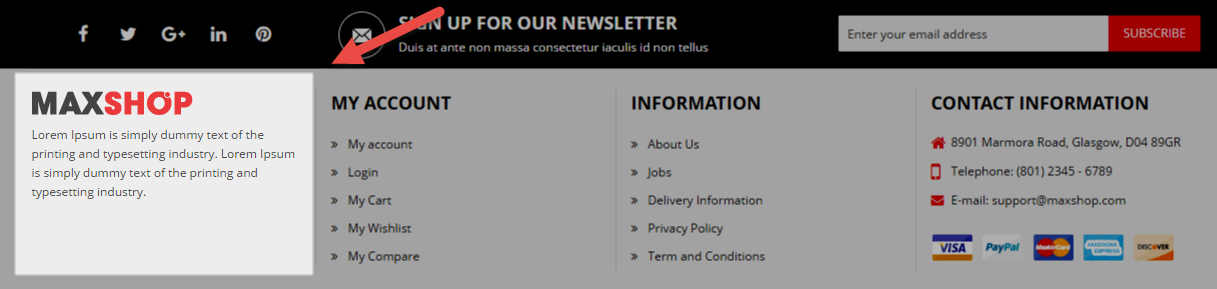
displayNewsletter
SP Newsletter Block
Frontend Appearance:
![]()
Backend Settings:
Step 1: In the Pretashop Admin Panel, navigate to Modules and Services >> Modules and Services >> look for “SP Newsletter Block” module.
![]()
Step 2: You could configure its settings like the following image.
![]()
To edit the text in this module, please follow these steps:
In your Website’s Directory, go to themes\sp_agood\modules\spblocknewsletter folder. To change the text in this module, in this folder, you could open the file named blocknewsletter.tpl by your editor program.
Find and change the text you want to edit, such as: SUBCRIBE, Sign up and Save!, Receive email-only deals, special offers & product exclusives
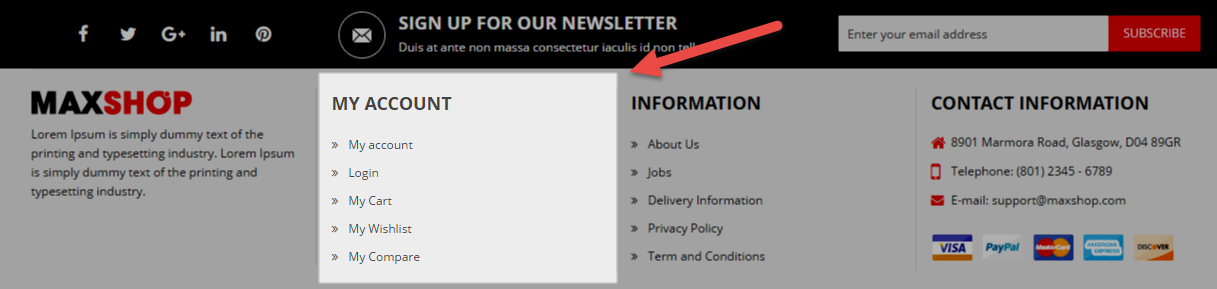
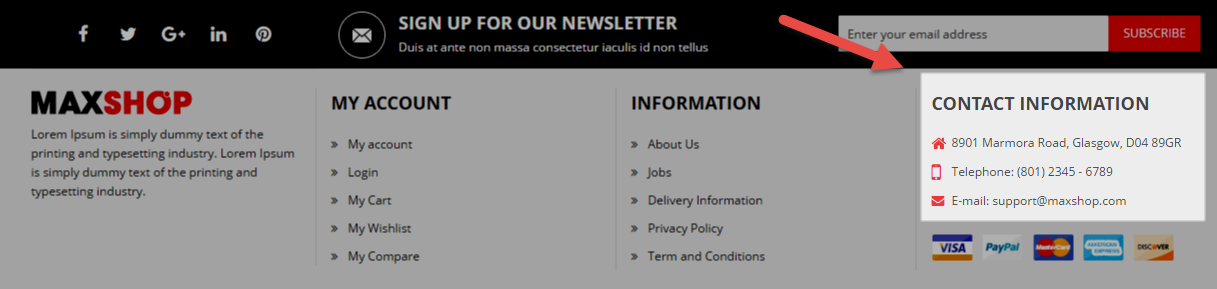
display Customhtml10
1. SP Custom HTML – us address
Frontend Appearance:
![]()
Backend Settings:
Step 1: In the Pretashop Admin Panel, navigate to Modules and Services >> Modules and Services >> look for “SP Custom HTML” module >> click “Configure” button to configure.
![]()
Step 2: In the “SP Custom HTML” configuration page, click ![]() button in the right corner to “ADD NEW MODULE”.
button in the right corner to “ADD NEW MODULE”.
Step 3: You could configure this module like the following image.
![]()
Copy and paste the following code into the content:
<ul>
<li><a href="#">View Points and Certificates</a></li>
<li><a href="#">Learn More</a></li>
<li><a href="#">Exclusive Offers</a></li>
<li><a href="#">Sign in or Create Account</a></li>
</ul>
2. SP Custom HTML – support & services
Frontend Appearance:
![]()
Backend Settings:
Step 1: In the Pretashop Admin Panel, navigate to Modules and Services >> Modules and Services >> look for “SP Custom HTML” module >> click “Configure” button to configure.
![]()
Step 2: In the “SP Custom HTML” configuration page, click ![]() button in the right corner to “ADD NEW MODULE”.
button in the right corner to “ADD NEW MODULE”.
Step 3: You could configure this module like the following image.
![]()
Copy and paste the following code into the content:
<ul>
<li><a href="#">Customer Service</a></li>
<li><a href="#">Protection Plans</a></li>
<li><a href="#">Installation</a></li>
<li><a href="#">Trade-In Program</a></li>
<li><a href="#">More Support & Services</a></li>
</ul>
3. SP Custom HTML – orders & returns
Frontend Appearance:
![]()
Backend Settings:
Step 1: In the Pretashop Admin Panel, navigate to Modules and Services >> Modules and Services >> look for “SP Custom HTML” module >> click “Configure” button to configure.
![]()
Step 2: In the “SP Custom HTML” configuration page, click ![]() button in the right corner to “ADD NEW MODULE”.
button in the right corner to “ADD NEW MODULE”.
Step 3: You could configure this module like the following image.
![]()
Copy and paste the following code into the content:
<ul>
<li><a href="#">Order Status</a></li>
<li><a href="#">Return & Exchange Promise</a></li>
<li><a href="#">Price Match Guarantee</a></li>
<li><a href="#">Pay With Points</a></li>
<li><a href="#">More Orders & Returns Help</a></li>
</ul>
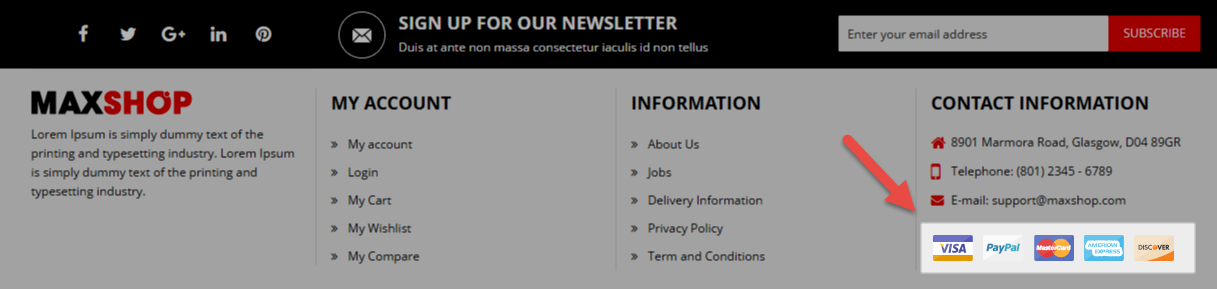
4. SP Custom HTML – credit cards
Frontend Appearance:
![]()
Backend Settings:
Step 1: In the Pretashop Admin Panel, navigate to Modules and Services >> Modules and Services >> look for “SP Custom HTML” module >> click “Configure” button to configure.
![]()
Step 2: In the “SP Custom HTML” configuration page, click ![]() button in the right corner to “ADD NEW MODULE”.
button in the right corner to “ADD NEW MODULE”.
Step 3: You could configure this module like the following image.
![]()
Copy and paste the following code into the content:
<ul>
<li><a href="#">make payment/check balance</a></li>
<li><a href="#">credit card offers</a></li>
<li><a href="#">apply now</a></li>
</ul>
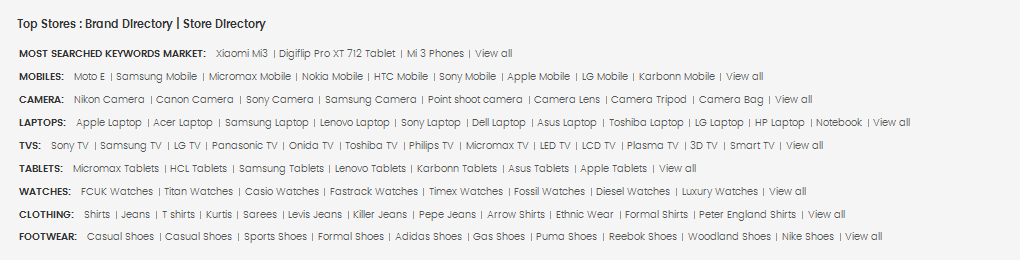
display Customhtml11
SP Custom HTML – products tag
Frontend Appearance:
![]()
Backend Settings:
Step 1: In the Pretashop Admin Panel, navigate to Modules and Services >> Modules and Services >> look for “SP Custom HTML” module >> click “Configure” button to configure.
![]()
Step 2: In the “SP Custom HTML” configuration page, click ![]() button in the right corner to “ADD NEW MODULE”.
button in the right corner to “ADD NEW MODULE”.
Step 3: You could configure this module like the following image.
![]()
Copy and paste the following code into the content:
<div class="tags-container">
<ul>
<li><strong>furniture: </strong></li>
<li><a href="#">Bedsheets</a></li>
<li><a href="#">Curtains</a></li>
<li><a href="#">Lighting</a></li>
<li><a href="#">Kitchen</a></li>
<li><a href="#">Storage</a></li>
<li><a href="#">Kitchen</a></li>
<li><a href="#">Tools</a></li>
<li><a href="#">Wall</a></li>
<li><a href="#">Decor</a></li>
<li><a href="#">Showpieces</a></li>
<li><a href="#">Clocks</a></li>
<li><a href="#">Towels</a></li>
<li><a href="#">Coffee</a></li>
<li><a href="#">Mugs</a></li>
<li><a href="#">Screwdrivers</a></li>
</ul>
<ul>
<li><strong>camera: </strong></li>
<li><a href="#">Nikon</a></li>
<li><a href="#">Camera</a></li>
<li><a href="#">Canon</a></li>
<li><a href="#">Camera</a></li>
<li><a href="#">Sony</a></li>
<li><a href="#">Camera</a></li>
<li><a href="#">Samsung</a></li>
<li><a href="#">Camera</a></li>
<li><a href="#">Canon</a></li>
<li><a href="#">DSLR</a></li>
<li><a href="#">Nikon</a></li>
<li><a href="#">DSLR</a></li>
<li><a href="#">DSLR</a></li>
<li><a href="#">Camera</a></li>
<li><a href="#">Lens</a></li>
<li><a href="#">Camera</a></li>
<li><a href="#">Tripod</a></li>
</ul>
<ul>
<li><strong>laptops: </strong></li>
<li><a href="#">Apple</a></li>
<li><a href="#">Laptop</a></li>
<li><a href="#">Acer</a></li>
<li><a href="#">Laptop</a></li>
<li><a href="#">Samsung</a></li>
<li><a href="#">Laptop</a></li>
<li><a href="#">Lenovo</a></li>
<li><a href="#">Laptop</a></li>
<li><a href="#">Sony</a></li>
<li><a href="#">Laptop</a></li>
<li><a href="#">Dell</a></li>
<li><a href="#">Laptop</a></li>
<li><a href="#">Asus</a></li>
<li><a href="#">Laptop</a></li>
<li><a href="#">Toshiba</a></li>
<li><a href="#">Laptop</a></li>
<li><a href="#">LG</a></li>
<li><a href="#">HP</a></li>
<li><a href="#">Laptop</a></li>
<li><a href="#">Notebook</a></li>
</ul>
<ul>
<li><strong>tvs: </strong></li>
<li><a href="#">Sony</a></li>
<li><a href="#">TV Samsung</a></li>
<li><a href="#">TV LG</a></li>
<li><a href="#">TV Panasonic</a></li>
<li><a href="#">TV Onida</a></li>
<li><a href="#">TV Toshiba</a></li>
<li><a href="#">TV Philips</a></li>
<li><a href="#">TV Micromax</a></li>
<li><a href="#">TV LED</a></li>
<li><a href="#">TV 3D</a></li>
<li><a href="#">TV Curved</a></li>
<li><a href="#">TV Smart</a></li>
</ul>
</div>
displayPayment
SP Theme Configuration
Frontend Appearance:
![]()
Backend Settings:
Step 1: In the Pretashop Admin Panel, navigate to Modules and Services >> Modules and Services >> look for “SP Theme Configuration” module.
![]()
Step 2: You could configure its settings like the following image.
![]()
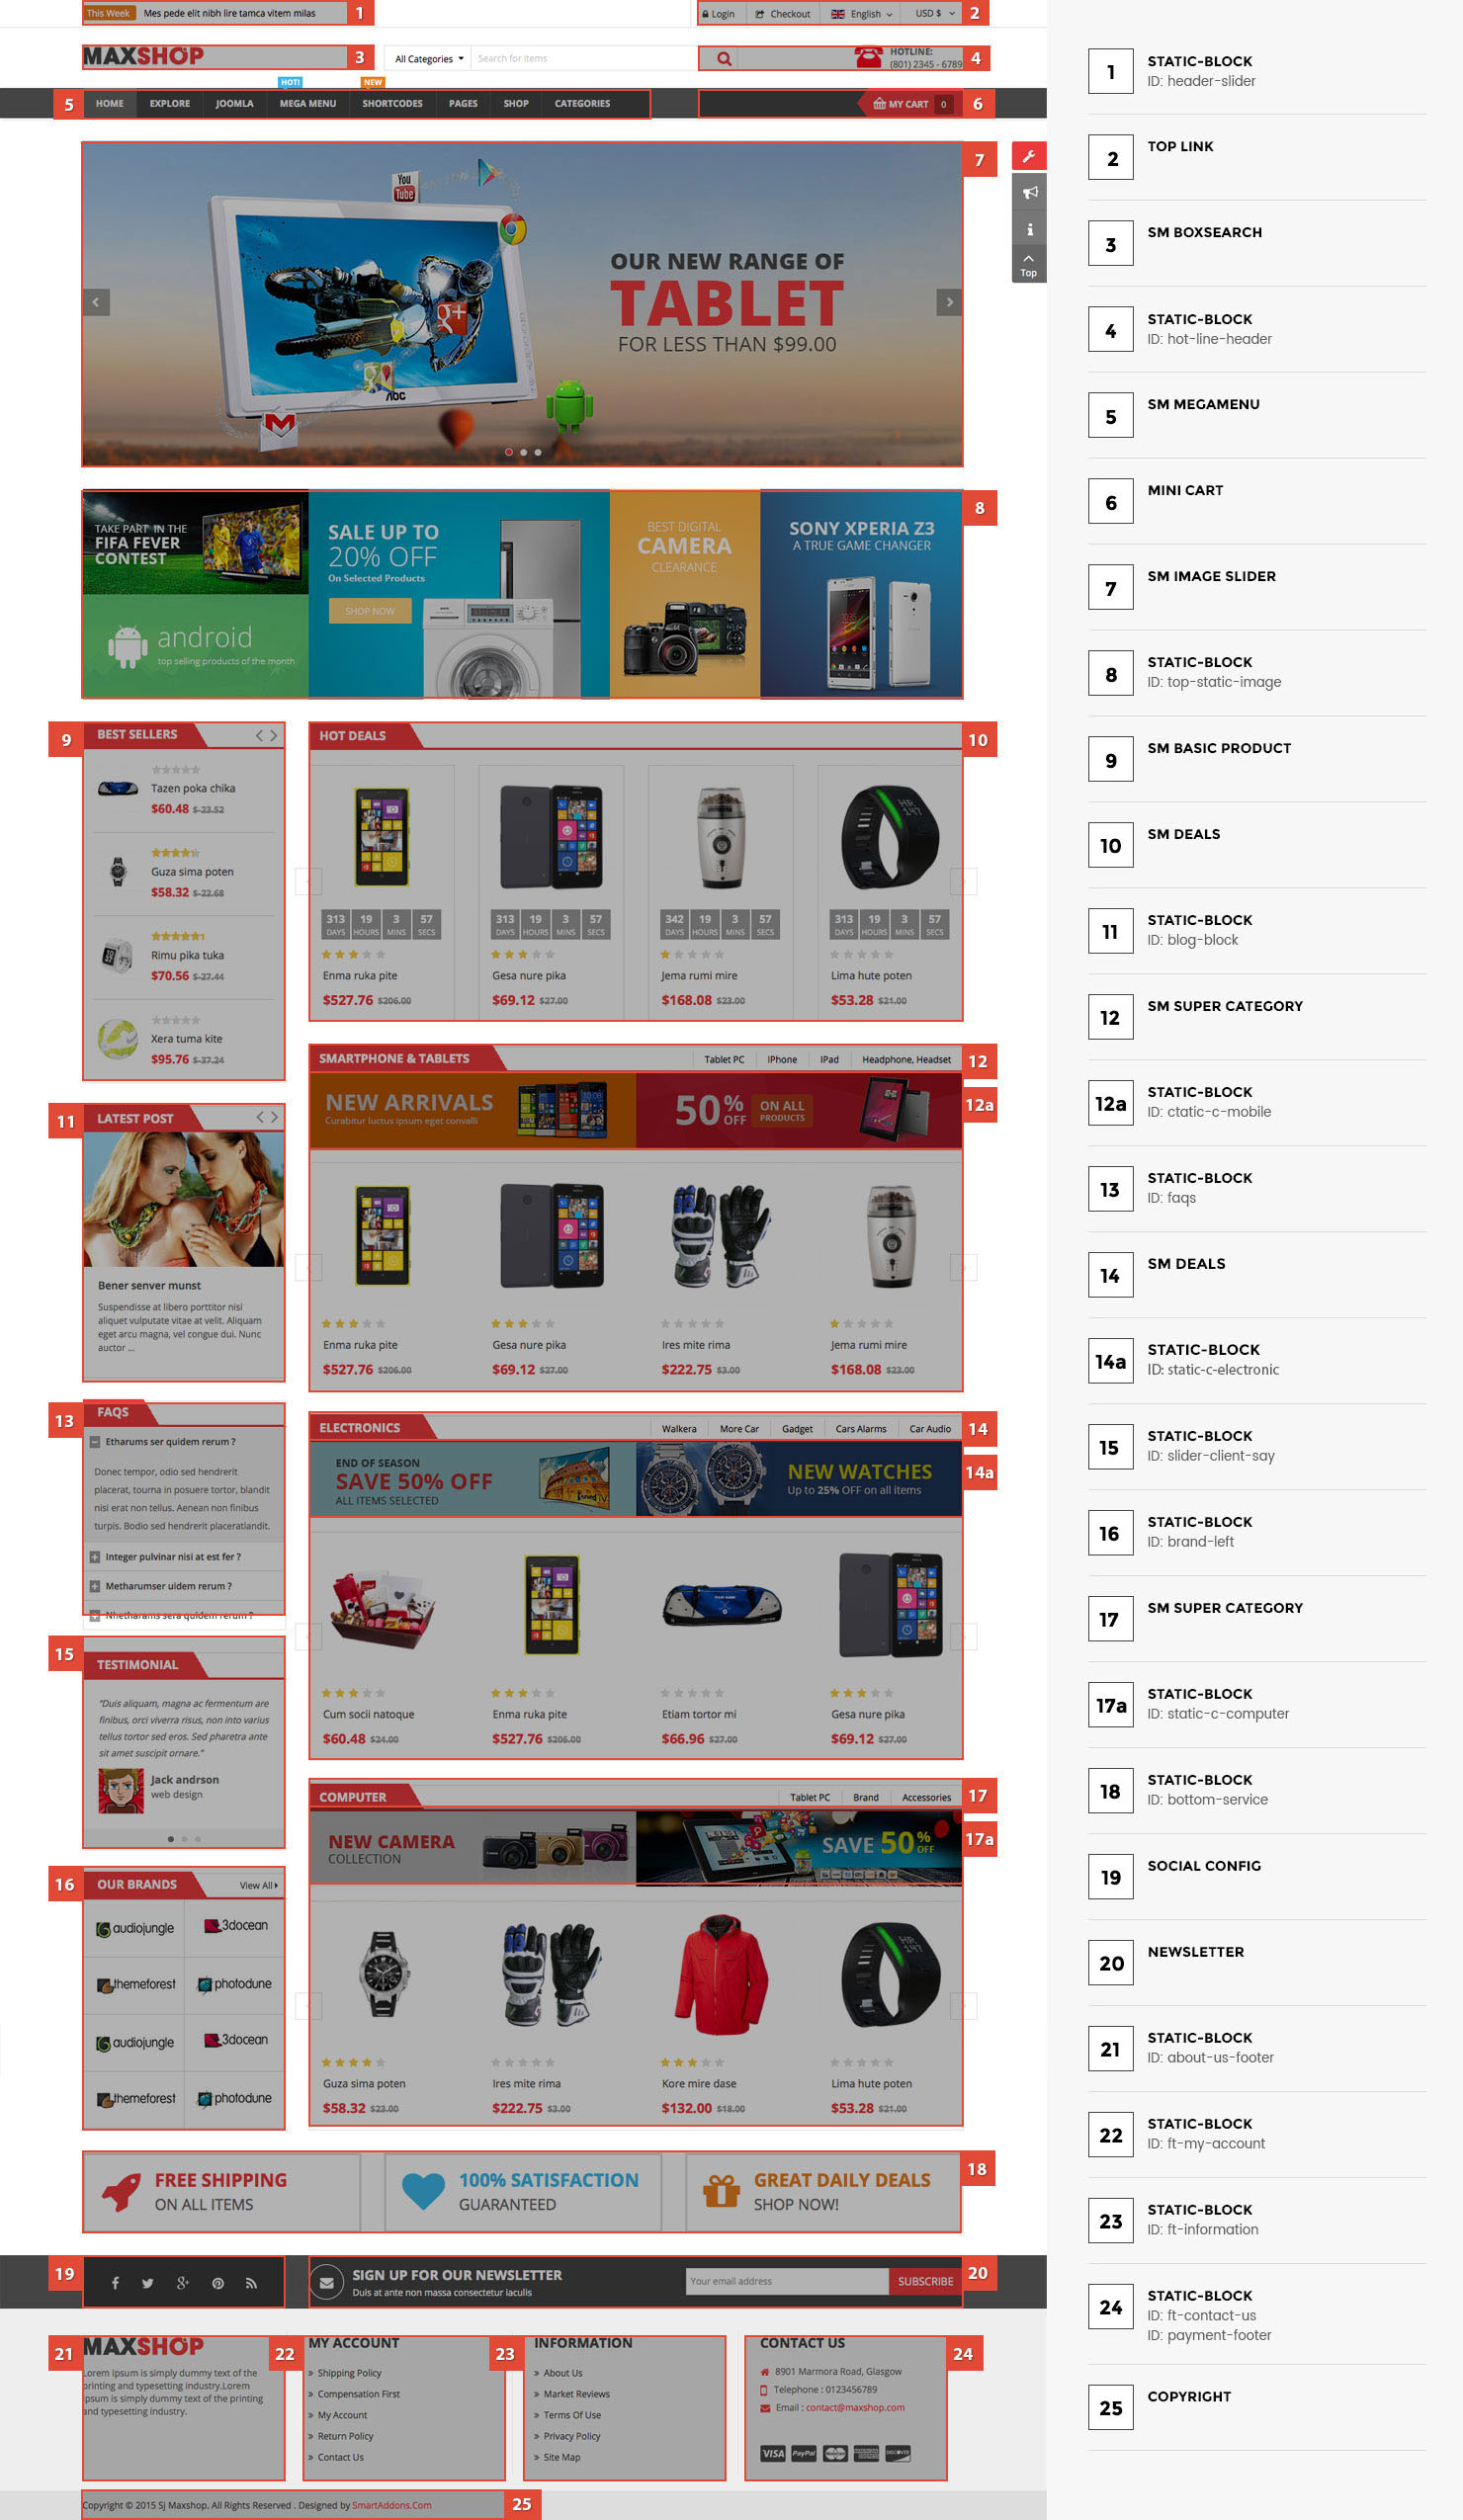
6.2 SP Agood Layout 2
![]()
displaySlideShow2
Sp slider for your homepage
Frontend Appearance:
![]()
Backend Settings:
Step 1: In the Pretashop Admin Panel, navigate to Modules and Services >> Modules and Services >> look for “SP Home Slider” module >> click “Configure” button to configure.
![]()
Step 2: In the “SP Slider For Your Homepage” configuration page, click ![]() button in the right corner to “ADD NEW MODULE”.
button in the right corner to “ADD NEW MODULE”.
Step 3: You could configure this module like the following image.
![]()
Step 4: In the last part named Slides List of this configuration page, click ![]() button in the right corner to add new slide and edit slide’s information as follows:
button in the right corner to add new slide and edit slide’s information as follows:
- Sample 4: Please click Here to view
- Sample 5: Please click Here to view
- Sample 6: Please click Here to view
display Customhtml9
SP Custom HTML – Layout 2 – Banner slider
Frontend Appearance:
![]()
Backend Settings:
Step 1: In the Pretashop Admin Panel, navigate to Modules and Services >> Modules and Services >> look for “SP Custom HTML” module >> click “Configure” button to configure.
![]()
Step 2: In the “SP Custom HTML” configuration page, click ![]() button in the right corner to “ADD NEW MODULE”.
button in the right corner to “ADD NEW MODULE”.
Step 3: You could configure this module like the following image.
![]()
Copy and paste the following code into the content:
<div class="custom-bannerSlider">
<div class="row">
<div class="style-01 col-md-6 col-sm-6 col-xs-6"><a href="#"><img src="../themes/sp_agood/img/cms/banner06.jpg" alt="images" /></a></div>
<div class="style-02 col-md-6 col-sm-6 col-xs-6"><a href="#"><img src="../themes/sp_agood/img/cms/banner07.jpg" alt="images" /></a></div>
</div>
</div>
display Customhtml12
SP Custom HTML – Layout 2 – Banner right
Frontend Appearance:
![]()
Backend Settings:
Step 1: In the Pretashop Admin Panel, navigate to Modules and Services >> Modules and Services >> look for “SP Custom HTML” module >> click “Configure” button to configure.
![]()
Step 2: In the “SP Custom HTML” configuration page, click ![]() button in the right corner to “ADD NEW MODULE”.
button in the right corner to “ADD NEW MODULE”.
Step 3: You could configure this module like the following image.
![]()
Copy and paste the following code into the content:
<div class="col-sm-12 images"><a href="#"><img src="../themes/sp_agood/img/cms/banner08.jpg" alt="image" /></a></div>
displayExtraSlider8
SP Extra Slider – top10 popular
Frontend Appearance:
![]()
Backend Settings:
Step 1: In the Pretashop Admin Panel, navigate to Modules and Services >> Modules and Services >> look for “SP Extra Slider” module.
![]()
Step 2: In the “SP Extra Slider” configuration page, click ![]() button in the right corner to “ADD NEW MODULE”.
button in the right corner to “ADD NEW MODULE”.
Step 3: You could configure this module like the following image.
![]()
displayExtraSlider5
SP Extra Slider – feature products!
Frontend Appearance:
![]()
Backend Settings:
Step 1: In the Pretashop Admin Panel, navigate to Modules and Services >> Modules and Services >> look for “SP Extra Slider” module.
![]()
Step 2: In the “SP Extra Slider” configuration page, click ![]() button in the right corner to “ADD NEW MODULE”.
button in the right corner to “ADD NEW MODULE”.
Step 3: You could configure this module like the following image.
![]()
displayCowndowntproducts2
SP Cowndowntproductslider – Deals of the day!
Frontend Appearance:
![]()
Backend Settings:
Step 1: In the Pretashop Admin Panel, navigate to Modules and Services >> Modules and Services >> look for “SP Cowndowntproductslider” module.
![]()
Step 2: In the “SP Cowndowntproductslider” configuration page, click ![]() button in the right corner to “ADD NEW MODULE”.
button in the right corner to “ADD NEW MODULE”.
Step 3: You could configure this module like the following image.
![]()
displayListingtab2
SP Listingtabs – Top Selling!
Frontend Appearance:
![]()
Backend Settings:
Step 1: In the Pretashop Admin Panel, navigate to Modules and Services >> Modules and Services >> look for “SP Listingtabs” module.
![]()
Step 2: In the “SP Listingtabs” configuration page, click ![]() button in the right corner to “ADD NEW MODULE”.
button in the right corner to “ADD NEW MODULE”.
Step 3: You could configure this module like the following image.
![]()
display Customhtml3
SP Custom HTML – Layout 2 – Banner center
Frontend Appearance:
![]()
Backend Settings:
Step 1: In the Pretashop Admin Panel, navigate to Modules and Services >> Modules and Services >> look for “SP Custom HTML” module >> click “Configure” button to configure.
![]()
Step 2: In the “SP Custom HTML” configuration page, click ![]() button in the right corner to “ADD NEW MODULE”.
button in the right corner to “ADD NEW MODULE”.
Step 3: You could configure this module like the following image.
![]()
Copy and paste the following code into the content:
<div class="row">
<div class="images style-01 col-md-6 col-sm-6 col-xs-12"><a href="#"><img src="../themes/sp_agood/img/cms/banner09.jpg" alt="images" /></a></div>
<div class="images style-02 col-md-6 col-sm-6 col-xs-12"><a href="#"><img src="../themes/sp_agood/img/cms/banner10.jpg" alt="images" /></a></div>
</div>
displayExtraSlider7
SP Extra Slider – new arrivals!
Frontend Appearance:
![]()
Backend Settings:
Step 1: In the Pretashop Admin Panel, navigate to Modules and Services >> Modules and Services >> look for “SP Extra Slider” module.
![]()
Step 2: In the “SP Extra Slider” configuration page, click ![]() button in the right corner to “ADD NEW MODULE”.
button in the right corner to “ADD NEW MODULE”.
Step 3: You could configure this module like the following image.
![]()
display Customhtml4
SP Custom HTML – Layout 2 Testimonial
Frontend Appearance:
![]()
Backend Settings:
Step 1: In the Pretashop Admin Panel, navigate to Modules and Services >> Modules and Services >> look for “SP Custom HTML” module >> click “Configure” button to configure.
![]()
Step 2: In the “SP Custom HTML” configuration page, click ![]() button in the right corner to “ADD NEW MODULE”.
button in the right corner to “ADD NEW MODULE”.
Step 3: You could configure this module like the following image.
![]()
Copy and paste the following code into the content:
<div class="bg_testimonia2">
<div class="item">
<div class="thumb-left">
<div class="author"><a href="#">mr: phamtu</a> <span>Happy customer</span></div>
<a href="#"><img src="../themes/sp_agood/img/cms/tes2.jpg" alt="images" /></a></div>
<div class="content">
<div class="des">Lorem ipsum dolor sit consectetur adipiscing elit, do et eiusmod tempor incididunt but labore et, do et eiusmod tempor.dolor sit consectetur adipiscing elit, do et eiusmod tempor incididunt</div>
<div class="comment_note">
<div class="star star_on"></div>
<div class="star star_on"></div>
<div class="star star_on"></div>
<div class="star"></div>
<div class="star"></div>
</div>
<div class="date">08 SEP 2016</div>
</div>
</div>
</div>
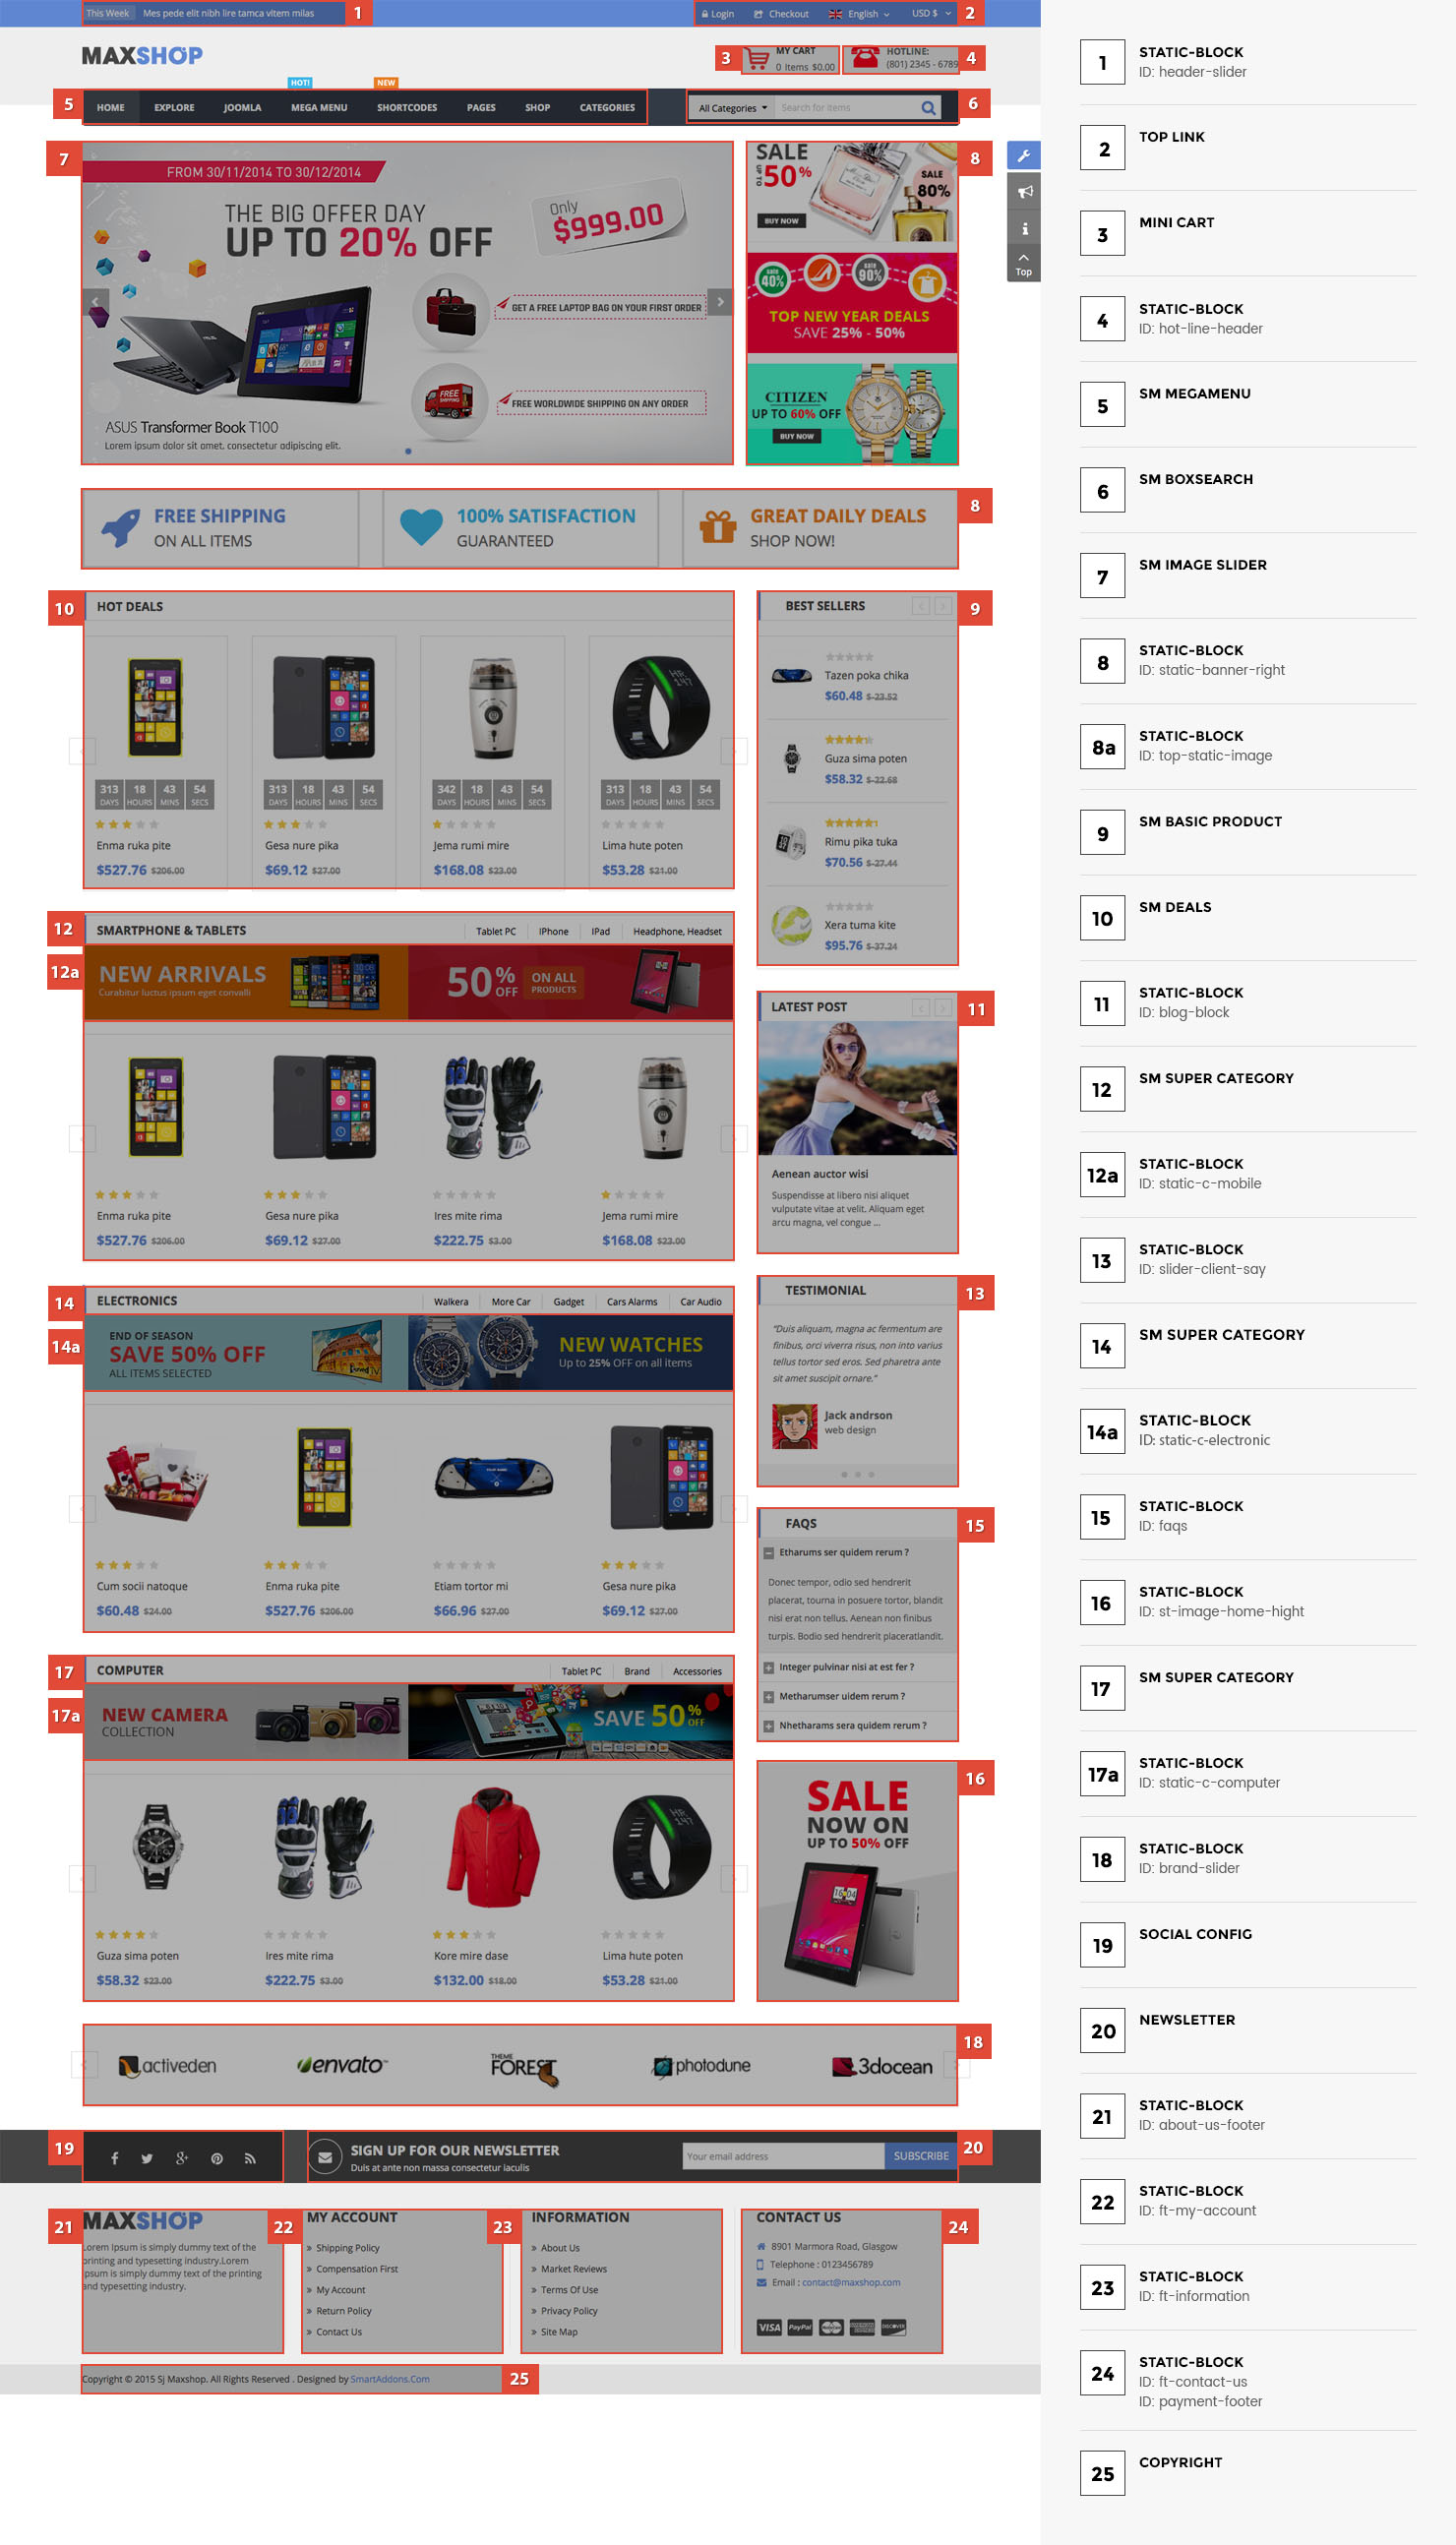
6.3 SP Agood Layout 3
![]()
displaySlideShow3
Sp slider for your homepage
Frontend Appearance:
![]()
Backend Settings:
Step 1: In the Pretashop Admin Panel, navigate to Modules and Services >> Modules and Services >> look for “SP Home Slider” module >> click “Configure” button to configure.
![]()
Step 2: In the “SP Slider For Your Homepage” configuration page, click ![]() button in the right corner to “ADD NEW MODULE”.
button in the right corner to “ADD NEW MODULE”.
Step 3: You could configure this module like the following image.
![]()
Step 4: In the last part named Slides List of this configuration page, click ![]() button in the right corner to add new slide and edit slide’s information as follows:
button in the right corner to add new slide and edit slide’s information as follows:
- Sample 7: Please click Here to view
- Sample 8: Please click Here to view
- Sample 9: Please click Here to view
displayExtraSlider9
SP Extra Slider – extraslider index 3!
Frontend Appearance:
![]()
Backend Settings:
Step 1: In the Pretashop Admin Panel, navigate to Modules and Services >> Modules and Services >> look for “SP Extra Slider” module.
![]()
Step 2: In the “SP Extra Slider” configuration page, click ![]() button in the right corner to “ADD NEW MODULE”.
button in the right corner to “ADD NEW MODULE”.
Step 3: You could configure this module like the following image.
![]()
displaySuperCategory2
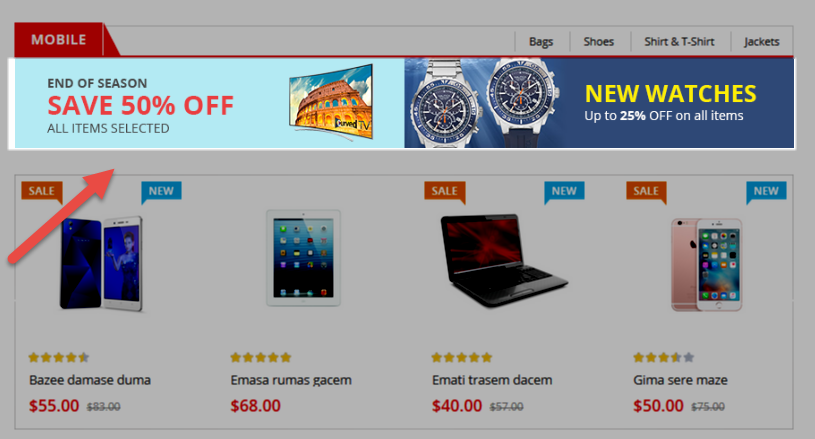
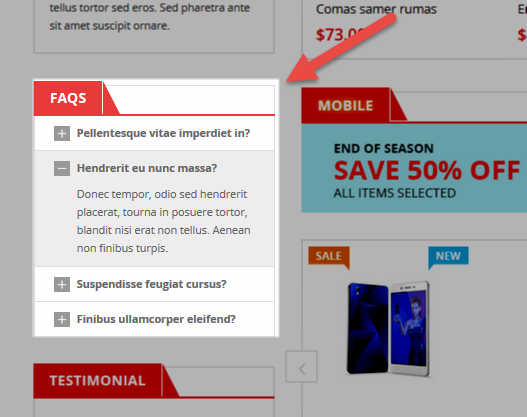
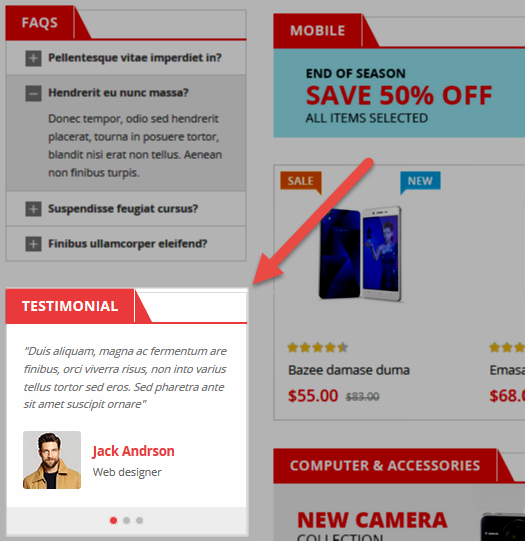
SP Super Category – mobile & tablet
Frontend Appearance:
![]()
Backend Settings:
Step 1: In the Pretashop Admin Panel, navigate to Modules and Services >> Modules and Services >> look for “SP Super Category” module.
![]()
Step 2: In the “SP Super Category” configuration page, click ![]() button in the right corner to “ADD NEW MODULE”.
button in the right corner to “ADD NEW MODULE”.
Step 3: You could configure this module like the following image.
![]()
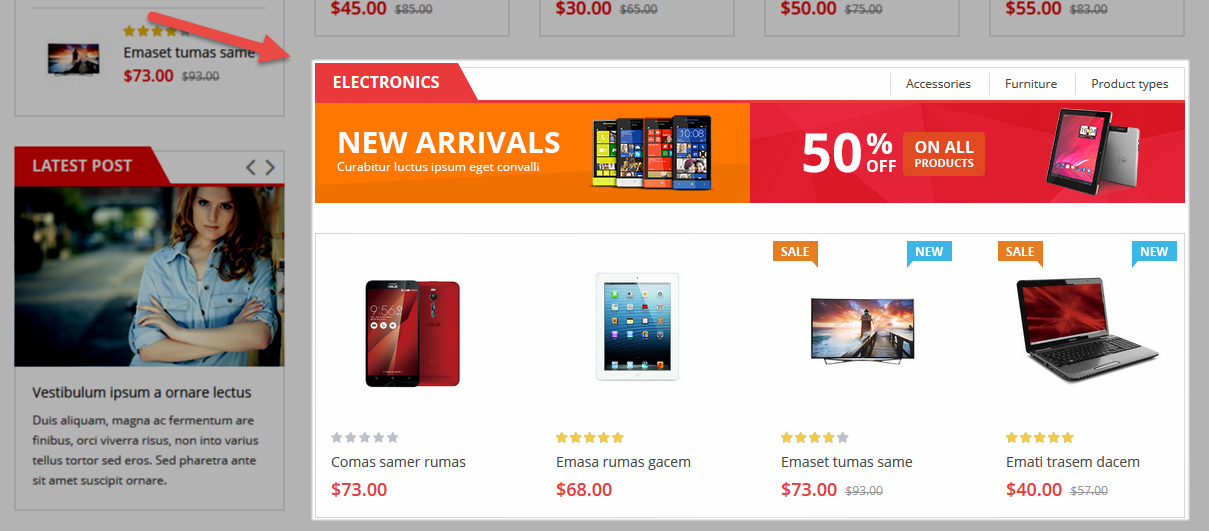
displaySuperCategory1
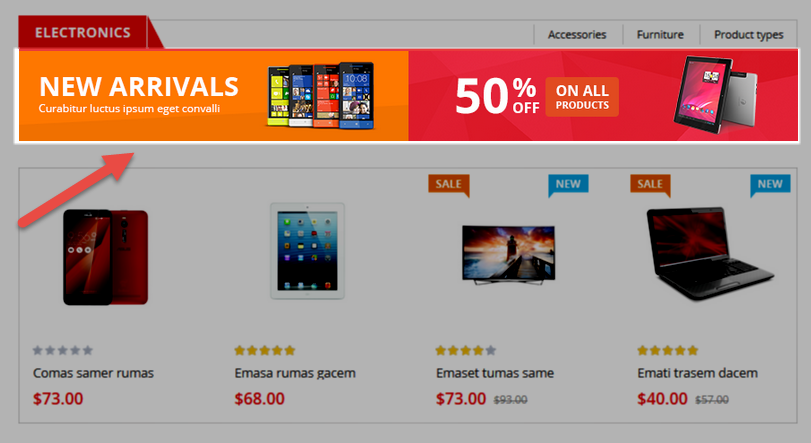
SP Super Category – electronics
Frontend Appearance:
![]()
Backend Settings:
Step 1: In the Pretashop Admin Panel, navigate to Modules and Services >> Modules and Services >> look for “SP Super Category” module.
![]()
Step 2: In the “SP Super Category” configuration page, click ![]() button in the right corner to “ADD NEW MODULE”.
button in the right corner to “ADD NEW MODULE”.
Step 3: You could configure this module like the following image.
![]()
display Home News2
SP SmartBlog Home Lastest
Frontend Appearance:
![]()
Backend Settings:
Step 1: In the Pretashop Admin Panel, navigate to Modules and Services >> Modules and Services >> look for “SmartBlog Home Lastest” module.
![]()
Step 2: You could configure this module like the following image.
![]()
display Customhtml16
SP Custom HTML – Banner Center layout 3
Frontend Appearance:
![]()
Backend Settings:
Step 1: In the Pretashop Admin Panel, navigate to Modules and Services >> Modules and Services >> look for “SP Custom HTML” module >> click “Configure” button to configure.
![]()
Step 2: In the “SP Custom HTML” configuration page, click ![]() button in the right corner to “ADD NEW MODULE”.
button in the right corner to “ADD NEW MODULE”.
Step 3: You could configure this module like the following image.
![]()
Copy and paste the following code into the content:
<div class="row custom-row">
<div class="images col-md-6 col-sm-6 col-xs-12"><a href="#"><img src="../themes/sp_agood/img/cms/banner11.jpg" alt="images" /></a></div>
<div class="images col-md-6 col-sm-6 col-xs-12"><a href="#"><img src="../themes/sp_agood/img/cms/banner12.jpg" alt="images" /></a></div>
<div class="images col-md-12 col-sm-12 col-xs-12"><a href="#"><img src="../themes/sp_agood/img/cms/banner13.jpg" alt="images" /></a></div>
</div>
displayListingtab4
SP Listing Tabs – SPORTS & OUTDOORS
Frontend Appearance:
![]()
Backend Settings:
Step 1: In the Pretashop Admin Panel, navigate to Modules and Services >> Modules and Services >> look for “SP Listing Tabs” module.
![]()
Step 2: In the “SP Listing Tabs” configuration page, click ![]() button in the right corner to “ADD NEW MODULE”.
button in the right corner to “ADD NEW MODULE”.
Step 3: You could configure this module like the following image.
![]()
displayListingtab5
SP Listing Tabs – SPORTS & OUTDOORS
Frontend Appearance:
![]()
Backend Settings:
Step 1: In the Pretashop Admin Panel, navigate to Modules and Services >> Modules and Services >> look for “SP Listing Tabs” module.
![]()
Step 2: In the “SP Listing Tabs” configuration page, click ![]() button in the right corner to “ADD NEW MODULE”.
button in the right corner to “ADD NEW MODULE”.
Step 3: You could configure this module like the following image.
![]()
display Customhtml13
SP Custom HTML – banner bottom layout 3
Frontend Appearance:
![]()
Backend Settings:
Step 1: In the Pretashop Admin Panel, navigate to Modules and Services >> Modules and Services >> look for “SP Custom HTML” module >> click “Configure” button to configure.
![]()
Step 2: In the “SP Custom HTML” configuration page, click ![]() button in the right corner to “ADD NEW MODULE”.
button in the right corner to “ADD NEW MODULE”.
Step 3: You could configure this module like the following image.
![]()
Copy and paste the following code into the content:
</div class="custom-bottom-l3"></a href="#"></img src="../themes/sp_agood/img/cms/banner20.jpg" alt="" /><//a><//div>
display Customhtml14
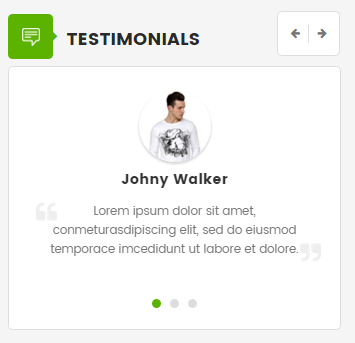
SP Custom HTML – TESTIMONIALS
Frontend Appearance:
![]()
Backend Settings:
Step 1: In the Pretashop Admin Panel, navigate to Modules and Services >> Modules and Services >> look for “SP Custom HTML” module >> click “Configure” button to configure.
![]()
Step 2: In the “SP Custom HTML” configuration page, click ![]() button in the right corner to “ADD NEW MODULE”.
button in the right corner to “ADD NEW MODULE”.
Step 3: You could configure this module like the following image.
![]()
Copy and paste the following code into the content:
</div class="clients_say">
</div class="slider-clients-say">
</div class="block_content">
</div class="image"></img src="../themes/sp_agood/img/cms/img-client-1.png" alt="" /><//div>
</div class="block-info">
</div class="text">Donec sit amet vulputate velit. Aenean tempus nisl ac fermentum tincidunt. Nam aliquet enim quam scelerisque rutrum. Aliquam ante dolor, posuere nec mattis id, suscipit ac mi. Praesent luctus ex massa, nec feugiat est eleifend nec phasellus euismod.<//div>
<//div>
<//div>
</div class="block_content">
</div class="image"></img src="../themes/sp_agood/img/cms/img-client-2.png" alt="" /><//div>
</div class="block-info">
</div class="text">Donec sit amet vulputate velit. Aenean tempus nisl ac fermentum tincidunt. Nam aliquet enim quam scelerisque rutrum. Aliquam ante dolor, posuere nec mattis id, suscipit ac mi. Praesent luctus ex massa, nec feugiat est eleifend nec phasellus euismod.<//div>
<//div>
<//div>
</div class="block_content">
</div class="image"></img src="../themes/sp_agood/img/cms/img-client-3.png" alt="" /><//div>
</div class="block-info">
</div class="text">Donec sit amet vulputate velit. Aenean tempus nisl ac fermentum tincidunt. Nam aliquet enim quam scelerisque rutrum. Aliquam ante dolor, posuere nec mattis id, suscipit ac mi. Praesent luctus ex massa, nec feugiat est eleifend nec phasellus euismod.<//div>
<//div>
<//div>
<//div>
<//div>
</p><//p>
6.4 SP Agood Layout 4
![]()
displaySlideShow4
Sp slider for your homepage
Frontend Appearance:
![]()
Backend Settings:
Step 1: In the Pretashop Admin Panel, navigate to Modules and Services >> Modules and Services >> look for “SP Home Slider” module >> click “Configure” button to configure.
![]()
Step 2: In the “SP Slider For Your Homepage” configuration page, click ![]() button in the right corner to “ADD NEW MODULE”.
button in the right corner to “ADD NEW MODULE”.
Step 3: You could configure this module like the following image.
![]()
Step 4: In the last part named Slides List of this configuration page, click ![]() button in the right corner to add new slide and edit slide’s information as follows:
button in the right corner to add new slide and edit slide’s information as follows:
- Sample 10: Please click Here to view
- Sample 11: Please click Here to view
- Sample 12: Please click Here to view
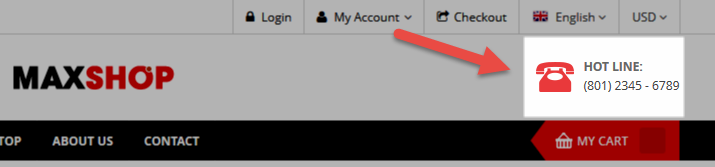
display Customhtml15
SP Custom HTML – TESTIMONIALS
Frontend Appearance:
![]()
Backend Settings:
Step 1: In the Pretashop Admin Panel, navigate to Modules and Services >> Modules and Services >> look for “SP Custom HTML” module >> click “Configure” button to configure.
![]()
Step 2: In the “SP Custom HTML” configuration page, click ![]() button in the right corner to “ADD NEW MODULE”.
button in the right corner to “ADD NEW MODULE”.
Step 3: You could configure this module like the following image.
![]()
Copy and paste the following code into the content:
</div class="hot-line"></em class="fa fa-phone"><//em> Hotline: </a title="0123 456 7891" href="#">0123 456 7891<//a><//div>
display Customhtml16
SP Custom HTML – banner top Layout 4
Frontend Appearance:
![]()
Backend Settings:
Step 1: In the Pretashop Admin Panel, navigate to Modules and Services >> Modules and Services >> look for “SP Custom HTML” module >> click “Configure” button to configure.
![]()
Step 2: In the “SP Custom HTML” configuration page, click ![]() button in the right corner to “ADD NEW MODULE”.
button in the right corner to “ADD NEW MODULE”.
Step 3: You could configure this module like the following image.
![]()
Copy and paste the following code into the content:
</div class="custom-banner-l4">
</div class="col-sm-6 banner-left"></a href="#"> </img src="../themes/sp_agood/img/cms/banner21.jpg" alt="" /> <//a><//div>
</div class="col-sm-6 banner-right">
</div class="banner-top"></a href="#"> </img src="../themes/sp_agood/img/cms/banner22.jpg" alt="" /> <//a><//div>
</div class="banner-bottom"></a href="#"> </img src="../themes/sp_agood/img/cms/banner23.jpg" alt="" /> <//a><//div>
<//div>
<//div>
displaysupercategory2
SP Super Category – Luxury ferume
Frontend Appearance:
![]()
Backend Settings:
Step 1: In the Pretashop Admin Panel, navigate to Modules and Services >> Modules and Services >> look for “SP Super Category” module.
![]()
Step 2: In the “SP Super Category” configuration page, click ![]() button in the right corner to “ADD NEW MODULE”.
button in the right corner to “ADD NEW MODULE”.
Step 3: You could configure this module like the following image.
![]()
display Customhtml17
SP Custom HTML – banner center Layout 4
Frontend Appearance:
![]()
Backend Settings:
Step 1: In the Pretashop Admin Panel, navigate to Modules and Services >> Modules and Services >> look for “SP Custom HTML” module >> click “Configure” button to configure.
![]()
Step 2: In the “SP Custom HTML” configuration page, click ![]() button in the right corner to “ADD NEW MODULE”.
button in the right corner to “ADD NEW MODULE”.
Step 3: You could configure this module like the following image.
![]()
Copy and paste the following code into the content:
</div class="custom-banner-center-l4">
</div class="col-sm-4 banner-left"></a href="#"> </img src="../themes/sp_agood/img/cms/banner24.jpg" alt="" /> <//a><//div>
</div class="col-sm-4 banner-center"></a href="#"> </img src="../themes/sp_agood/img/cms/banner25.jpg" alt="" /> <//a><//div>
</div class="col-sm-4 banner-right"></a href="#"> </img src="../themes/sp_agood/img/cms/banner26.jpg" alt="" /> <//a><//div>
<//div>
displaysupercategory3
SP Super Category – Skin Care
Frontend Appearance:
![]()
Backend Settings:
Step 1: In the Pretashop Admin Panel, navigate to Modules and Services >> Modules and Services >> look for “SP Super Category” module.
![]()
Step 2: In the “SP Super Category” configuration page, click ![]() button in the right corner to “ADD NEW MODULE”.
button in the right corner to “ADD NEW MODULE”.
Step 3: You could configure this module like the following image.
![]()
display Customhtml18
SP Custom HTML – banner bottom Layout 4
Frontend Appearance:
![]()
Backend Settings:
Step 1: In the Pretashop Admin Panel, navigate to Modules and Services >> Modules and Services >> look for “SP Custom HTML” module >> click “Configure” button to configure.
![]()
Step 2: In the “SP Custom HTML” configuration page, click ![]() button in the right corner to “ADD NEW MODULE”.
button in the right corner to “ADD NEW MODULE”.
Step 3: You could configure this module like the following image.
![]()
Copy and paste the following code into the content:
</div class="custom-banner-bottom-l4">
</div class="col-sm-6 banner-left"></a href="#"> </img src="../themes/sp_agood/img/cms/banner27.jpg" alt="" /> <//a><//div>
</div class="col-sm-6 banner-center"></a href="#"> </img src="../themes/sp_agood/img/cms/banner28.jpg" alt="" /> <//a><//div>
<//div>
display Customhtml19
SP Custom HTML – Testimonial layout4
Frontend Appearance:
![]()
Backend Settings:
Step 1: In the Pretashop Admin Panel, navigate to Modules and Services >> Modules and Services >> look for “SP Custom HTML” module >> click “Configure” button to configure.
![]()
Step 2: In the “SP Custom HTML” configuration page, click ![]() button in the right corner to “ADD NEW MODULE”.
button in the right corner to “ADD NEW MODULE”.
Step 3: You could configure this module like the following image.
![]()
Copy and paste the following code into the content:
</div class="client">
</div class="content-inner">
</div class="item">
</div class="item-inner col-lg-12">
</div class="image-client"></a href="#" title="KATERINA SANDEROVA"> </img src="../themes/sp_agood/img/cms/img-client-1.png" alt="" /> <//a><//div>
</div class="client-say-info">
</div class="client-comment">Donec sit amet vulputate velit. Aenean tempus nisl ac fermentum tincidunt. Nam aliquet enim ac quam scelerisque rutrum. Aliquam ante dolor, posuere nec mattis id, suscipit ac mi. Praesent luctus ex massa, nec feugiat est eleifend nec. Cras viverra purus a mauris malesuada aliquam. Integer purus lectus, volutpat quis gravida porttitor, venenatis ut tortor. Phasellus a sapien lorem.<//div>
</div class="name-client">
</h2></a title="KATERINA SANDEROVA">KATERINA SANDEROVA<//a><//h2>
<//div>
</div class="info-client">--- Sale & Martketing ---<//div>
<//div>
<//div>
<//div>
</div class="item ">
</div class="item-inner col-lg-12">
</div class="image-client"></a href="#" title="Jane Doe"> </img src="../themes/sp_agood/img/cms/img-client-2.png" alt="" /> <//a><//div>
</div class="client-say-info">
</div class="client-comment">Donec sit amet vulputate velit. Aenean tempus nisl ac fermentum tincidunt. Nam aliquet enim ac quam scelerisque rutrum. Aliquam ante dolor, posuere nec mattis id, suscipit ac mi. Praesent luctus ex massa, nec feugiat est eleifend nec. Cras viverra purus a mauris malesuada aliquam. Integer purus lectus, volutpat quis gravida porttitor, venenatis ut tortor. Phasellus a sapien lorem.<//div>
</div class="name-client">
</h2></a title="Jane Doe">Jane Doe<//a><//h2>
<//div>
</div class="info-client">--- Sale & Martketing ---<//div>
<//div>
<//div>
<//div>
</div class="item ">
</div class="item-inner col-lg-12">
</div class="image-client"></a href="#" title="Jack Andrson"> </img src="../themes/sp_agood/img/cms/img-client-3.png" alt="" /> <//a><//div>
</div class="client-say-info">
</div class="client-comment">Donec sit amet vulputate velit. Aenean tempus nisl ac fermentum tincidunt. Nam aliquet enim ac quam scelerisque rutrum. Aliquam ante dolor, posuere nec mattis id, suscipit ac mi. Praesent luctus ex massa, nec feugiat est eleifend nec. Cras viverra purus a mauris malesuada aliquam. Integer purus lectus, volutpat quis gravida porttitor, venenatis ut tortor. Phasellus a sapien lorem.<//div>
</div class="name-client">
</h2></a title="Jack Andrson">Jack Andrson<//a><//h2>
<//div>
</div class="info-client">--- Sale & Martketing ---<//div>
<//div>
<//div>
<//div>
<//div>
<//div>
SP Extra Slider – special items
Frontend Appearance:
![]()
Backend Settings:
Step 1: In the Pretashop Admin Panel, navigate to Modules and Services >> Modules and Services >> look for “SP Extra Slider” module.
![]()
Step 2: In the “SP Extra Slider” configuration page, click ![]() button in the right corner to “ADD NEW MODULE”.
button in the right corner to “ADD NEW MODULE”.
Step 3: You could configure this module like the following image.
![]()
SP Extra Slider – top seller
Frontend Appearance:
![]()
Backend Settings:
Step 1: In the Pretashop Admin Panel, navigate to Modules and Services >> Modules and Services >> look for “SP Extra Slider” module.
![]()
Step 2: In the “SP Extra Slider” configuration page, click ![]() button in the right corner to “ADD NEW MODULE”.
button in the right corner to “ADD NEW MODULE”.
Step 3: You could configure this module like the following image.
![]()
display Customhtml20
SP Custom HTML – banner bottom l4 left
Frontend Appearance:
![]()
Backend Settings:
Step 1: In the Pretashop Admin Panel, navigate to Modules and Services >> Modules and Services >> look for “SP Custom HTML” module >> click “Configure” button to configure.
![]()
Step 2: In the “SP Custom HTML” configuration page, click ![]() button in the right corner to “ADD NEW MODULE”.
button in the right corner to “ADD NEW MODULE”.
Step 3: You could configure this module like the following image.
![]()
Copy and paste the following code into the content:
</div class="custom-bottom-l4-left"></a href="#"></img src="../themes/sp_agood/img/cms/banner29.jpg" alt="" /><//a><//div>
display Customhtml21
SP Custom HTML – banner bottom l4 right
Frontend Appearance:
![]()
Backend Settings:
Step 1: In the Pretashop Admin Panel, navigate to Modules and Services >> Modules and Services >> look for “SP Custom HTML” module >> click “Configure” button to configure.
![]()
Step 2: In the “SP Custom HTML” configuration page, click ![]() button in the right corner to “ADD NEW MODULE”.
button in the right corner to “ADD NEW MODULE”.
Step 3: You could configure this module like the following image.
![]()
Copy and paste the following code into the content:
</div class="custom-bottom-l4-left"></a href="#"></img src="../themes/sp_agood/img/cms/banner30.jpg" alt="" /><//a><//div>
displayListingtab6
SP Listing Tabs – SPORTS & OUTDOORS
Frontend Appearance:
![]()
Backend Settings:
Step 1: In the Pretashop Admin Panel, navigate to Modules and Services >> Modules and Services >> look for “SP Listing Tabs” module.
![]()
Step 2: In the “SP Listing Tabs” configuration page, click ![]() button in the right corner to “ADD NEW MODULE”.
button in the right corner to “ADD NEW MODULE”.
Step 3: You could configure this module like the following image.
![]()
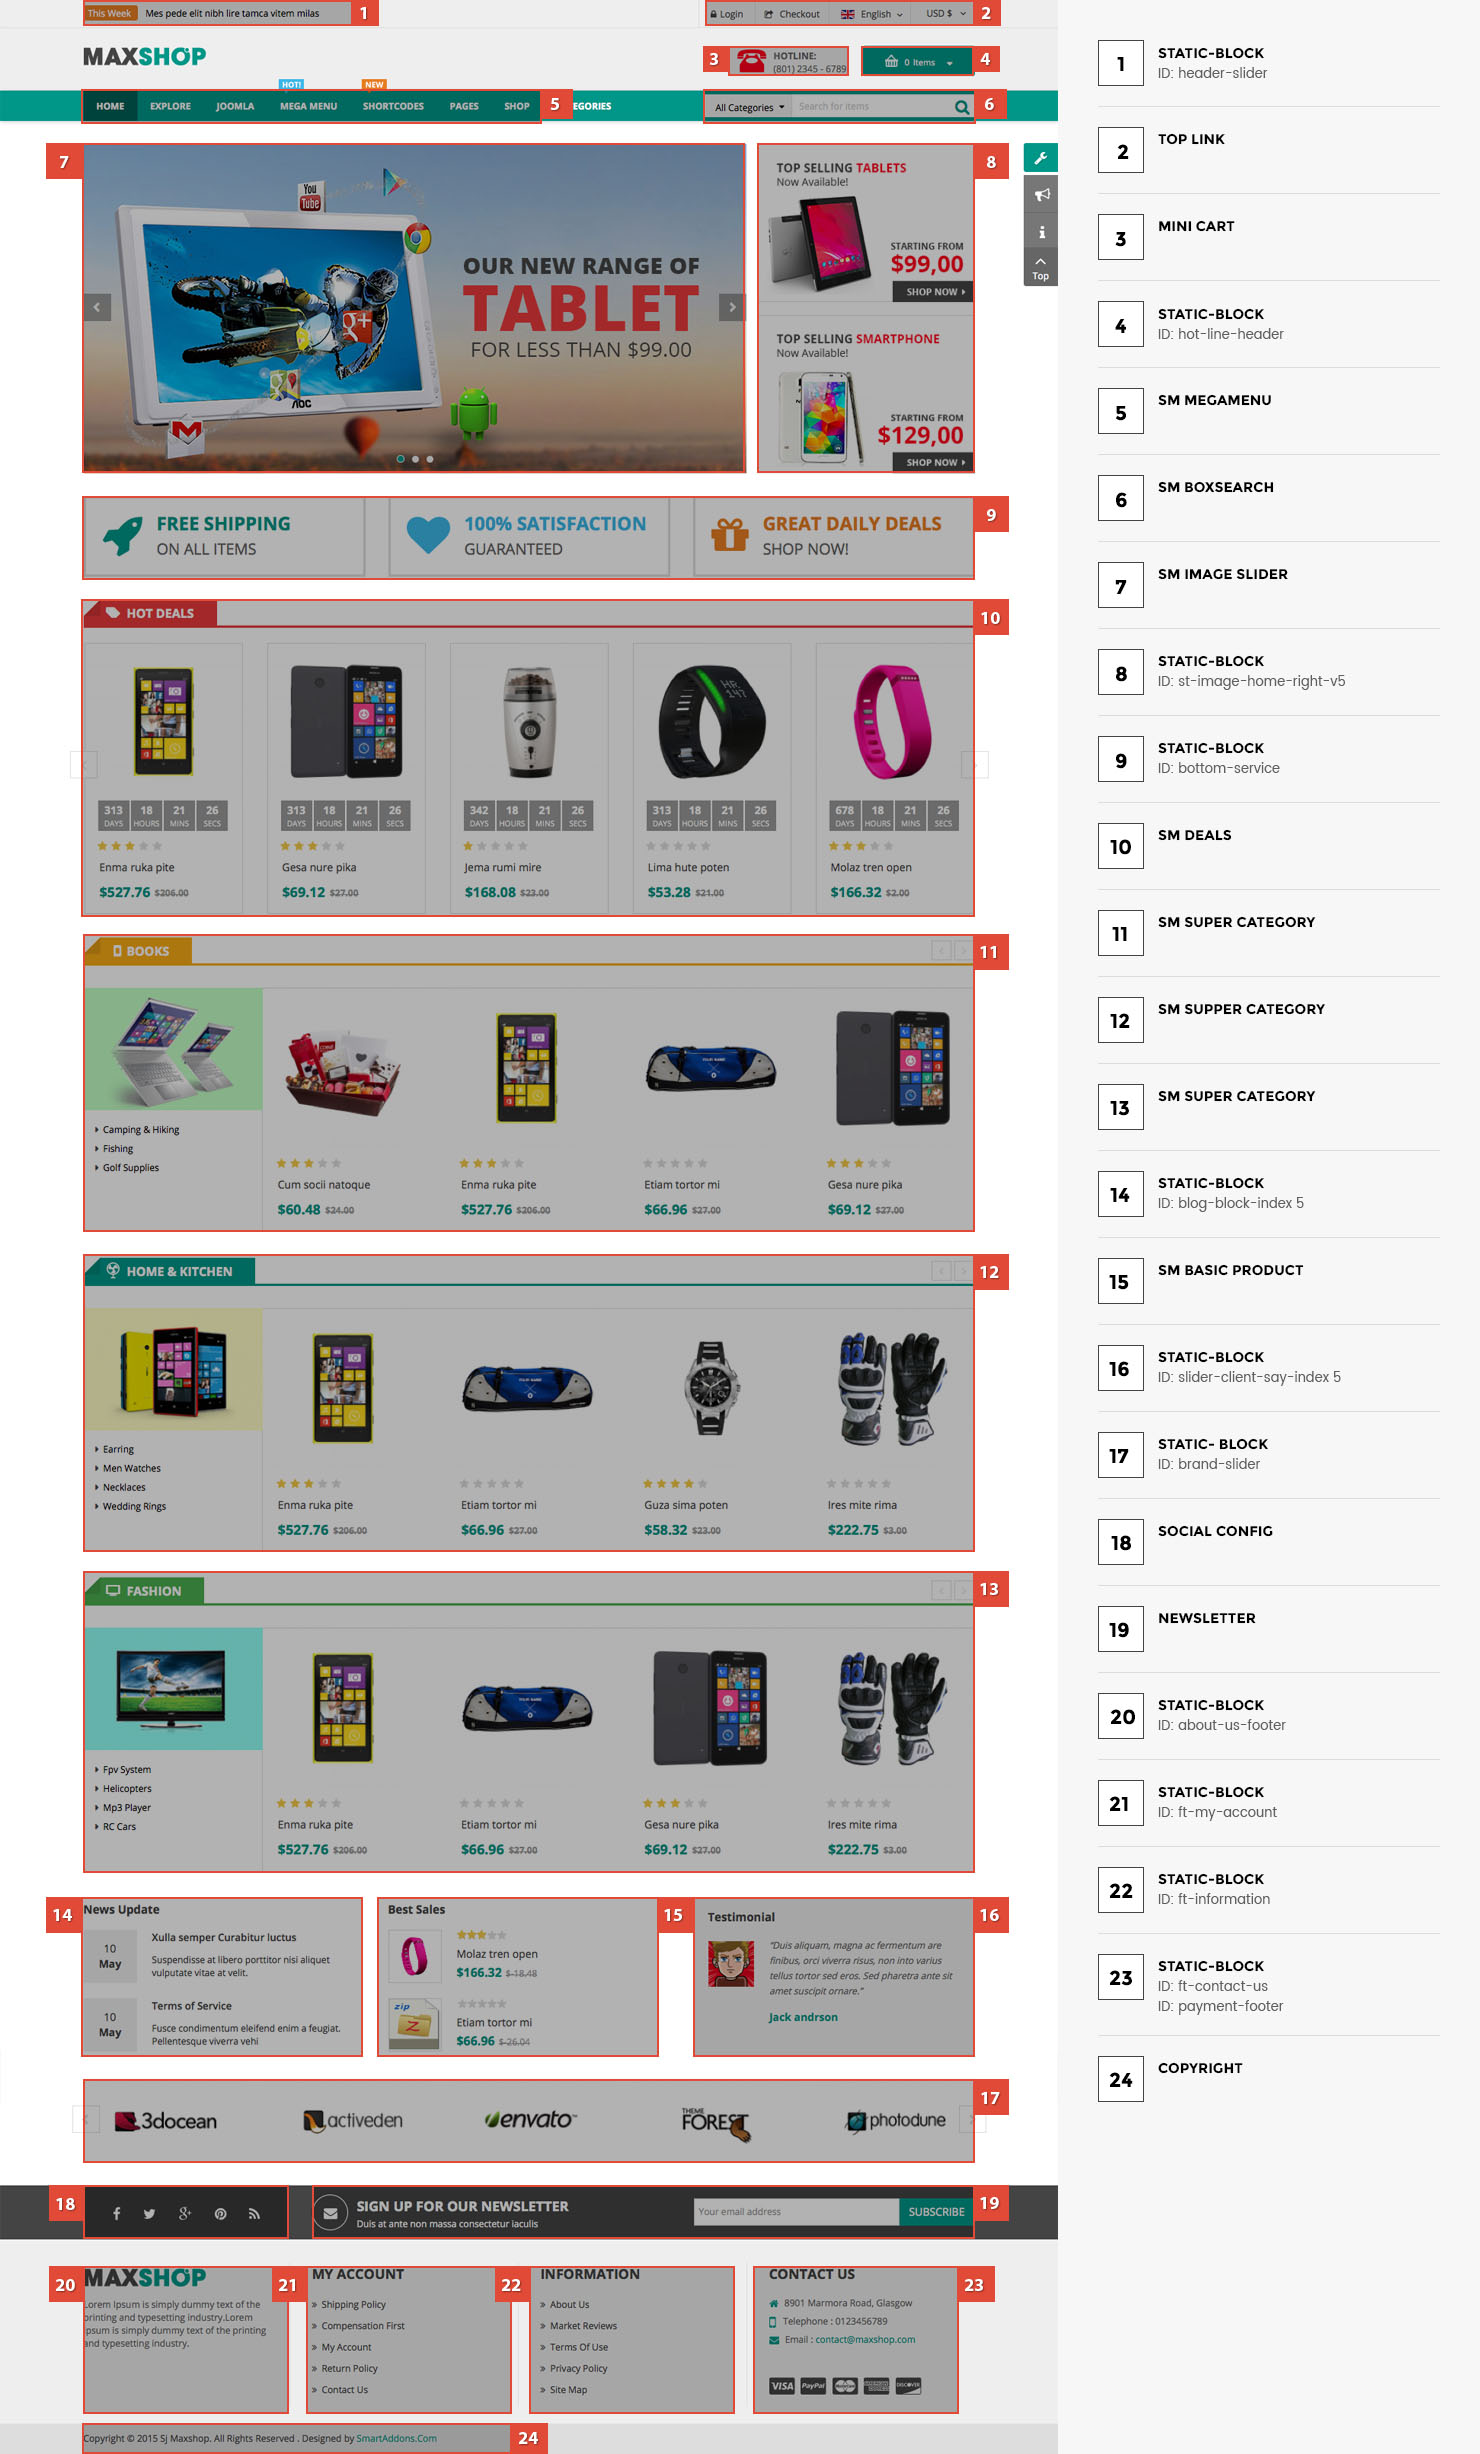
6.5 SP Agood Layout 5
![]()
displaySlideShow5
Sp slider for your homepage
Frontend Appearance:
![]()
Backend Settings:
Step 1: In the Pretashop Admin Panel, navigate to Modules and Services >> Modules and Services >> look for “SP Home Slider” module >> click “Configure” button to configure.
![]()
Step 2: In the “SP Slider For Your Homepage” configuration page, click ![]() button in the right corner to “ADD NEW MODULE”.
button in the right corner to “ADD NEW MODULE”.
Step 3: You could configure this module like the following image.
![]()
Step 4: In the last part named Slides List of this configuration page, click ![]() button in the right corner to add new slide and edit slide’s information as follows:
button in the right corner to add new slide and edit slide’s information as follows:
- Sample 13: Please click Here to view
- Sample 14: Please click Here to view
- Sample 15: Please click Here to view
display Customhtml26
SP Custom HTML – Banner Top layout5
Frontend Appearance:
![]()
Backend Settings:
Step 1: In the Pretashop Admin Panel, navigate to Modules and Services >> Modules and Services >> look for “SP Custom HTML” module >> click “Configure” button to configure.
![]()
Step 2: In the “SP Custom HTML” configuration page, click ![]() button in the right corner to “ADD NEW MODULE”.
button in the right corner to “ADD NEW MODULE”.
Step 3: You could configure this module like the following image.
![]()
Copy and paste the following code into the content:
</div class="banner-top-l5">
</div class="col-sm-4"></a href="#"></img src="../themes/sp_agood/img/cms/banner31.jpg" alt="" /><//a><//div>
</div class="col-sm-4">
</div class="img1"></a href="#"></img src="../themes/sp_agood/img/cms/banner32.jpg" alt="" /><//a><//div>
</div class="img2"></a href="#"></img src="../themes/sp_agood/img/cms/banner33.jpg" alt="" /><//a><//div>
<//div>
</div class="col-sm-4"></a href="#"></img src="../themes/sp_agood/img/cms/banner34.jpg" alt="" /><//a><//div>
<//div>
displayListingtab7
SP Listing Tabs – best seller
Frontend Appearance:
![]()
Backend Settings:
Step 1: In the Pretashop Admin Panel, navigate to Modules and Services >> Modules and Services >> look for “SP Listing Tabs” module.
![]()
Step 2: In the “SP Listing Tabs” configuration page, click ![]() button in the right corner to “ADD NEW MODULE”.
button in the right corner to “ADD NEW MODULE”.
Step 3: You could configure this module like the following image.
![]()
display Customhtml27
SP Custom HTML – Img gallery
Frontend Appearance:
![]()
Backend Settings:
Step 1: In the Pretashop Admin Panel, navigate to Modules and Services >> Modules and Services >> look for “SP Custom HTML” module >> click “Configure” button to configure.
![]()
Step 2: In the “SP Custom HTML” configuration page, click ![]() button in the right corner to “ADD NEW MODULE”.
button in the right corner to “ADD NEW MODULE”.
Step 3: You could configure this module like the following image.
![]()
Copy and paste the following code into the content:
</div class="Img_gallery">
</div class="col-sm-4 img"></a href="#"></img src="../themes/sp_agood/img/cms/g1.jpg" alt="" /><//a><//div>
</div class="col-sm-4 img"></a href="#"></img src="../themes/sp_agood/img/cms/g2.jpg" alt="" /><//a><//div>
</div class="col-sm-4 img"></a href="#"></img src="../themes/sp_agood/img/cms/g3.jpg" alt="" /><//a><//div>
</div class="col-sm-4 img"></a href="#"></img src="../themes/sp_agood/img/cms/g4.jpg" alt="" /><//a><//div>
</div class="col-sm-4 img"></a href="#"></img src="../themes/sp_agood/img/cms/g5.jpg" alt="" /><//a><//div>
</div class="col-sm-4 img"></a href="#"></img src="../themes/sp_agood/img/cms/g6.jpg" alt="" /><//a><//div>
<//div>
display Customhtml28
SP Custom HTML – Our gallery
Frontend Appearance:
![]()
Backend Settings:
Step 1: In the Pretashop Admin Panel, navigate to Modules and Services >> Modules and Services >> look for “SP Custom HTML” module >> click “Configure” button to configure.
![]()
Step 2: In the “SP Custom HTML” configuration page, click ![]() button in the right corner to “ADD NEW MODULE”.
button in the right corner to “ADD NEW MODULE”.
Step 3: You could configure this module like the following image.
![]()
Copy and paste the following code into the content:
</div class="Our_gallery">
</div class="text-title">
</h2>– Our gallery –<//h2>
<//div>
</div class="text-des">Lorem ipsum dolor sit amet, consectetur adipisicing elit, sed do eiusmod tempor incididunt ut labore et dolore magna aliqua. Ut enim ad minim veniam, quis nostrud exercitation ullamco laboris nisi ut aliquip ex ea commodo consequat. Duis aute irure dolor in reprehenderit in voluptate velit esse cillum dolore eu fugiat nulla pariatur<//div>
</p></a href="#" class="text-button">VIEW MORE<//a><//p>
<//div>
displayListingtab8
SP Listing Tabs – featured items
Frontend Appearance:
![]()
Backend Settings:
Step 1: In the Pretashop Admin Panel, navigate to Modules and Services >> Modules and Services >> look for “SP Listing Tabs” module.
![]()
Step 2: In the “SP Listing Tabs” configuration page, click ![]() button in the right corner to “ADD NEW MODULE”.
button in the right corner to “ADD NEW MODULE”.
Step 3: You could configure this module like the following image.
![]()
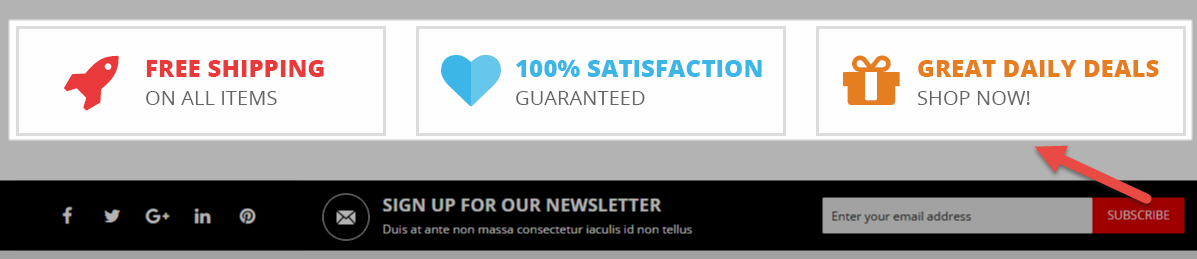
display Customhtml29
SP Custom HTML – Free Shiping l5
Frontend Appearance:
![]()
Backend Settings:
Step 1: In the Pretashop Admin Panel, navigate to Modules and Services >> Modules and Services >> look for “SP Custom HTML” module >> click “Configure” button to configure.
![]()
Step 2: In the “SP Custom HTML” configuration page, click ![]() button in the right corner to “ADD NEW MODULE”.
button in the right corner to “ADD NEW MODULE”.
Step 3: You could configure this module like the following image.
![]()
Copy and paste the following code into the content:
</div class="free_shipping">
</div class="col-sm-4 img"></a href="#"></img src="../themes/sp_agood/img/cms/f1.jpg" alt="" /><//a><//div>
</div class="col-sm-4 img"></a href="#"></img src="../themes/sp_agood/img/cms/f2.jpg" alt="" /><//a><//div>
</div class="col-sm-4 img"></a href="#"></img src="../themes/sp_agood/img/cms/f3.jpg" alt="" /> <//a><//div>
<//div>
SP Extra Slider – on sale
Frontend Appearance:
![]()
Backend Settings:
Step 1: In the Pretashop Admin Panel, navigate to Modules and Services >> Modules and Services >> look for “SP Extra Slider” module.
![]()
Step 2: In the “SP Extra Slider” configuration page, click ![]() button in the right corner to “ADD NEW MODULE”.
button in the right corner to “ADD NEW MODULE”.
Step 3: You could configure this module like the following image.
![]()
6.6 SP Agood Layout 6
![]()
displaySlideShow6
Sp slider for your homepage
Frontend Appearance:
![]()
Backend Settings:
Step 1: In the Pretashop Admin Panel, navigate to Modules and Services >> Modules and Services >> look for “SP Home Slider” module >> click “Configure” button to configure.
![]()
Step 2: In the “SP Slider For Your Homepage” configuration page, click ![]() button in the right corner to “ADD NEW MODULE”.
button in the right corner to “ADD NEW MODULE”.
Step 3: You could configure this module like the following image.
![]()
Step 4: In the last part named Slides List of this configuration page, click ![]() button in the right corner to add new slide and edit slide’s information as follows:
button in the right corner to add new slide and edit slide’s information as follows:
- Sample 16: Please click Here to view
- Sample 17: Please click Here to view
- Sample 18: Please click Here to view
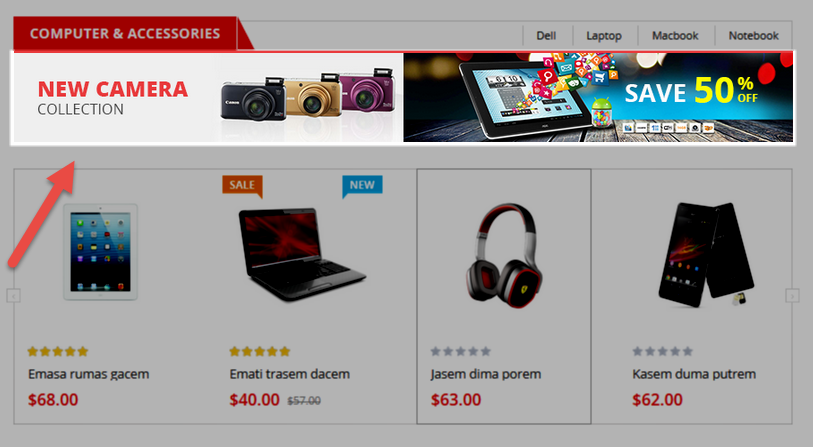
display Customhtml30
SP Custom HTML – Banner Top l6
Frontend Appearance:
![]()
Backend Settings:
Step 1: In the Pretashop Admin Panel, navigate to Modules and Services >> Modules and Services >> look for “SP Custom HTML” module >> click “Configure” button to configure.
![]()
Step 2: In the “SP Custom HTML” configuration page, click ![]() button in the right corner to “ADD NEW MODULE”.
button in the right corner to “ADD NEW MODULE”.
Step 3: You could configure this module like the following image.
![]()
Copy and paste the following code into the content:
</div class="banner-top-l6">
</div class="img-top"></a href="#"></img src="../themes/sp_agood/img/cms/banner35.jpg" alt="" /><//a><//div>
</div class="img-left"></a href="#"></img src="../themes/sp_agood/img/cms/banner36.jpg" alt="" /><//a><//div>
</div class="img-right"></a href="#"></img src="../themes/sp_agood/img/cms/banner37.jpg" alt="" /><//a><//div>
<//div>
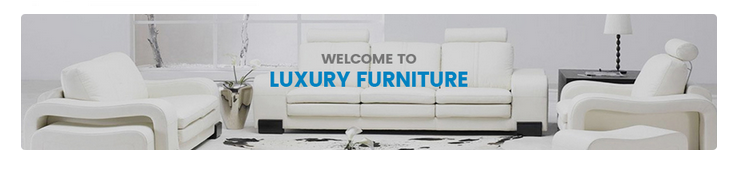
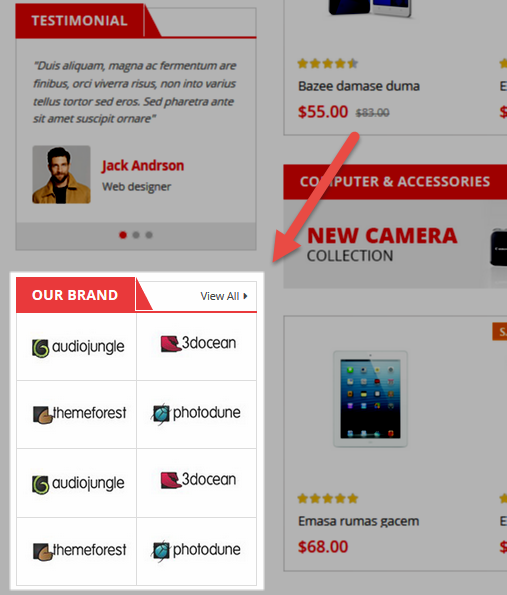
display Customhtml22
SP Custom HTML – Our Brands L6
Frontend Appearance:
![]()
Backend Settings:
Step 1: In the Pretashop Admin Panel, navigate to Modules and Services >> Modules and Services >> look for “SP Custom HTML” module >> click “Configure” button to configure.
![]()
Step 2: In the “SP Custom HTML” configuration page, click ![]() button in the right corner to “ADD NEW MODULE”.
button in the right corner to “ADD NEW MODULE”.
Step 3: You could configure this module like the following image.
![]()
Copy and paste the following code into the content:
</div class="banner-top-l6">
</div class="img-top"></a href="#"></img src="../themes/sp_agood/img/cms/banner35.jpg" alt="" /><//a><//div>
</div class="img-left"></a href="#"></img src="../themes/sp_agood/img/cms/banner36.jpg" alt="" /><//a><//div>
</div class="img-right"></a href="#"></img src="../themes/sp_agood/img/cms/banner37.jpg" alt="" /><//a><//div>
<//div>
displayListingtab9
SP Listing Tabs – featured items
Frontend Appearance:
![]()
Backend Settings:
Step 1: In the Pretashop Admin Panel, navigate to Modules and Services >> Modules and Services >> look for “SP Listing Tabs” module.
![]()
Step 2: In the “SP Listing Tabs” configuration page, click ![]() button in the right corner to “ADD NEW MODULE”.
button in the right corner to “ADD NEW MODULE”.
Step 3: You could configure this module like the following image.
![]()
display Customhtml23
SP Custom HTML – Banner Bottom 1
Frontend Appearance:
![]()
Backend Settings:
Step 1: In the Pretashop Admin Panel, navigate to Modules and Services >> Modules and Services >> look for “SP Custom HTML” module >> click “Configure” button to configure.
![]()
Step 2: In the “SP Custom HTML” configuration page, click ![]() button in the right corner to “ADD NEW MODULE”.
button in the right corner to “ADD NEW MODULE”.
Step 3: You could configure this module like the following image.
![]()
Copy and paste the following code into the content:
</div class="banner-bottom-l6">
</div class="col-sm-6 img-left"></a href="#"></img src="../themes/sp_agood/img/cms/banner38.jpg" alt="" /><//a><//div>
</div class="col-sm-6 img-right"></a href="#"></img src="../themes/sp_agood/img/cms/banner39.jpg" alt="" /><//a><//div>
<//div>
displaysupercategory1
SP Super Category – Women’s
Frontend Appearance:
![]()
Backend Settings:
Step 1: In the Pretashop Admin Panel, navigate to Modules and Services >> Modules and Services >> look for “SP Super Category” module.
![]()
Step 2: In the “SP Super Category” configuration page, click ![]() button in the right corner to “ADD NEW MODULE”.
button in the right corner to “ADD NEW MODULE”.
Step 3: You could configure this module like the following image.
![]()
displaysupercategory4
SP Super Category – Men’s
Frontend Appearance:
![]()
Backend Settings:
Step 1: In the Pretashop Admin Panel, navigate to Modules and Services >> Modules and Services >> look for “SP Super Category” module.
![]()
Step 2: In the “SP Super Category” configuration page, click ![]() button in the right corner to “ADD NEW MODULE”.
button in the right corner to “ADD NEW MODULE”.
Step 3: You could configure this module like the following image.
![]()
SP Extra Slider – top rated
Frontend Appearance:
![]()
Backend Settings:
Step 1: In the Pretashop Admin Panel, navigate to Modules and Services >> Modules and Services >> look for “SP Extra Slider” module.
![]()
Step 2: In the “SP Extra Slider” configuration page, click ![]() button in the right corner to “ADD NEW MODULE”.
button in the right corner to “ADD NEW MODULE”.
Step 3: You could configure this module like the following image.
![]()
display Customhtml24
SP Custom HTML – banner bottom 2 l6
Frontend Appearance:
![]()
Backend Settings:
Step 1: In the Pretashop Admin Panel, navigate to Modules and Services >> Modules and Services >> look for “SP Custom HTML” module >> click “Configure” button to configure.
![]()
Step 2: In the “SP Custom HTML” configuration page, click ![]() button in the right corner to “ADD NEW MODULE”.
button in the right corner to “ADD NEW MODULE”.
Step 3: You could configure this module like the following image.
![]()
Copy and paste the following code into the content:
</div class="custom-bottom2-l6">
</div class="img-1 images"></a href="#"></img src="../themes/sp_agood/img/cms/banner42.jpg" alt="" /><//a><//div>
</div class="img-2 images"></a href="#"></img src="../themes/sp_agood/img/cms/banner43.jpg" alt="" /><//a><//div>
<//div>


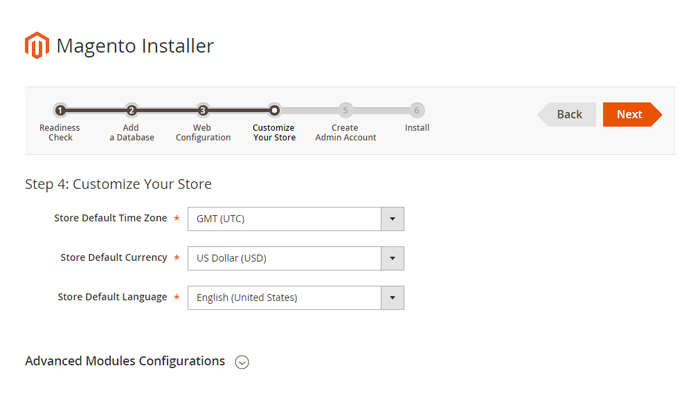
 The parameters are divided into the following groups:
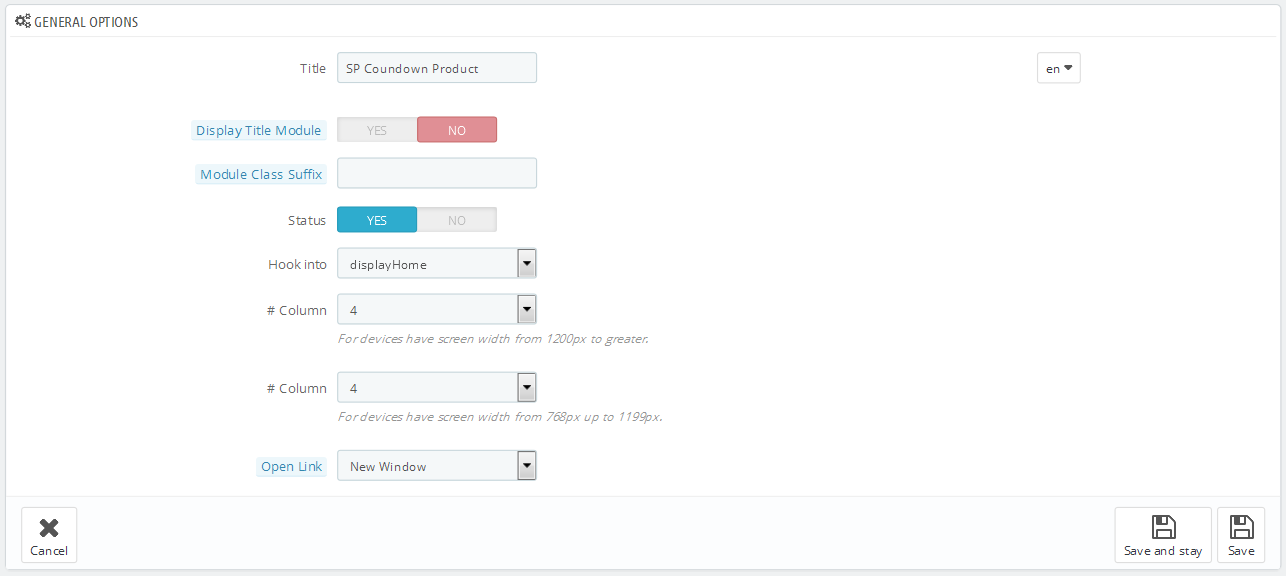


 When you are done, click the ‘Next’ button.


 button in the right corner to “ADD NEW MODULE”.


 button in the right corner to “ADD NEW MODULE”.


 When you are done, click the ‘Next’ button.


 button in the right corner to “ADD NEW”.


 button in the right corner to “ADD NEW MODULE”.


 button in the right corner to “ADD NEW”.


